InformationEdit
|
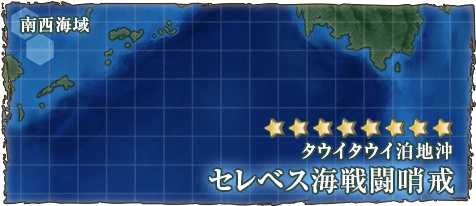
Tawi-Tawi Anchorage タウイタウイ泊地沖 | |
 | |
 | |
| Information | |
| Experience | HQ: 180 non-boss, 360 1st boss, 2360 2nd boss |
| Kills required | 3+4? |
| In-game description | |
| Operation | セレベス海戦闘哨戒 Celebes Sea Combat Patrols |
| 7-2 Branching Rules Part 1 | ||
|---|---|---|
| Nodes | Rules | |
| Start | A |
|
B |
| |
C |
| |
C |
D |
|
E | ||
E |
F |
|
G | ||
| 7-2 Branching Rules Part 2 | ||
|---|---|---|
| Nodes | Rules | |
D |
H |
|
I | ||
I |
J |
|
L |
| |
M |
| |
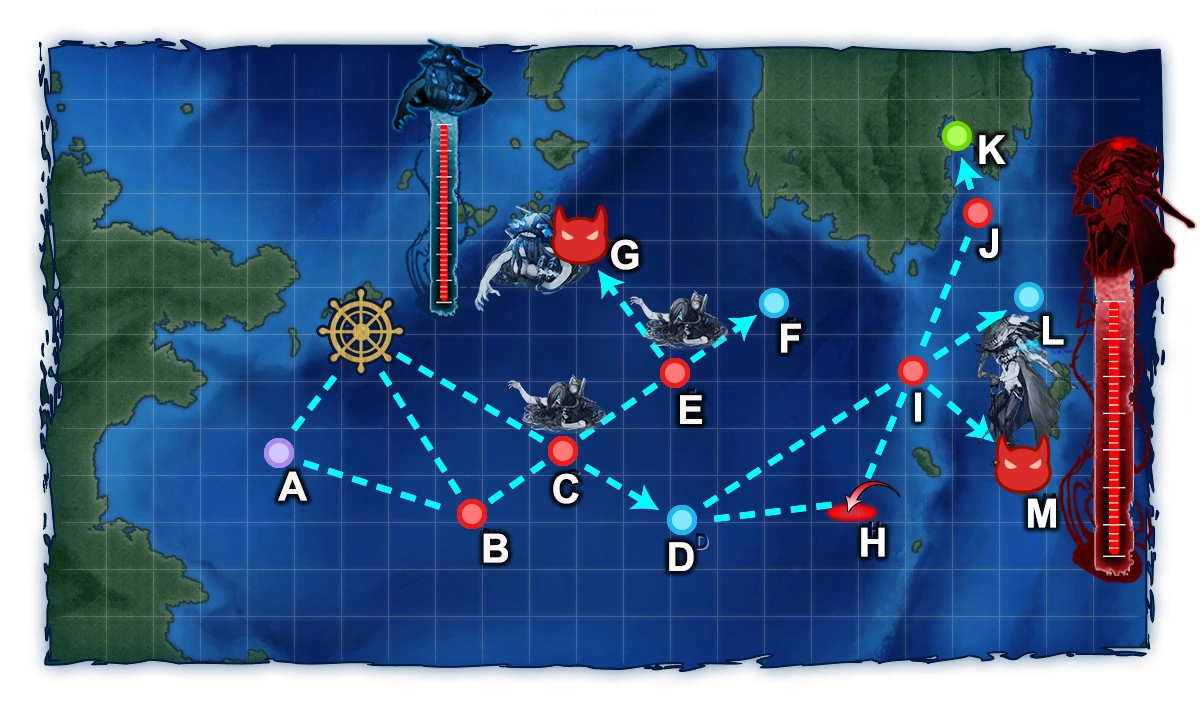
Map Guide
- This map is divided in 2 phases, a HP phase at node G against a submarine boss and another HP phase at node M against a surface fleet. The 2nd HP phase will be hidden (alongside its related nodes) on the map until the 1st phase is not cleared (see map progression below).
- This map will reset each month, it will be necessary to re-deplete both HP phases again in order to clear the map.
Phase 1
- To clear this phase, the boss Submarine So-Class
must be sunk 3 times. - There is no speed limitation.
- This is an anti-submarine operation, use of ships capable of using opening ASW attacks (OASW) is highly recommended.
- Route:C E G
- 3DD/DE 1XX, No [(F)BB(V)/CV(B)/SS(V)]
- 3DE 2XX, No [(F)BB(V)/CV(B)/SS(V), Max 1 CL]
- Unlike 7-1, there is no surface battle before the boss node on this route.
- Use of CL(T) and/or DDs capable of using opening ASW attacks either from being able to reach 100
 stat or having built-in OASW capabilities (e.g. Isuzu Kai Ni, Tatsuta Kai Ni, Jervis Kai, Samuel B. Roberts Kai and Johnston) is highly recommended, however do keep in mind that you are limited in the number of CL(T)s in your fleet (only 1 max).
 - DE
are able to perform OASW at only 60 and are very cheap to run so they are also highly recommended.
- Use of CL(T) and/or DDs capable of using opening ASW attacks either from being able to reach 100
- Bringing 2CVEs as the wildcards in the 3DE composition is recommended if you have Taiyou, Shinyou and/or Gambier Bay at a mimimum of Kai remodel, or Zuihou Kai Ni B. Giving them dive bombers or torpedo bombers with high stat alongside sonars and depth charges (launchers) will allow them to OASW easily while still maintaining a high anti-surface firepower to deal with the DDs at the boss node.
- As for the other CVLs, it is recommended to equip them with enough torpedo bombers to clear out at boss node most if not all of the surface enemies.
- As for the other CVLs, it is recommended to equip them with enough torpedo bombers


Phase 2
- To clear this phase, the boss Standard Carrier Wo-Class Kai Flagship must be sunk 4 times.
- Route:B C D I M
- 1CV(B) 1(F)BB(V) 1CVL 1CA(V)/CL(T) 2DD
- 1CV(B) 2(F)BB(V) 1CA(V)/CL(T) 2DD
- Fast Fleet
- Route:A B C D I M
- 6XX, No [AO]
- 6SS(V)
- Beware of heavy enemy en route.
- 6XX, No [AO]
- Must be fast fleet or submarine fleet in order to avoid any risk of routing to nodeH
- It is recommended to have at least 370+ airpower to be able to obtain AS at boss node for any possible formation.
- CVLs and (F)BB(V) are interchangeable, however keep in mind that with no Battleship in the fleet you lose second shelling on EVERY node (boss included) which is NOT recommended.
- AACI setup on DDs is highly recommended in order to mitigate airstrike damage at the boss node.
- Node C is a weak submarine node so bringing equipments for it is not necessary.
- Node C is a weak submarine node so bringing
- There are Light Cruisers Tsu-Class
at both node B and boss node M, use of seaplane bombers on your CA(V)s or BB(V)s is NOT recommended as they can get easily shot down. - Keep in mind that there is a LoS check at node I
- 69+ using the F33(Cn=4) formula is required in order to safely pass.
- Cn=4 means that LoS from equipments weights 4 times more than usual.
- 69+


- NOTE: After clearing the map, the 2nd boss node will lock to the easiest pre-clear formation (Nu-class Elite, Ne-class base, Tsu-class base). This greatly reduces the required Air Power needed for AS from 359 to 266.
Map progression
")
")
Enemy patterns

Lua error in package.lua at line 80: module 'Module:Collection/EnemyShips' not found. Lua error in package.lua at line 80: module 'Module:Collection/EnemyShips' not found. Lua error in package.lua at line 80: module 'Module:Collection/EnemyShips' not found. Lua error in package.lua at line 80: module 'Module:Collection/EnemyShips' not found. Lua error in package.lua at line 80: module 'Module:Collection/EnemyShips' not found. Lua error in package.lua at line 80: module 'Module:Collection/EnemyShips' not found. Lua error in package.lua at line 80: module 'Module:Collection/EnemyShips' not found. Lua error in package.lua at line 80: module 'Module:Collection/EnemyShips' not found. Lua error in package.lua at line 80: module 'Module:Collection/EnemyShips' not found. Lua error in package.lua at line 80: module 'Module:Collection/EnemyShips' not found. Lua error in package.lua at line 80: module 'Module:Collection/EnemyShips' not found. Lua error in package.lua at line 80: module 'Module:Collection/EnemyShips' not found. Lua error in package.lua at line 80: module 'Module:Collection/EnemyShips' not found.
Drop list
- As of the 27th August 2020 update, Sado & Matsuwa no longer drop here.