No edit summary |
|||
| (38 intermediate revisions by 11 users not shown) | |||
| Line 14: | Line 14: | ||
|strategy_info_ja = 南方海域に有力な艦隊を投入し鼠輸送作戦を敢行、可能であれば同方面の敵艦隊も撃滅せよ! |
|strategy_info_ja = 南方海域に有力な艦隊を投入し鼠輸送作戦を敢行、可能であれば同方面の敵艦隊も撃滅せよ! |
||
| − | |exp_hq = |
+ | |exp_hq = 210 |
| − | |exp_hq_boss = |
+ | |exp_hq_boss = 3020 |
}} |
}} |
||
{{MapBranchingTable |
{{MapBranchingTable |
||
|id = 5-4 |
|id = 5-4 |
||
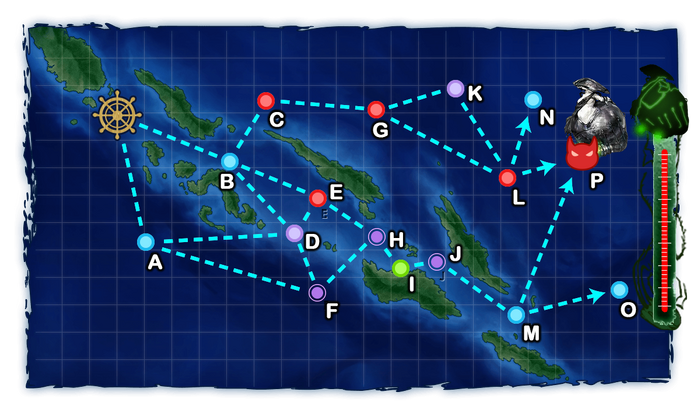
| + | |0 -> A/empty, B/empty = |
||
| + | *'''FORCE''' node B if fleet contains CV(L/B) |
||
| + | *Meet '''ANY''' of the following to go to A |
||
| + | **(F)BB(V) ≥ 3 |
||
| + | **CA(V) ≥ 5 |
||
| + | *Meet '''ANY''' of the following to go to B |
||
| + | **CL = 1 '''AND''' DD ≥ 3 |
||
| + | **DD ≥ 4 |
||
| + | **5 ships carrying Drum Canister or Daihatsu-class Landing Craft '''AND''' the amount of (Drum Canister + Daihatsu-class Landing Craft) in the fleet ≥ 5 ('''T89 Landing Force and T2 Kami Tank also count. If one ship carries both Drum Canister & Daihatsu-class Landing Craft, it will be counted as "2 ships"''') |
||
| + | * Otherwise, go to A |
||
| + | |||
| + | |A/empty -> D/storm, F/night = |
||
| + | * Meet '''ANY''' of the following requirements to go to D |
||
| + | ** Fleet contains SS(V) |
||
| + | **(F)BB(V) ≥ 5 |
||
| + | ** DD ≥ 2 |
||
| ⚫ | |||
| + | * Otherwise, go to F |
||
| + | |||
| + | |B/empty -> C, D/storm, E = |
||
| + | * Go to C if fleet contains CV(L/B) or SS(V) |
||
| + | *Go to E if '''Fast+''' fleet |
||
| + | * Meet '''ANY''' of the following requirements to go to D |
||
| + | ** DD = 0 |
||
| + | ** Fleet contains (F)BB(V) '''AND''' slow ship |
||
| + | ** BBV ≥ 1 and amount of slow BB(V) in total ≥ 2 ('''Ignores Turbine + Boiler synergy''') |
||
| + | * Otherwise, go to E |
||
| + | |||
| + | |D/storm -> E, F/night = |
||
| + | * Go to E if DD ≥ 2 '''AND''' slow BB ≤ 1 ('''BBV doesn't count, ignores Turbine + Boiler synergy''') |
||
| + | * Otherwise, go to F |
||
| + | |||
| + | |G -> K/storm, L = |
||
| + | * Go to K if (F)BB(V) ≥ 4 |
||
| + | * Random between K and L if CV(B) ≥ 3 |
||
| + | * Otherwise, go to L |
||
| + | |||
| + | |L -> N/empty, P = |
||
| + | *Meet '''ALL''' of the following to go to P |
||
| + | **(F)BB(V)+CV(B) ≤ 4 |
||
| + | **'''Fast+''' fleet '''OR''' pass the LoS Check ('''≥ 60 F33 Cn2''') |
||
| + | *Random between N and P if (F)BB(V)+CV(B) ≥ 5 |
||
| + | *Otheriwse, N |
||
| + | |||
| + | |M/empty -> O/empty = |
||
| + | * Random between O and P if fleet contains SS(V) |
||
| + | * Fail the LOS Check |
||
| + | |||
| + | |M/empty -> P = |
||
| + | * Random between O and P if fleet contains SS(V) |
||
| + | * Meet '''ANY''' of the following requirements: |
||
| + | ** Pass the LoS check ('''≥ 45 F33 Cn2''') |
||
| + | ** '''Fast+''' fleet ('''LoS check is ignored''') |
||
}} |
}} |
||
===Tips=== |
===Tips=== |
||
*Like [[5-3]], you must sink the flagship at the boss node '''5 times''' to clear the map. |
*Like [[5-3]], you must sink the flagship at the boss node '''5 times''' to clear the map. |
||
| − | *There is a LoS Check in {{Event/Route|L|red}} to go to the Boss Node. You require approximately above eLoS '''(F33)''' |
+ | *There is a LoS Check in {{Event/Route|L|red}} to go to the Boss Node. You require approximately above eLoS '''(F33) Cn=2''' of '''60''' or higher. |
| + | *There is a LoS Check in {{Event/Route|M|blue}} to go to the Boss Node. It is ignored if your fleet is Fast+. If your fleet is just Fast (and not Fast+), it requires approximately above eLoS '''(F33) Cn=2''' of '''45''' or higher. |
||
*Node {{Event/Route|C|red}} has a pattern with 1-2 Enemy Submarines, sometimes in '''Line Ahead'''. You are recommended go Line Abreast against this Node (Heavy Ships such as BB/CV can handle all Surface Enemies in the Node even in this formation), and bring OASW capable Destroyers to deal with them. |
*Node {{Event/Route|C|red}} has a pattern with 1-2 Enemy Submarines, sometimes in '''Line Ahead'''. You are recommended go Line Abreast against this Node (Heavy Ships such as BB/CV can handle all Surface Enemies in the Node even in this formation), and bring OASW capable Destroyers to deal with them. |
||
*There are {{ShipLink|Light Cruiser Tsu-Class}} nearly everywhere in this Map. If using a composition with CVs, you are recommended to use ones with high capacity aircraft slots, and place Bombers only in the Highest Capacity Slots on your CVs to avoid all of your Bombers getting shot down to 0 by the time you reach the Boss Node. |
*There are {{ShipLink|Light Cruiser Tsu-Class}} nearly everywhere in this Map. If using a composition with CVs, you are recommended to use ones with high capacity aircraft slots, and place Bombers only in the Highest Capacity Slots on your CVs to avoid all of your Bombers getting shot down to 0 by the time you reach the Boss Node. |
||
| + | *[[List of Seaplanes by stats|Seaplane Fighters]] are required should you go south route and wish to obtain Air Superiority at the boss node. |
||
| − | ===Recommended |
+ | ===Recommended Fleets=== |
| − | * |
+ | *{{Event/Route|B|blue|C|red|G|red|L|red|P|red}} |
| − | **2 BB(V) 2 DD 2 CV(B) |
+ | **2 BB(V) 2 DD 2 CV(B) |
| + | **2 BB(V) 2 CA(V) 2 CV(B) |
||
| ⚫ | |||
| + | **2 CV(B) 4 CA (2 CL 3 CA CV(B) for simultaneous Bq13) |
||
| ⚫ | |||
| + | ***This variant can be used to complete '''[[Quests#Bq7|Bq7]]''' (Mikawa Quarterly 5-4 quest), and has the advantages of not having to go through the dangerous night battle node {{Event/Route|F|purple}}, while also being able to gain air control at the boss node as well as making use of CV(B)'s massive striking potential. Anti-Air setups can be considered if {{EquipmentLink|GFCS Mk.37 + 5inch Twin Dual-purpose Gun Mount (Concentrated Deployment)|text= 5inch Twin Mount (CD)}} variants are used alongside an AA Radar for API 5 |
||
| ⚫ | |||
| + | *{{Event/Route|B|blue|E|red|H|purple|I|green|J|purple|M|blue|P|red}} '''(must be fast fleet)''' |
||
| ⚫ | |||
| + | **2 (F)BB(V)/CA(V) 1 CL 3 DD |
||
| + | ***Standard comp for south route, suitable for quest '''Bq6''' ({{ShipLink|Naganami Kai Ni}} quarterly 5-4 quest). |
||
| ⚫ | |||
| + | **3 CA(V) 1 CL 2DD |
||
| + | ***Avoids night node {{Event/Route|F|purple}} . {{EquipmentLink|Type 2 Seaplane Fighter Kai|Kyoufuu Kai|Type 2 Seaplane Fighter Kai (Skilled)|link=Seaplane Fighter|text=Seaplane fighters|icon=x}} are recommended in securing a minimum of Air Parity at the boss node to avoid Enemy [[Artillery Spotting]]. |
||
| + | ***This route can also be used to combine clearing the 5-4 part of '''Bq7''' (Mikawa Quarterly quest) with one run of the {{ShipLink|Naganami Kai Ni}} Quarterly 5-4 quest '''Bq6'''. However you will be facing the boss node in AI and need to have high level ships and good equipment to make this option feasible. |
||
| + | **2 BB(V) 2CA(V) 2DD |
||
| + | ***The heavier variant of the above fleet. Usage of either {{ShipLink|Ise/Kai Ni}} or {{ShipLink|Hyuuga/Kai Ni}} is highly recommended due to their ability to ferry [[List of Fighters by stats|carrier-based fighters]], thus removing the need to use seaplane fighters and opening up room for more equipment combinations on other ships. |
||
| + | *{{Event/Route|A|blue|D|black|F|purple|H|purple|I|green|J|purple|M|blue|P|red}} |
||
| + | **4 CA 2 CAV |
||
| + | ***Suitable for quest '''Bq7'''. Goes through night node {{Event/Route|F|purple}}, but is able to bring air power to the boss to enable allied [[Artillery Spotting]]. |
||
**6 SS(V) |
**6 SS(V) |
||
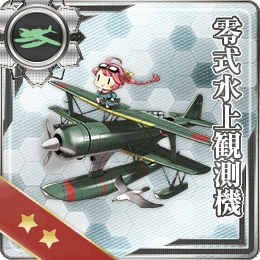
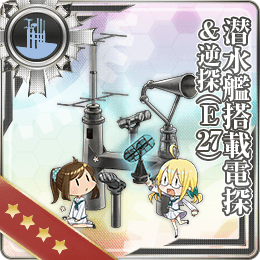
| − | ***Please note due to the LoS check, you will be required to bring some LoS Equipment such as {{EquipmentLink|Type 0 Observation Seaplane|text=Seaplanes}} or {{EquipmentLink|Submarine Radar & Passive Radiolocator (E27)|text=Submarine Radars}} on your Submarines. |
+ | ***Please note that due to the LoS check, you will be required to bring some LoS Equipment such as {{EquipmentLink|Type 0 Observation Seaplane|text=Seaplanes}} or {{EquipmentLink|Submarine Radar & Passive Radiolocator (E27)|text=Submarine Radars}} on your Submarines. |
| − | |||
| − | |||
| − | |||
{{Map/Footer}} |
{{Map/Footer}} |
||
Latest revision as of 12:16, 31 May 2020
InformationEdit
|
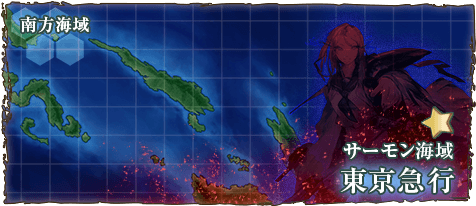
Salmon Sea Area サーモン海域 | |
 | |
 | |
| Information | |
| Special Mechanics | LoS Check |
| Experience | HQ: 210 non-boss, 3020 boss |
| Kills required | 5? |
| In-game description | |
| Operation | 東京急行 Tokyo Express |
| Task | 南方海域に有力な艦隊を投入し鼠輸送作戦を敢行、可能であれば同方面の敵艦隊も撃滅せよ! Deploy a powerful fleet and perform a vital "rat transport" operation. If possible, also destroy the enemy fleet in the area! |
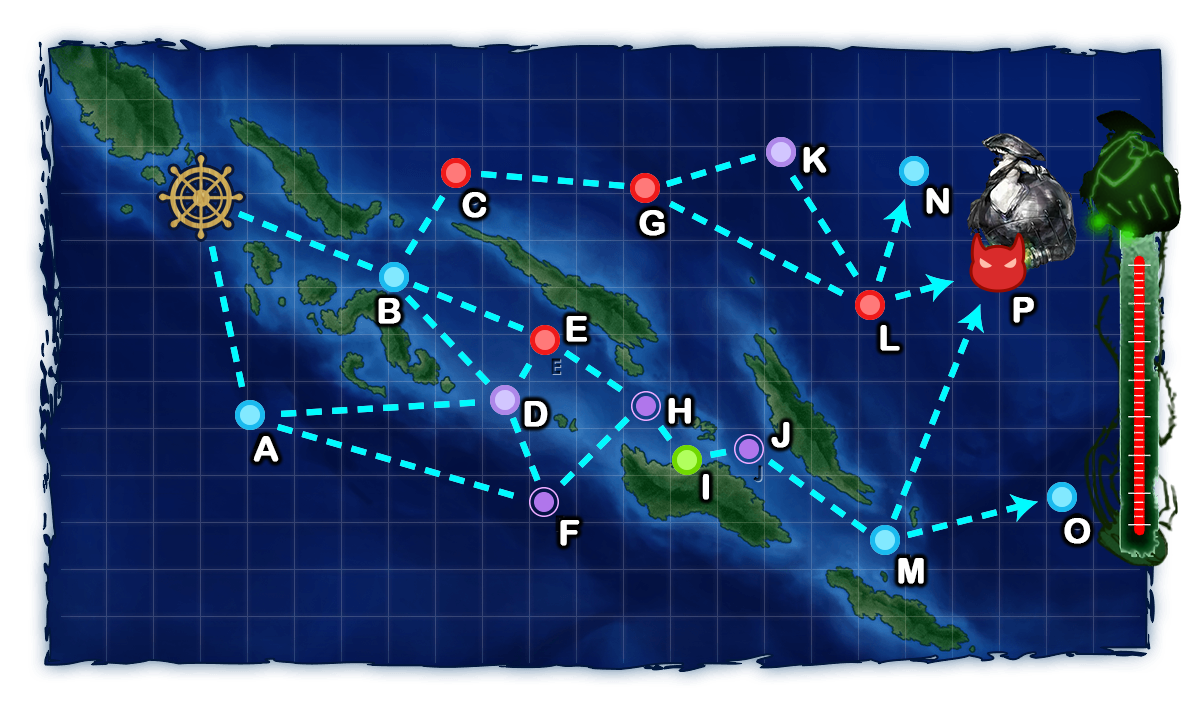
| Branching Rules | ||
|---|---|---|
| Nodes | Rules | |
| Start | A |
|
B | ||
A |
D |
|
F | ||
B |
C |
|
D | ||
E | ||
D |
E |
|
F | ||
G |
K |
|
L | ||
L |
N |
|
P | ||
M |
O |
|
P |
| |
Tips[]
- Like 5-3, you must sink the flagship at the boss node 5 times to clear the map.
- There is a LoS Check in L to go to the Boss Node. You require approximately above eLoS (F33) Cn=2 of 60 or higher.
- There is a LoS Check in M to go to the Boss Node. It is ignored if your fleet is Fast+. If your fleet is just Fast (and not Fast+), it requires approximately above eLoS (F33) Cn=2 of 45 or higher.
- Node C has a pattern with 1-2 Enemy Submarines, sometimes in Line Ahead. You are recommended go Line Abreast against this Node (Heavy Ships such as BB/CV can handle all Surface Enemies in the Node even in this formation), and bring OASW capable Destroyers to deal with them.
- There are Light Cruiser Tsu-Class nearly everywhere in this Map. If using a composition with CVs, you are recommended to use ones with high capacity aircraft slots, and place Bombers only in the Highest Capacity Slots on your CVs to avoid all of your Bombers getting shot down to 0 by the time you reach the Boss Node.
- Seaplane Fighters are required should you go south route and wish to obtain Air Superiority at the boss node.

Recommended Fleets[]
- B C G L P
- 2 BB(V) 2 DD 2 CV(B)
- 2 BB(V) 2 CA(V) 2 CV(B)
- 2 CV(B) 4 CA (2 CL 3 CA CV(B) for simultaneous Bq13)
- This variant can be used to complete Bq7 (Mikawa Quarterly 5-4 quest), and has the advantages of not having to go through the dangerous night battle node F, while also being able to gain air control at the boss node as well as making use of CV(B)'s massive striking potential. Anti-Air setups can be considered if 5inch Twin Mount (CD)
 variants are used alongside an AA Radar for API 5
- This variant can be used to complete Bq7 (Mikawa Quarterly 5-4 quest), and has the advantages of not having to go through the dangerous night battle node F, while also being able to gain air control at the boss node as well as making use of CV(B)'s massive striking potential. Anti-Air setups can be considered if 5inch Twin Mount (CD)
- B E H I J M P (must be fast fleet)
- 1 (F)BB(V) 1 CLT 4 DD
- 2 (F)BB(V)/CA(V) 1 CL 3 DD
- Standard comp for south route, suitable for quest Bq6 (Naganami Kai Ni quarterly 5-4 quest).
- A D E H I J M P
- 3 CA(V) 1 CL 2DD
- Avoids night node F . Seaplane fighters are recommended in securing a minimum of Air Parity at the boss node to avoid Enemy Artillery Spotting.
- This route can also be used to combine clearing the 5-4 part of Bq7 (Mikawa Quarterly quest) with one run of the Naganami Kai Ni Quarterly 5-4 quest Bq6. However you will be facing the boss node in AI and need to have high level ships and good equipment to make this option feasible.
- Avoids night node F .
- 2 BB(V) 2CA(V) 2DD
- The heavier variant of the above fleet. Usage of either Ise Kai Ni or Hyuuga Kai Ni is highly recommended due to their ability to ferry carrier-based fighters, thus removing the need to use seaplane fighters and opening up room for more equipment combinations on other ships.
- 3 CA(V) 1 CL 2DD
- A D F H I J M P
- 4 CA 2 CAV
- Suitable for quest Bq7. Goes through night node F, but is able to bring air power to the boss to enable allied Artillery Spotting.
- 6 SS(V)
- Please note that due to the LoS check, you will be required to bring some LoS Equipment such as Seaplanes or Submarine Radars on your Submarines.
- Please note that due to the LoS check, you will be required to bring some LoS Equipment such as Seaplanes
- 4 CA 2 CAV


Enemy patterns[]
Lua error in package.lua at line 80: module 'Module:Collection/EnemyShips' not found. Lua error in package.lua at line 80: module 'Module:Collection/EnemyShips' not found. Lua error in package.lua at line 80: module 'Module:Collection/EnemyShips' not found. Lua error in package.lua at line 80: module 'Module:Collection/EnemyShips' not found. Lua error in package.lua at line 80: module 'Module:Collection/EnemyShips' not found. Lua error in package.lua at line 80: module 'Module:Collection/EnemyShips' not found. Lua error in package.lua at line 80: module 'Module:Collection/EnemyShips' not found. Lua error in package.lua at line 80: module 'Module:Collection/EnemyShips' not found. Lua error in package.lua at line 80: module 'Module:Collection/EnemyShips' not found. Lua error in package.lua at line 80: module 'Module:Collection/EnemyShips' not found. Lua error in package.lua at line 80: module 'Module:Collection/EnemyShips' not found. Lua error in package.lua at line 80: module 'Module:Collection/EnemyShips' not found. Lua error in package.lua at line 80: module 'Module:Collection/EnemyShips' not found. Lua error in package.lua at line 80: module 'Module:Collection/EnemyShips' not found. Lua error in package.lua at line 80: module 'Module:Collection/EnemyShips' not found.