m (Restoring wikia database bug. Damn you fandom!!!) |
|||
| Line 1,341: | Line 1,341: | ||
__FORCETOC__ |
__FORCETOC__ |
||
__NEWSECTIONLINK__ |
__NEWSECTIONLINK__ |
||
| − | [[Category:Sortie]] |
||
| − | [[Category:World Map]] |
||
| − | [[Category:Drop List]] |
||
Revision as of 04:53, 7 April 2018
Template:Sortieworld
Stage Guide
| 1-1 Branching Rules | ||
|---|---|---|
| Nodes | Rules | |
A |
B |
|
C | ||
Nodes and Enemy Encounters
| Area | Pattern | Encountered vessels | Form |
|---|---|---|---|
| A 敵偵察艦 |
Pattern 1 | ||
| Pattern 2 | |||
| Pattern 3 | |||
| B 敵はぐれ艦隊 |
Pattern 1 | ||
| Pattern 2 | |||
| Pattern 3 | |||
| C 敵主力艦隊 |
Pattern 1 | ||
| Pattern 2 | |||
| Pattern 3 | |||
| Pattern 4 |
Tip
- Easy map for flagship-sparkling.
Drops
| Node | Destroyers | Light Cruisers |
|---|---|---|
| A | Template:ShipLinkTmp, Template:ShipLinkTmp, Template:ShipLinkTmp, Template:ShipLinkTmp, Template:ShipLinkTmp, Template:ShipLinkTmp, Template:ShipLinkTmp, Template:ShipLinkTmp, Template:ShipLinkTmp, Template:ShipLinkTmp, Template:ShipLinkTmp, Template:ShipLinkTmp, Template:ShipLinkTmp, Template:ShipLinkTmp, Template:ShipLinkTmp, Template:ShipLinkTmp, Template:ShipLinkTmp, Template:ShipLinkTmp, Template:ShipLinkTmp, Template:ShipLinkTmp, Template:ShipLinkTmp, Template:ShipLinkTmp, Template:ShipLinkTmp, Template:ShipLinkTmp, Template:ShipLinkTmp, Template:ShipLinkTmp, Template:ShipLinkTmp, Template:ShipLinkTmp, Template:ShipLinkTmp, Template:ShipLinkTmp, Template:ShipLinkTmp, Template:ShipLinkTmp, Template:ShipLinkTmp, Template:ShipLinkTmp, Template:ShipLinkTmp, Template:ShipLinkTmp | Template:ShipLinkTmp, Template:ShipLinkTmp, Template:ShipLinkTmp |
| B | Template:ShipLinkTmp, Template:ShipLinkTmp, Template:ShipLinkTmp, Template:ShipLinkTmp, Template:ShipLinkTmp, Template:ShipLinkTmp, Template:ShipLinkTmp, Template:ShipLinkTmp, Template:ShipLinkTmp, Template:ShipLinkTmp, Template:ShipLinkTmp, Template:ShipLinkTmp, Template:ShipLinkTmp, Template:ShipLinkTmp, Template:ShipLinkTmp, Template:ShipLinkTmp, Template:ShipLinkTmp, Template:ShipLinkTmp, Template:ShipLinkTmp, Template:ShipLinkTmp, Template:ShipLinkTmp, Template:ShipLinkTmp, Template:ShipLinkTmp, Template:ShipLinkTmp, Template:ShipLinkTmp, Template:ShipLinkTmp, Template:ShipLinkTmp, Template:ShipLinkTmp, Template:ShipLinkTmp, Template:ShipLinkTmp, Template:ShipLinkTmp, Template:ShipLinkTmp | Template:ShipLinkTmp, Template:ShipLinkTmp, Template:ShipLinkTmp, Template:ShipLinkTmp |
| C | Template:ShipLinkTmp, Template:ShipLinkTmp, Template:ShipLinkTmp, Template:ShipLinkTmp, Template:ShipLinkTmp, Template:ShipLinkTmp, Template:ShipLinkTmp, Template:ShipLinkTmp, Template:ShipLinkTmp, Template:ShipLinkTmp, Template:ShipLinkTmp, Template:ShipLinkTmp, Template:ShipLinkTmp, Template:ShipLinkTmp, Template:ShipLinkTmp, Template:ShipLinkTmp, Template:ShipLinkTmp, Template:ShipLinkTmp, Template:ShipLinkTmp, Template:ShipLinkTmp, Template:ShipLinkTmp, Template:ShipLinkTmp, Template:ShipLinkTmp, Template:ShipLinkTmp, Template:ShipLinkTmp, Template:ShipLinkTmp, Template:ShipLinkTmp, Template:ShipLinkTmp, Template:ShipLinkTmp, Template:ShipLinkTmp, Template:ShipLinkTmp, Template:ShipLinkTmp, Template:ShipLinkTmp, Template:ShipLinkTmp, Template:ShipLinkTmp, Template:ShipLinkTmp, Template:ShipLinkTmp, Template:ShipLinkTmp, Template:ShipLinkTmp, Template:ShipLinkTmp, Template:ShipLinkTmp, Template:ShipLinkTmp, Template:ShipLinkTmp | Template:ShipLinkTmp, Template:ShipLinkTmp, Template:ShipLinkTmp, Template:ShipLinkTmp, Template:ShipLinkTmp, Template:ShipLinkTmp, Template:ShipLinkTmp, Template:ShipLinkTmp, Template:ShipLinkTmp |
World 1-2: 南西諸島沖 Sea around the Nansei Islands
Template:Sortieworld
Stage Guide
| 1-2 Branching Rules | ||
|---|---|---|
| Nodes | Rules | |
| Start | A |
|
C | ||
Nodes and Enemy Encounters
| Area | Pattern | Encountered vessels | Formation |
|---|---|---|---|
| A 敵前衛艦隊 |
Pattern 1 | ||
| Pattern 2 | |||
| Pattern 3 | |||
| B 敵主力部隊 |
Pattern 1 | ||
| Pattern 2 | |||
| Pattern 3 | |||
| C | |||
| D 敵前衛艦隊 |
Pattern 1 | N/A | |
| Pattern 2 | |||
| Pattern 3 | |||
Drops
| Node | Destroyers | Light Cruisers |
|---|---|---|
| A | Template:ShipLinkTmp, Template:ShipLinkTmp, Template:ShipLinkTmp, Template:ShipLinkTmp, Template:ShipLinkTmp, Template:ShipLinkTmp, Template:ShipLinkTmp, Template:ShipLinkTmp, Template:ShipLinkTmp, Template:ShipLinkTmp, Template:ShipLinkTmp, Template:ShipLinkTmp, Template:ShipLinkTmp, Template:ShipLinkTmp, Template:ShipLinkTmp, Template:ShipLinkTmp, Template:ShipLinkTmp, Template:ShipLinkTmp, Template:ShipLinkTmp, Template:ShipLinkTmp, Template:ShipLinkTmp, Template:ShipLinkTmp, Template:ShipLinkTmp, Template:ShipLinkTmp, Template:ShipLinkTmp, Template:ShipLinkTmp, Template:ShipLinkTmp, Template:ShipLinkTmp, Template:ShipLinkTmp, Template:ShipLinkTmp, Template:ShipLinkTmp, Template:ShipLinkTmp, Template:ShipLinkTmp, Template:ShipLinkTmp, Template:ShipLinkTmp | Template:ShipLinkTmp, Template:ShipLinkTmp, Template:ShipLinkTmp, Template:ShipLinkTmp, Template:ShipLinkTmp, Template:ShipLinkTmp, Template:ShipLinkTmp, Template:ShipLinkTmp, Template:ShipLinkTmp |
| B | Template:ShipLinkTmp, Template:ShipLinkTmp, Template:ShipLinkTmp, Template:ShipLinkTmp, Template:ShipLinkTmp, Template:ShipLinkTmp, Template:ShipLinkTmp, Template:ShipLinkTmp, Template:ShipLinkTmp, Template:ShipLinkTmp, Template:ShipLinkTmp, Template:ShipLinkTmp, Template:ShipLinkTmp, Template:ShipLinkTmp, Template:ShipLinkTmp, Template:ShipLinkTmp, Template:ShipLinkTmp, Template:ShipLinkTmp, Template:ShipLinkTmp, Template:ShipLinkTmp, Template:ShipLinkTmp, Template:ShipLinkTmp, Template:ShipLinkTmp, Template:ShipLinkTmp, Template:ShipLinkTmp, Template:ShipLinkTmp, Template:ShipLinkTmp, Template:ShipLinkTmp, Template:ShipLinkTmp, Template:ShipLinkTmp, Template:ShipLinkTmp, Template:ShipLinkTmp, Template:ShipLinkTmp, Template:ShipLinkTmp, Template:ShipLinkTmp, Template:ShipLinkTmp, Template:ShipLinkTmp, Template:ShipLinkTmp | Template:ShipLinkTmp, Template:ShipLinkTmp, Template:ShipLinkTmp, Template:ShipLinkTmp, Template:ShipLinkTmp, Template:ShipLinkTmp, Template:ShipLinkTmp, Template:ShipLinkTmp, Template:ShipLinkTmp, Template:ShipLinkTmp, Template:ShipLinkTmp, Template:ShipLinkTmp, Template:ShipLinkTmp, Template:ShipLinkTmp |
| D | Template:ShipLinkTmp, Template:ShipLinkTmp, Template:ShipLinkTmp, Template:ShipLinkTmp, Template:ShipLinkTmp, Template:ShipLinkTmp, Template:ShipLinkTmp, Template:ShipLinkTmp, Template:ShipLinkTmp, Template:ShipLinkTmp, Template:ShipLinkTmp, Template:ShipLinkTmp, Template:ShipLinkTmp, Template:ShipLinkTmp, Template:ShipLinkTmp, Template:ShipLinkTmp, Template:ShipLinkTmp, Template:ShipLinkTmp, Template:ShipLinkTmp, Template:ShipLinkTmp, Template:ShipLinkTmp, Template:ShipLinkTmp, Template:ShipLinkTmp, Template:ShipLinkTmp, Template:ShipLinkTmp, Template:ShipLinkTmp, Template:ShipLinkTmp, Template:ShipLinkTmp, Template:ShipLinkTmp, Template:ShipLinkTmp, Template:ShipLinkTmp, Template:ShipLinkTmp, Template:ShipLinkTmp | Template:ShipLinkTmp, Template:ShipLinkTmp, Template:ShipLinkTmp, Template:ShipLinkTmp, Template:ShipLinkTmp, Template:ShipLinkTmp, Template:ShipLinkTmp, Template:ShipLinkTmp, Template:ShipLinkTmp, Template:ShipLinkTmp |
World 1-3: 製油所地帯沿岸 Coastal Refinery Zone
Template:Sortieworld
Stage Guide
| 1-3 Branching Rules | ||
|---|---|---|
| Nodes | Rules | |
| Start | A |
|
B | ||
B |
C |
|
E |
| |
C |
F |
|
D |
G |
|
C | ||
The route from D to C is one-way only (you can not move from C to D). All compass spins on this stage are random. B to C is 30%, B to E is 70% (according to Japanese wiki [[1]]). Keep trying if you're getting detoured to the maelstrom. Do note that F has heavy cruisers and the boss node has a battleship.
Nodes and Enemy Encounters
| Area | Pattern | Encountered vessels | Formation |
|---|---|---|---|
| A 敵前衛艦隊 |
Pattern 1 | ||
| Pattern 2 | |||
| Pattern 3 | |||
| B | Maelstrom: | ||
| C | |||
| D | |||
| E 敵前衛艦隊 |
Pattern 1 | ||
| Pattern 2 | |||
| F 敵支援艦隊 |
Pattern 1 | ||
| Pattern 2 | |||
| Pattern 3 | |||
| G 敵主力艦隊 |
Pattern 1 | ||
Drops
| Node | Destroyers | Light Cruisers | Heavy Cruisers | Seaplane Tender | Aircraft Carrier |
|---|---|---|---|---|---|
| A | Template:ShipLinkTmp, Template:ShipLinkTmp, Template:ShipLinkTmp, Template:ShipLinkTmp, Template:ShipLinkTmp, Template:ShipLinkTmp, Template:ShipLinkTmp, Template:ShipLinkTmp, Template:ShipLinkTmp, Template:ShipLinkTmp, Template:ShipLinkTmp, Template:ShipLinkTmp, Template:ShipLinkTmp, Template:ShipLinkTmp, Template:ShipLinkTmp, Template:ShipLinkTmp, Template:ShipLinkTmp, Template:ShipLinkTmp, Template:ShipLinkTmp, Template:ShipLinkTmp, Template:ShipLinkTmp, Template:ShipLinkTmp, Template:ShipLinkTmp, Template:ShipLinkTmp, Template:ShipLinkTmp, Template:ShipLinkTmp, Template:ShipLinkTmp, Template:ShipLinkTmp, Template:ShipLinkTmp, Template:ShipLinkTmp, Template:ShipLinkTmp, Template:ShipLinkTmp, Template:ShipLinkTmp, Template:ShipLinkTmp, Template:ShipLinkTmp, Template:ShipLinkTmp | Template:ShipLinkTmp, Template:ShipLinkTmp, Template:ShipLinkTmp, Template:ShipLinkTmp, Template:ShipLinkTmp, Template:ShipLinkTmp, Template:ShipLinkTmp, Template:ShipLinkTmp, Template:ShipLinkTmp | Template:ShipLinkTmp | Template:ShipLinkTmp, Template:ShipLinkTmp | Template:ShipLinkTmp |
| E | Template:ShipLinkTmp, Template:ShipLinkTmp, Template:ShipLinkTmp, Template:ShipLinkTmp, Template:ShipLinkTmp, Template:ShipLinkTmp, Template:ShipLinkTmp, Template:ShipLinkTmp, Template:ShipLinkTmp, Template:ShipLinkTmp, Template:ShipLinkTmp, Template:ShipLinkTmp, Template:ShipLinkTmp, Template:ShipLinkTmp, Template:ShipLinkTmp, Template:ShipLinkTmp, Template:ShipLinkTmp, Template:ShipLinkTmp, Template:ShipLinkTmp, Template:ShipLinkTmp, Template:ShipLinkTmp, Template:ShipLinkTmp, Template:ShipLinkTmp, Template:ShipLinkTmp, Template:ShipLinkTmp, Template:ShipLinkTmp, Template:ShipLinkTmp, Template:ShipLinkTmp, Template:ShipLinkTmp, Template:ShipLinkTmp, Template:ShipLinkTmp, Template:ShipLinkTmp | Template:ShipLinkTmp, Template:ShipLinkTmp, Template:ShipLinkTmp, Template:ShipLinkTmp, Template:ShipLinkTmp, Template:ShipLinkTmp, Template:ShipLinkTmp, Template:ShipLinkTmp, Template:ShipLinkTmp | - | Template:ShipLinkTmp, Template:ShipLinkTmp | - |
| F | Template:ShipLinkTmp, Template:ShipLinkTmp, Template:ShipLinkTmp, Template:ShipLinkTmp, Template:ShipLinkTmp, Template:ShipLinkTmp, Template:ShipLinkTmp, Template:ShipLinkTmp, Template:ShipLinkTmp, Template:ShipLinkTmp, Template:ShipLinkTmp, Template:ShipLinkTmp, Template:ShipLinkTmp, Template:ShipLinkTmp, Template:ShipLinkTmp, Template:ShipLinkTmp, Template:ShipLinkTmp, Template:ShipLinkTmp, Template:ShipLinkTmp, Template:ShipLinkTmp, Template:ShipLinkTmp, Template:ShipLinkTmp, Template:ShipLinkTmp, Template:ShipLinkTmp, Template:ShipLinkTmp, Template:ShipLinkTmp, Template:ShipLinkTmp, Template:ShipLinkTmp, Template:ShipLinkTmp, Template:ShipLinkTmp, Template:ShipLinkTmp, Template:ShipLinkTmp, Template:ShipLinkTmp, Template:ShipLinkTmp, Template:ShipLinkTmp | Template:ShipLinkTmp, Template:ShipLinkTmp, Template:ShipLinkTmp, Template:ShipLinkTmp, Template:ShipLinkTmp, Template:ShipLinkTmp, Template:ShipLinkTmp, Template:ShipLinkTmp, Template:ShipLinkTmp | - | Template:ShipLinkTmp, Template:ShipLinkTmp | Template:ShipLinkTmp |
| G | Template:ShipLinkTmp, Template:ShipLinkTmp, Template:ShipLinkTmp, Template:ShipLinkTmp, Template:ShipLinkTmp, Template:ShipLinkTmp, Template:ShipLinkTmp, Template:ShipLinkTmp, Template:ShipLinkTmp, Template:ShipLinkTmp, Template:ShipLinkTmp, Template:ShipLinkTmp, Template:ShipLinkTmp, Template:ShipLinkTmp, Template:ShipLinkTmp, Template:ShipLinkTmp, Template:ShipLinkTmp, Template:ShipLinkTmp, Template:ShipLinkTmp, Template:ShipLinkTmp, Template:ShipLinkTmp, Template:ShipLinkTmp, Template:ShipLinkTmp, Template:ShipLinkTmp, Template:ShipLinkTmp, Template:ShipLinkTmp, Template:ShipLinkTmp, Template:ShipLinkTmp, Template:ShipLinkTmp, Template:ShipLinkTmp, Template:ShipLinkTmp | Template:ShipLinkTmp, Template:ShipLinkTmp, Template:ShipLinkTmp, Template:ShipLinkTmp, Template:ShipLinkTmp, Template:ShipLinkTmp, Template:ShipLinkTmp, Template:ShipLinkTmp, Template:ShipLinkTmp, Template:ShipLinkTmp, Template:ShipLinkTmp, Template:ShipLinkTmp, Template:ShipLinkTmp, Template:ShipLinkTmp | Template:ShipLinkTmp, Template:ShipLinkTmp, Template:ShipLinkTmp, Template:ShipLinkTmp | Template:ShipLinkTmp, Template:ShipLinkTmp | Template:ShipLinkTmp |
World 1-4: 南西諸島防衛線 Hold the Line at the Nansei Islands
Template:Sortieworld
Stage Guide
| 1-4 Branching Rules | ||
|---|---|---|
| Nodes | Rules | |
| Start | A |
|
B | ||
G | ||
C |
D |
|
E | ||
I |
F |
|
J |
| |
After playing this stage once, you may notice that standard aircraft carriers kind of hurt. For now, your only countermeasures are farming for heavy cruisers at 1-3/this stage and training them, crafting battleships and using them to push through with their firepower and armor, or building your own aircraft carrier and equipping fighters of your own to shoot down enemy aircraft. If you have Isuzu, getting her to level 12 and Remodeling her gives a huge boost to Anti-Air which also helps. Note that getting an aircraft carrier will also help to complete the Akagi quest (A11 and B10).
Nodes and Enemy Encounters
| Area | # | Encountered vessels | Form | Air |
|---|---|---|---|---|
| A 敵偵察艦隊 |
1 | |||
| 2 | ||||
| 3 | ||||
| 4 | ||||
| B 敵偵察艦隊 |
1 | |||
| 2 | ||||
| 3 | ||||
| C | ||||
| D | ||||
| E 敵前衛艦隊 |
1 | |||
| AS+ 48 | ||||
| AS 24 | ||||
| 2 | ||||
| AS+ 48 | ||||
| AS 24 | ||||
| F 敵機動部隊 |
1 | |||
| AS+ 54 | ||||
| AS 27 | ||||
| 2 | ||||
| AS+ 60 | ||||
| AS 30 | ||||
| G | ||||
| H | ||||
| I 敵前衛艦隊 |
1 | |||
| AS+ 48 | ||||
| AS 24 | ||||
| 2 | ||||
| AS+ 48 | ||||
| AS 24 | ||||
| J 敵支援艦隊 |
1 | |||
| 2 | ||||
Drops
| Node | Destroyers | Light Cruisers | Heavy Cruisers | Seaplane Tender | Aircraft Carrier |
|---|---|---|---|---|---|
| A | Template:ShipLinkTmp, Template:ShipLinkTmp, Template:ShipLinkTmp, Template:ShipLinkTmp, Template:ShipLinkTmp, Template:ShipLinkTmp, Template:ShipLinkTmp, Template:ShipLinkTmp, Template:ShipLinkTmp, Template:ShipLinkTmp, Template:ShipLinkTmp, Template:ShipLinkTmp, Template:ShipLinkTmp, Template:ShipLinkTmp, Template:ShipLinkTmp, Template:ShipLinkTmp, Template:ShipLinkTmp, Template:ShipLinkTmp, Template:ShipLinkTmp, Template:ShipLinkTmp, Template:ShipLinkTmp, Template:ShipLinkTmp, Template:ShipLinkTmp, Template:ShipLinkTmp, Template:ShipLinkTmp, Template:ShipLinkTmp, Template:ShipLinkTmp, Template:ShipLinkTmp, Template:ShipLinkTmp, Template:ShipLinkTmp, Template:ShipLinkTmp, Template:ShipLinkTmp, Template:ShipLinkTmp | Template:ShipLinkTmp, Template:ShipLinkTmp, Template:ShipLinkTmp, Template:ShipLinkTmp, Template:ShipLinkTmp, Template:ShipLinkTmp, Template:ShipLinkTmp, Template:ShipLinkTmp, Template:ShipLinkTmp, Template:ShipLinkTmp, Template:ShipLinkTmp | Template:ShipLinkTmp, Template:ShipLinkTmp, Template:ShipLinkTmp, Template:ShipLinkTmp, Template:ShipLinkTmp, Template:ShipLinkTmp, Template:ShipLinkTmp | Template:ShipLinkTmp, Template:ShipLinkTmp | Template:ShipLinkTmp |
| B | Template:ShipLinkTmp, Template:ShipLinkTmp, Template:ShipLinkTmp, Template:ShipLinkTmp, Template:ShipLinkTmp, Template:ShipLinkTmp, Template:ShipLinkTmp, Template:ShipLinkTmp, Template:ShipLinkTmp, Template:ShipLinkTmp, Template:ShipLinkTmp, Template:ShipLinkTmp, Template:ShipLinkTmp, Template:ShipLinkTmp, Template:ShipLinkTmp, Template:ShipLinkTmp, Template:ShipLinkTmp, Template:ShipLinkTmp, Template:ShipLinkTmp, Template:ShipLinkTmp, Template:ShipLinkTmp, Template:ShipLinkTmp, Template:ShipLinkTmp, Template:ShipLinkTmp, Template:ShipLinkTmp, Template:ShipLinkTmp, Template:ShipLinkTmp, Template:ShipLinkTmp, Template:ShipLinkTmp, Template:ShipLinkTmp, Template:ShipLinkTmp | Template:ShipLinkTmp, Template:ShipLinkTmp, Template:ShipLinkTmp, Template:ShipLinkTmp, Template:ShipLinkTmp, Template:ShipLinkTmp, Template:ShipLinkTmp, Template:ShipLinkTmp, Template:ShipLinkTmp, Template:ShipLinkTmp | Template:ShipLinkTmp, Template:ShipLinkTmp, Template:ShipLinkTmp, Template:ShipLinkTmp, Template:ShipLinkTmp, Template:ShipLinkTmp, Template:ShipLinkTmp | Template:ShipLinkTmp, Template:ShipLinkTmp | Template:ShipLinkTmp |
| E | Template:ShipLinkTmp, Template:ShipLinkTmp, Template:ShipLinkTmp, Template:ShipLinkTmp, Template:ShipLinkTmp, Template:ShipLinkTmp, Template:ShipLinkTmp, Template:ShipLinkTmp, Template:ShipLinkTmp, Template:ShipLinkTmp, Template:ShipLinkTmp, Template:ShipLinkTmp, Template:ShipLinkTmp, Template:ShipLinkTmp, Template:ShipLinkTmp, Template:ShipLinkTmp, Template:ShipLinkTmp, Template:ShipLinkTmp, Template:ShipLinkTmp, Template:ShipLinkTmp, Template:ShipLinkTmp, Template:ShipLinkTmp, Template:ShipLinkTmp, Template:ShipLinkTmp | Template:ShipLinkTmp, Template:ShipLinkTmp, Template:ShipLinkTmp, Template:ShipLinkTmp, Template:ShipLinkTmp, Template:ShipLinkTmp, Template:ShipLinkTmp, Template:ShipLinkTmp, Template:ShipLinkTmp | Template:ShipLinkTmp, Template:ShipLinkTmp, Template:ShipLinkTmp, Template:ShipLinkTmp, Template:ShipLinkTmp, Template:ShipLinkTmp | Template:ShipLinkTmp, Template:ShipLinkTmp | Template:ShipLinkTmp |
| F | Template:ShipLinkTmp, Template:ShipLinkTmp, Template:ShipLinkTmp, Template:ShipLinkTmp, Template:ShipLinkTmp, Template:ShipLinkTmp, Template:ShipLinkTmp, Template:ShipLinkTmp, Template:ShipLinkTmp, Template:ShipLinkTmp, Template:ShipLinkTmp, Template:ShipLinkTmp, Template:ShipLinkTmp, Template:ShipLinkTmp, Template:ShipLinkTmp, Template:ShipLinkTmp, Template:ShipLinkTmp, Template:ShipLinkTmp, Template:ShipLinkTmp, Template:ShipLinkTmp, Template:ShipLinkTmp, Template:ShipLinkTmp, Template:ShipLinkTmp, Template:ShipLinkTmp, Template:ShipLinkTmp, Template:ShipLinkTmp, Template:ShipLinkTmp, Template:ShipLinkTmp, Template:ShipLinkTmp, Template:ShipLinkTmp, Template:ShipLinkTmp, Template:ShipLinkTmp, Makigumo, Hamakaze | Template:ShipLinkTmp, Template:ShipLinkTmp, Template:ShipLinkTmp, Template:ShipLinkTmp, Template:ShipLinkTmp, Template:ShipLinkTmp, Template:ShipLinkTmp, Template:ShipLinkTmp, Template:ShipLinkTmp, Template:ShipLinkTmp, Template:ShipLinkTmp | Template:ShipLinkTmp, Template:ShipLinkTmp, Template:ShipLinkTmp, Template:ShipLinkTmp, Template:ShipLinkTmp, Template:ShipLinkTmp, Template:ShipLinkTmp, Template:ShipLinkTmp, Template:ShipLinkTmp, Template:ShipLinkTmp | Template:ShipLinkTmp, Template:ShipLinkTmp | Template:ShipLinkTmp, Template:ShipLinkTmp, Template:ShipLinkTmp, Template:ShipLinkTmp |
| I | Template:ShipLinkTmp, Template:ShipLinkTmp, Template:ShipLinkTmp, Template:ShipLinkTmp, Template:ShipLinkTmp, Template:ShipLinkTmp, Template:ShipLinkTmp, Template:ShipLinkTmp, Template:ShipLinkTmp, Template:ShipLinkTmp, Template:ShipLinkTmp, Template:ShipLinkTmp, Template:ShipLinkTmp, Template:ShipLinkTmp, Template:ShipLinkTmp, Template:ShipLinkTmp, Template:ShipLinkTmp, Template:ShipLinkTmp, Template:ShipLinkTmp, Template:ShipLinkTmp, Template:ShipLinkTmp, Template:ShipLinkTmp, Template:ShipLinkTmp, Template:ShipLinkTmp, Template:ShipLinkTmp, Template:ShipLinkTmp, Template:ShipLinkTmp, Template:ShipLinkTmp, Template:ShipLinkTmp, Template:ShipLinkTmp, Template:ShipLinkTmp | Template:ShipLinkTmp, Template:ShipLinkTmp, Template:ShipLinkTmp, Template:ShipLinkTmp, Template:ShipLinkTmp, Template:ShipLinkTmp, Template:ShipLinkTmp, Template:ShipLinkTmp, Template:ShipLinkTmp, Template:ShipLinkTmp | Template:ShipLinkTmp, Template:ShipLinkTmp, Template:ShipLinkTmp, Template:ShipLinkTmp, Template:ShipLinkTmp, Template:ShipLinkTmp, Template:ShipLinkTmp | Template:ShipLinkTmp, Template:ShipLinkTmp | Template:ShipLinkTmp, Template:ShipLinkTmp, Template:ShipLinkTmp, Template:ShipLinkTmp |
| J | Template:ShipLinkTmp, Template:ShipLinkTmp, Template:ShipLinkTmp, Template:ShipLinkTmp, Template:ShipLinkTmp, Template:ShipLinkTmp, Template:ShipLinkTmp, Template:ShipLinkTmp, Template:ShipLinkTmp, Template:ShipLinkTmp, Template:ShipLinkTmp, Template:ShipLinkTmp, Template:ShipLinkTmp, Template:ShipLinkTmp, Template:ShipLinkTmp, Template:ShipLinkTmp, Template:ShipLinkTmp, Template:ShipLinkTmp, Template:ShipLinkTmp, Template:ShipLinkTmp, Template:ShipLinkTmp, Template:ShipLinkTmp, Template:ShipLinkTmp, Template:ShipLinkTmp, Template:ShipLinkTmp, Template:ShipLinkTmp | Template:ShipLinkTmp, Template:ShipLinkTmp, Template:ShipLinkTmp, Template:ShipLinkTmp, Template:ShipLinkTmp, Template:ShipLinkTmp, Template:ShipLinkTmp, Template:ShipLinkTmp | Template:ShipLinkTmp, Template:ShipLinkTmp, Template:ShipLinkTmp, Template:ShipLinkTmp, Template:ShipLinkTmp, Template:ShipLinkTmp, Template:ShipLinkTmp, Template:ShipLinkTmp | Template:ShipLinkTmp, Template:ShipLinkTmp | Template:ShipLinkTmp, Template:ShipLinkTmp |

The Marshal Admiral Guide to 1-5
Template:Sortieworld
Stage Guide
| 1-5 Branching Rules | ||
|---|---|---|
| Nodes | Rules | |
B |
C |
|
D |
| |
C |
E |
|
F |
| |
D |
H |
|
I |
| |
E |
G |
|
I |
| |
This is the first map which has branching rules, the first map with a boss HP bar requiring multiple completions, and the first map where you can face Flagship and Elite enemies. The map is filled with only submarines unless your fleet composition is wrong and you go off-course.
- You are required to sink the boss submarine 4 times to clear the map.
- Since it is an Extra Operation, clearing this map is not required to continue onto World 2.
- Clearing this map rewards a Medal and 75 ranking points. At the start of each month, the boss HP bar will reset, allowing the rewards to be obtained again (if it doesn't reset, refresh the game, or get a new API link if you're using one).
- The enemies on the map are scaled to your HQ level, which means that the enemies will rank up when you hit a certain HQ level. Nodes power up at levels 40 and 80.
- Akashi drops on the boss node (Node I) for those who are HQ80+. She only drops if you currently do not have Akashi, meaning that you cannot get duplicates this way.

Tips
Beginners
- This map is a good place for players with HQ level below 80 to level their DDs and CLs. For details, refer to the leveling guide.
- Defeating the boss on this map will give you a large amount of HQ experience. If you don't want to inflate your HQ level and thus your enemies, then consider retreating on C node.
- Recommended composition: 1 CVL 1 BBV 2 CL. This will guarantee that you reach the boss node. You may replace any number of CLs with DDs if you wish.
- Taking more than 4 ships will not allow you to reach the boss node.
- 1 BBV is recommended since it can equip Seaplane Bombers to hit subs while allowing you to enter the second shelling phase.
- 1 CVL is recommended since it can equip Saiun to prevent T-cross disadvantage (Red T), which can make killing the boss difficult without good ASW equipment.
- It's possible to replace the CVL with a CAV or AV, but it's not advisable to do so without good equipment. An AV can equip Depth Charges, a CAV has better armor and can equip Seaplane Bombers to hit subs, but neither of them can equip Saiun to prevent the occasional Red T.
- Putting Sonar and Depth Charge on same ship will get 15% ASW power bonus (doesn't stack, one depth charge and sonars is the usual setup).
OASW
- Isuzu Kai Ni and ships with ASW of 100 or greater (or in the case of DEs and Taiyou Kai/Kai Ni: 60 and 65, respectively) will allow you to perform Opening ASW attacks, making the map much easier.
- Recommended composition: 3 OASW-capable DD/DE + 1 CVL/AV/LHA. Ideally: 3DE + Taiyou Kai (Kai Ni)/ Zuihou Kai Ni B. This setup trades the BBV for a DD or DE, reducing the resource consumption while disabling the second shelling phase, but also allows preemptive attacks that disable the enemy subs before they attack, working as if it was an extra shelling phase. You can swap up to 2 DDs for CLs. Using CTs or CLTs is also possible.
- Drop CVL/AV can be used (that is, dropped level 1 ships), up to two times without resupplying. Generally, this doesn't affect boss, boss S rank, and bucket rates. The cost is around 50 fuel and ammo for full sortie. More drop ships (DD and CL) also can be used, reducing resource consumption even further (Satsuki Kai Ni and 3 drop ships will cost around 10 fuel and ammo per full sortie); however, this will affect boss and boss kill rates (possibly down to 50%).
- CVL/AV/LHA range can be increased to medium/long by using OTO/SCAMP (will attack first in the first shelling phase after the OASW phase).
- For DD/CL/CT/CLT use one Type 3 Depth Charge Projector, and 2-3 Type 3 Active Sonars or Type 4 Passive Sonars. Generally, CVL/AV/LHA equipment don't matter, you can use boilers, bulges, normal ASW equipment, or default equipment if drop CVL/AV is used.
| Abilities to perform ASW attacks with different equipment and ASW types | |||||||||
|---|---|---|---|---|---|---|---|---|---|
|
Glossary:
| |||||||||
| Ship Type | Equipment Type | Notes | |||||||
| Dive Bomber |
Torpedo Bomber |
Sonar | Depth Charge |
Autogyro | ASW Aircraft |
Large Sonar |
Seaplane Bomber | ||
| Akitsu Maru Kai LHA |
N/A | N/A | N/A | N/A | 8 | 8 | (8)? | N/A | |
| Hayasui Kai AO |
N/A | 8 | 13 (8) | N/A | 8 | N/A | N/A | 8 | Bomber + Sonar combination uses Aircraft formula |
| Akitsushima Kai AV |
N/A | N/A | (8) | (8) | N/A | N/A | (8)? | 8 | Sonar + Depth Charge synergy bonus is possible (under Aircraft formula) |
| AV | N/A | N/A | N/A | (8) | N/A | N/A | (8)? | 8 | |
| CAV/BBV | N/A | N/A | N/A | N/A | 8 | N/A | (8)? | 8 | |
| CVL | 8 | 8 | N/A | N/A | (8) | (8) | (8)? | N/A | |
| DD/CL/CLT/CT | N/A | N/A | 13 | 13 | N/A | N/A | N/A | N/A | Sonar + Depth Charge synergy bonus is possible (under Sonar/Depth Charge formula) |
Nodes and Enemy Encounters
| Area | Admiral Level | # | Encountered vessels | Form |
|---|---|---|---|---|
| A 敵偵察潜水艦 |
79 and below | 1 | ||
| 80 and above | 2 | |||
| B 敵潜水艦隊A群 |
39 and below | 1 | ||
| 40 to 79 | 2 | |||
| 80 and above | 3 | |||
| C 敵潜水艦隊C群 |
39 and below | 1 | ||
| 40 to 79 | 2 | |||
| 80 and above | 3 | |||
| D 敵潜水艦隊B群 |
39 and below | 1 | ||
| 40 to 79 | 2 | |||
| 80 and above | 3 | |||
| E | "Must be my imagination" (battle avoided) | |||
| F 敵侵攻打撃艦隊A群 |
39 and below | 1 | ||
| 40 to 79 | 2 | |||
| 80 and above | 3 | |||
| G 敵侵攻打撃艦隊B群 |
39 and below | 1 | ||
| 40 to 79 | 2 | |||
| 80 and above | 3 | |||
| H | "Must be my imagination" (battle avoided) | |||
| I 敵通商破壊主力艦隊 |
39 and below | 1 | ||
| 40 to 79 | 2 | |||
| 80 and above | 3 | |||
Drops
Template:Sortieworld
Stage Guide
| 1-6 Branching Rules | ||
|---|---|---|
| Nodes | Rules | |
| Start | A |
|
C |
| |
G |
F |
|
K |
| |
M |
J |
|
L |
| |
- World 1-6 is unlocked by clearing World 1-5. The monthly map resets also locks 1-6 again, thus making it necessary to clear 1-5 every month to gain access to 1-6.
- The monthly map reset is conducted at 23h59 JST on the last day of the month. It is necessary to refresh the game/reload the API in order to view the reset lock - if you complete it after this time limit, you will not receive any map-clear reward but you can still get those resources and experience from the nodes themselves.
- The following ship types are not allowed on this map: (F)BB, CV, CLT, SS(V)
- Reaching node N 7 times clears the map, rewarding you with 1 Present Box & 75 ranking points and no medal. (no boss battle)
- If you reach Node N again after clearing the map, you will only be rewarded with either 50, 70, or 100 fuel, ammo, steel, or bauxite until the bar is reset on the 1st day of a new month.
- Because Node N (the node after node B and D) is the Ending Huge Resource Node, you may advance to the node with a Heavy Damaged Ship after fighting the enemy fleet in node B or D, as you won't be facing any enemies in node N. Furthermore, you can use a repair team on the flagship and proceed after node B or D even if the flagship is heavily damaged, the repair team won't be consumed.
- Using 3 CL 3 DD or 4 CL 2 DD will take you to node C.
- Using BBV, CA, CVL will take you to node C or K, which will take you to a route where there are very difficult enemies such as Flagship Wo-class, Flagship Ru-class waiting for you. Line Ahead Submarines also exist.
- Node A is an empty node. No Battle.
- Node E is Submarine Node with Echelon formation. Because this node is so minor in nature, bringing Anti-Submarine equipments is not required.
- Double-arrow nodes (D, F, L) are Aerial battle nodes like those in the Summer 2014 Event. On these nodes, only two Aerial Combat phases occur during day battle. Only CV/CVL participate here unless night battle is pursued (Originally ill-advised but an April 23, 2015 update promised to make this more feasible; its degree is still unknown)
- Having Anti-Air Cut-In equipment on your ships is highly recommended to survive node F.
- You can bring either 2 AV or Akitsu Maru + CAV to have a chance at getting a B rank on Node F.
Tips
- Node E is a good place for Players above Level 80 HQ to do their Daily Quest Bd8 (Sink 6 Submarines) and Weekly Quest Bw5 (Sink 15 Submarines).
Recommended Fleet Compositions:
- A - E - G - F - B - N (Huge Resource Node)
- 1 CL + 5 DD (Ensures movement from Node G to F). Since only CV/CVL participate in node F's aerial battle, the rank for this node will usually be D (i.e.,a loss). This can be avoided by pursuing night battle but enemy evasion is increased for aerial battle nodes and there is the risk of a ship receiving great damage before the final battle node B (which has some rare drops if cleared with a S rank). Therefore, it is usually better to just accept the defeat on node F. One should still keep their sortie ratio in mind when doing this (>75% for event participation), though running 1-1 a couple of times should be enough to return to a 'safe' ratio.
- 4 DD + ( 2 AV or 1 CAV + 1 LHA or 1 CL + 1 AV or 1 CAV + 1 AV or 1 CL+ 1 AO) (Has a chance to go from Node G to K. The advantage with this composition is the possibility of a B rank at Node F.) (Using Akitsushima could also help meet node J's LoS requirement and thus give a higher chance at finishing the run even if one is diverted away from the AEGFBN route)
Recommended Equipment:
- Set some of your destroyers to allow them to use Anti-Air Cut-In.
Resource Nodes
The resource nodes in Node G and M are fixed at 20 Ammo and 40 Fuel respectively, but can increase their yield as long as you have Daihatsus equipped, up to a max.
Node G: 20 Ammo, with +5 per Daihatsu equipped, up to a max of 35.
Node M: 40 Fuel, with +10 per Daihatsu equipped, up to a max of 70.
Note that if you use the Daihatsu Landing Craft (Type 89 Medium Tank & Landing Force), the bonus is instead +1 and +3 respectively.
Nodes and Enemy Encounters
| Area | # | Base EXP | Encountered vessels | Form | Air |
|---|---|---|---|---|---|
| A | "Must be my imagination" (battle avoided) | ||||
| B 任務部隊C群前衛部隊 |
1 | 100 | |||
| 2 | 120 | ||||
| 3 | 130 | ||||
| 4 | 140 | ||||
| AS+ 72 | |||||
| AS 36 | |||||
| 5 | 150 | ||||
| C 通商破壊潜水艦隊II群 |
1 | 20 | |||
| 2 | 20 | ||||
| 3 | 30 | ||||
| 4 | 30 | ||||
| 5 | 40 | ||||
| 6 | 50 | ||||
| D 任務部隊A群機動部隊(第二波) Aerial Battle |
1 | 110 | |||
| AS+ 144 | |||||
| AS 72 | |||||
| 2 | 110 | ||||
| AS+ 144 | |||||
| AS 72 | |||||
| 3 | 120 | ||||
| AS+ 141 | |||||
| AS 71 | |||||
| 4 | 130 | ||||
| AS+ 213 | |||||
| AS 107 | |||||
| 5 | 140 | ||||
| AS+ 228 | |||||
| AS 114 | |||||
| 6 | 150 | ||||
| AS+ 396 | |||||
| AS 198 | |||||
| E 通商破壊潜水艦隊III群 |
1 | 20 | |||
| 2 | 20 | ||||
| 3 | 30 | ||||
| 4 | 30 | ||||
| 5 | 40 | ||||
| 6 | 50 | ||||
| F 任務部隊C群機動部隊 Aerial Battle |
1 | 50 | |||
| AS+ 81 | |||||
| AS 41 | |||||
| 2 | 50 | ||||
| AS+ 144 | |||||
| AS 72 | |||||
| 3 | 60 | ||||
| AS+ 84 | |||||
| AS 42 | |||||
| 4 | 60 | ||||
| AS+ 141 | |||||
| AS 71 | |||||
| 5 | 70 | ||||
| AS+ 108 | |||||
| AS 54 | |||||
| 6 | 70 | ||||
| AS+ 156 | |||||
| AS 78 | |||||
| 7 | 70 | ||||
| AS+ 156 | |||||
| AS 78 | |||||
| 8 | 80 | ||||
| AS+ 165 | |||||
| AS 83 | |||||
| G | |||||
| H | "Must be my imagination" (battle avoided) | ||||
| I 通商破壊潜水艦隊I群 |
1 | 20 | |||
| 2 | 30 | ||||
| 3 | 40 | ||||
| J 任務部隊A群機動部隊本隊 |
1 | 170 | |||
| AS+ 84 | |||||
| AS 42 | |||||
| 2 | 170 | ||||
| AS+ 132 | |||||
| AS 66 | |||||
| 3 | 180 | ||||
| AS+ 156 | |||||
| AS 78 | |||||
| 4 | 200 | ||||
| AS+ 324 | |||||
| AS 162 | |||||
| 5 | 220 | ||||
| AS+ 300 | |||||
| AS 150 | |||||
| 6 | 220 | ||||
| AS+ 354 | |||||
| AS 177 | |||||
| K 任務部隊支援水上打撃部隊 |
1 | 70 | |||
| 2 | 80 | ||||
| 3 | 90 | ||||
| 4 | 100 | ||||
| 5 | 110 | ||||
| L 任務部隊A群機動部隊(第一波) Aerial Battle |
1 | 100 | |||
| AS+ 141 | |||||
| AS 71 | |||||
| 2 | 100 | ||||
| AS+ 213 | |||||
| AS 107 | |||||
| 3 | 110 | ||||
| AS+ 228 | |||||
| AS 144 | |||||
| 4 | 120 | ||||
| AS+ 396 | |||||
| AS 198 | |||||
| 5 | 120 | ||||
| AS+ 405 | |||||
| AS 203 | |||||
| 6 | 130 | ||||
| AS+ 576 | |||||
| AS 288 | |||||
| M | |||||
| N | Before Clearing 1-6 (7 Times) | ||||
| After Clearing 1-6 (7 Times) | |||||
Drops
Trivia
Actual location:[2]
| Click [Expand] to see the map. |
|---|
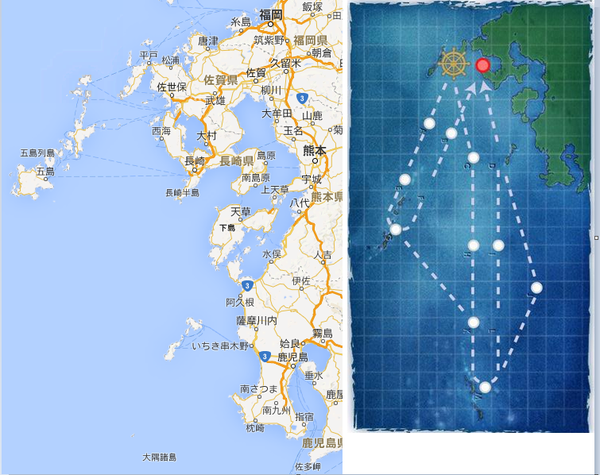
|
Links
| Sortie Worlds | ||
|---|---|---|