InformationEdit
|
Commence! : Operation Shingle
発動!「シングル作戦」 | |
 | |
 | |
| Information | |
| Boss gauge (HQ 120) |
Casual: 1600 HP + 4000 HP Easy: 1600 HP + 4000 HP Medium: 1800 HP + 4200 HP Hard: 2200 HP + 4800 HP |
| Rewards | |
All:
Casual:
Easy:
 1 1 1 1Medium:
2 1 1 1 1Hard:
211 1 1 1 1 | |
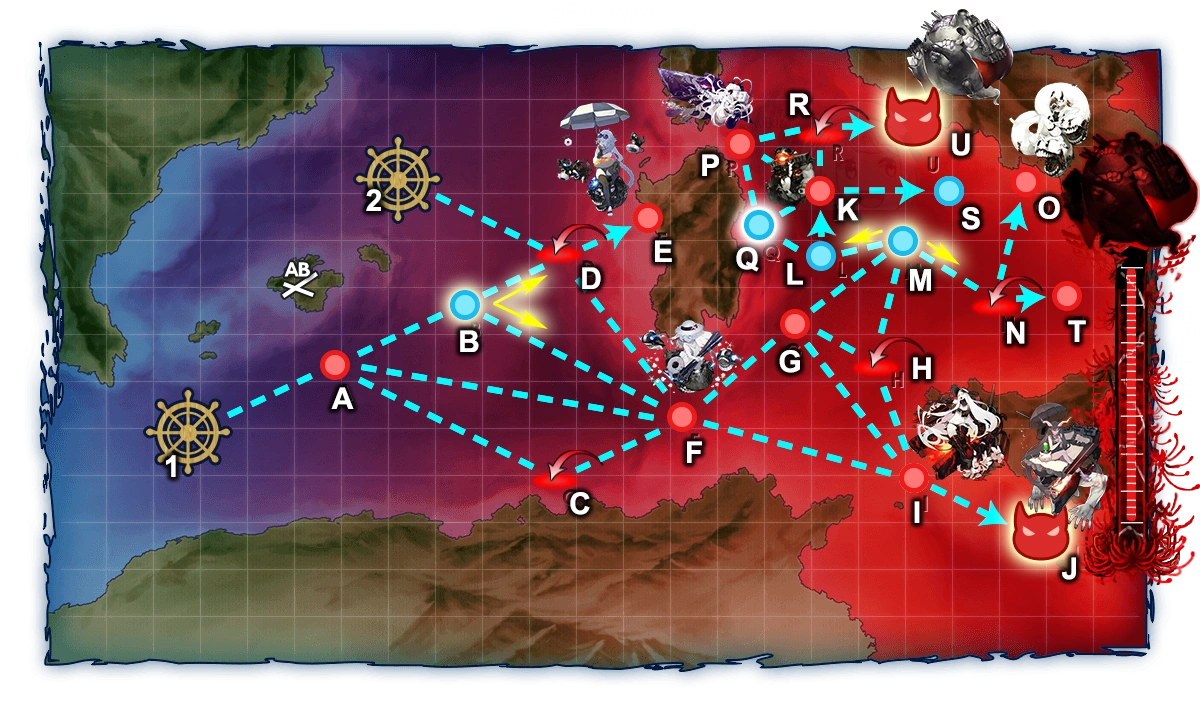
| E-3 Branching Rules | ||
|---|---|---|
| Nodes | Rules | |
| Start | 1 |
|
2 |
| |
A |
B |
|
C | ||
F | ||
B |
D |
|
F | ||
D |
E |
|
F |
| |
F |
G |
|
I | ||
G |
H |
|
I |
| |
M |
| |
H |
I |
|
M | ||
M |
L |
|
N | ||
N |
O |
|
T |
| |
L |
Q |
|
K |
| |
Q |
K |
|
P |
| |
K |
P |
|
R |
| |
S |
| |

Overview
- Both Single and Combined Fleets can be sortied to this map.
- There are two boss nodes, ask well as multiple gimmicks present for unlocking routes on the map and debuffing the boss.
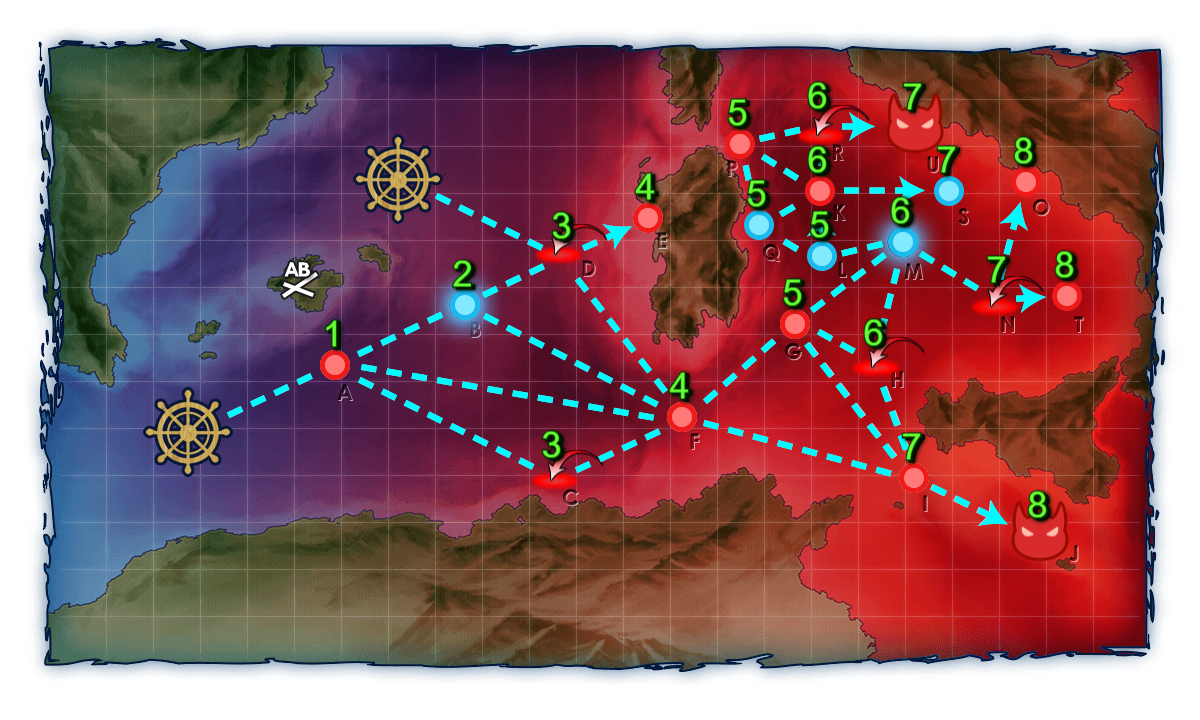
- The first boss is Anchorage Water Demon Vacation Mode, who is susceptible to anti-installation equipment.
- The second boss is a mixed fleet with installations, and the heavily armored Anzio Princess
as flagship. - This map has a hard only orange tag.


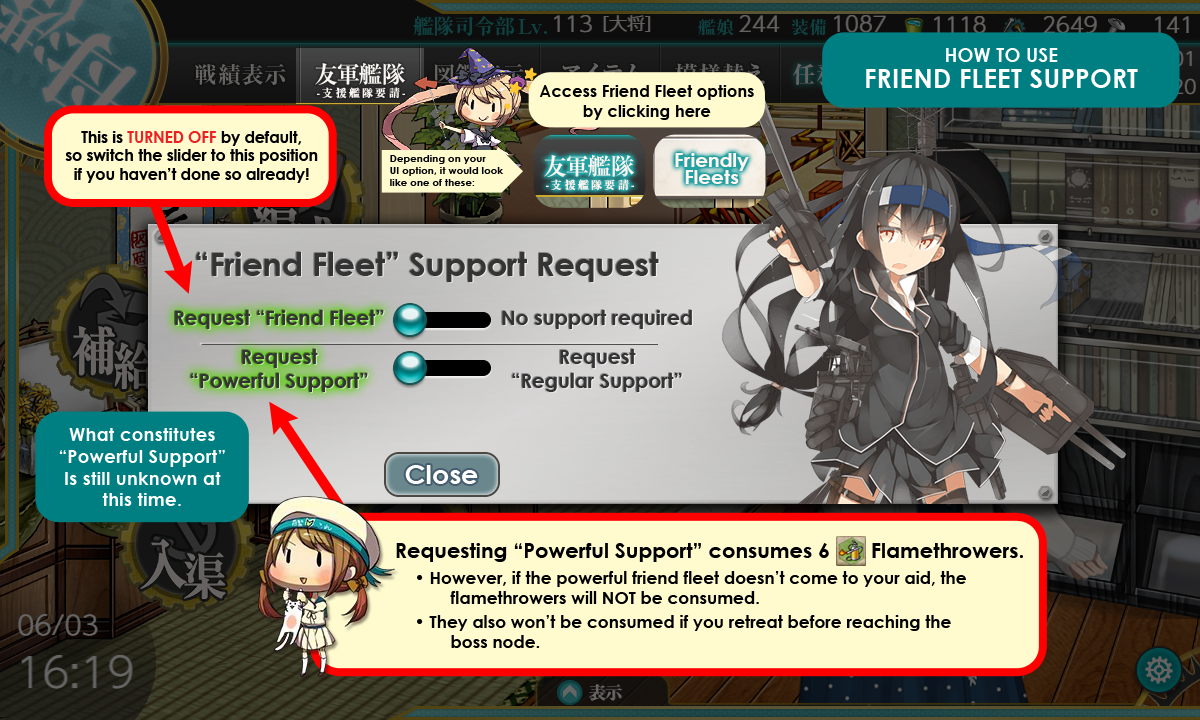
Map progression
")
")
")
")
Ship Bonuses
Template:Ambox/Disclaimer Mapwide
- German, Italian, US - 1.1x
- British - 1.15x(?)
Node J
- German, US - 1.1x
- Italian - 1.2x
- British - 1.25x
Node U
- German - 1.1x
- Italian - 1.15x
- USN - 1.25x
- British - 1.3x
- Shortcut Modifier - 1.07x
- Debuff Modifier - 1.15x (against Anzio Princess, and Anchorage Water Demon only)
Part 0: Before you start, especially if you wish to do Medium/Hard
The following section discusses a mechanic present in this map that is exclusive to Medium and Hard difficulties. If you tackling this map on Casual or Easy, the information here does not apply to you.
High-altitude Abyssal Bombers
When LBAS raids occur in this map on Medium and Hard difficulties, your bases will be subjected to attacks from High-altitude Abyssal Bombers. When defending your bases against these bombers, an additional modifier is applied to the total defense air power of your land bases; this modifier is influenced by the total number of rocket-powered interceptors present on all of your bases:
- 0: x0.5 (Total fighter power is halved)
- 1: x0.8
- 2: x1.1
- 3 or more: x1.2
The following interceptors are considered to be "rocket-powered interceptors":
- Me 163B
 (E-2 Medium/Hard reward)
 - Prototype Shuusui (E-1 reward for all difficulties)
- Shuusui (E-3 Hard reward)
- You will want at least the Me 163B from E-2 Medium/Hard and the Prototype Shuusui from E-1 to obtain the 1.1x modifier.
- If you cannot clear E-2 Medium/Hard, at least try to clear E-3 Easy as it also gives Me 163B so the 1.1x modifier is obtainable in future events which feature this mechanic.
- If you cannot clear E-2 Medium/Hard, at least try to clear E-3 Easy as it also gives Me 163B
- Ranking up these fighters up to Double Chevron (>>) will require at least 35+ runs which can be tedious.
- The best options to rank them up are E-1 Node C (Range Extender Aircraft required) and World 6-5 Node B.
AS Air Defense Requirements
Both Medium and Hard require you to obtain Air Superiority (AS) on air defense against the enemy's air raid. The AS values required are as followed for all possible compositions.
- Medium: 644, 683, or 780 (Locked on Anzio Princess
Final Form) - Hard: 956, 1092, or 1365 (Locked on Final Form)
There are 2 (3 for Hard) instances when you need to achieve this: unlocking the final boss
(Part 2, Hard only), unlocking the 2nd starting point & shortcut (Part 3), and unlocking the debuff while the boss is at her Final Form (Part 5).
- You can unlock the boss, the starting point, and the shortcut by achieving at least 644 (Medium) or 956 (Hard) defense air power and hope the easiest enemy raid comp shows up. This is doable with a bunch of fighters/interceptors.
- However, upon reaching the boss' Final Form, the AS requirement will lock to 780 (Medium) or 1365 (Hard). If you are unable to reach this threshold, you will not be able to unlock the debuff.
- It is nearly impossible to reach 1365 defense air power unless you have a collection of interceptors from previous events.
- Note that achieving at least 780 (or 956 for Hard's 2 other gimmicks) defense air power is doable even with non-event equipment. If you cannot reach 1365 defense air power, consider either trying to clear Hard without the debuff (but with the start point/shortcut unlocked) or dropping to Medium.
Note: Calculation of Defense Air Power
- Me 163B and Prototype Shuusui can give you 110 and 101 fighter power at >>, respectively.
- The following are fighter power values for easily obtainable fighters at >>:
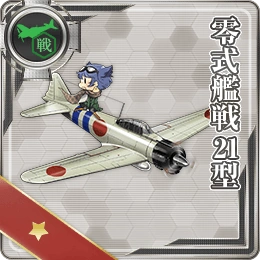
- Type 0 Fighter Model 21: 46 fighter power
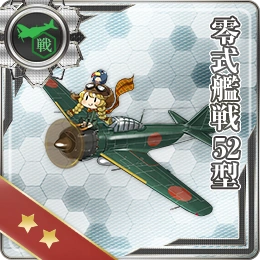
- Type 0 Fighter Model 52: 50
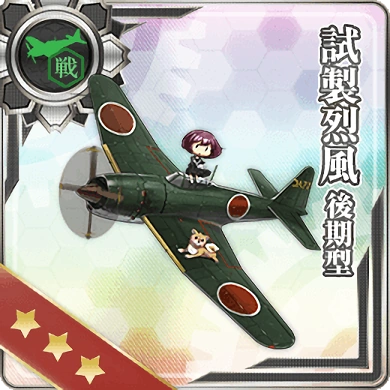
- Prototype Reppuu Late Model: 67
- Type 0 Fighter Model 21
- For all other planes, please see this link from reddit: https://i.imgur.com/DSy6Jtf.png
- You can replace one fighter on a land base with a Saiun, which provides you with a 1.3x multiplier to the defense air power of that specific base. Bases with planes that have high defense air power (Prototype Shuusui, Me 163B , Reppuu Kai) see the most benefit from the inclusion of a Saiun.
- Achieving 956 defense air power will require 8-10 >> Reppuu and/or 1-2 Saiun placed as suggested above, including Me 163B and Prototype Shuusui >> for around 970 fighter power.

Part 1: Defeat Anchorage Water Demon Vacation Mode
Route: A F I J
- STF
- Fast STF | 1-2 (F)BB / 2-1 CVL / CAV / XX + CL / 3 DD / 2 CA(V)
- Maximum of 3 BB+CVL in STF
- Fleet must be fast if STF.
- Bringing CV(B) will off-route you F to G; it must be CVL.
- Single Fleet
- No ship nor speed restriction. You can bring whatever you want.
- Boss
- Anchorage Water Demon is a normal surface ship, but also takes bonus damage from anti-installation equipment, which are the followings (ordered from least to most effective).
- Type 2 12cm - 1.15x
- Type 4 20cm - 1.15 ~ 1.25x
- WG42- 1.25x
- Daihatsu - 1.43 ~ 1.49x
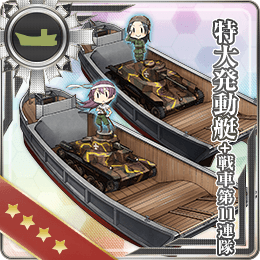
- 11th Tank - 1.44 ~ 1.56x
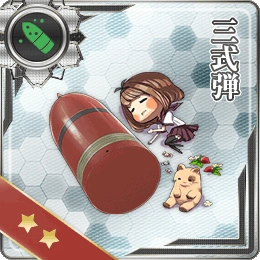
- T3 Shell - 1.5x
- 2 x WG42 - 1.6x
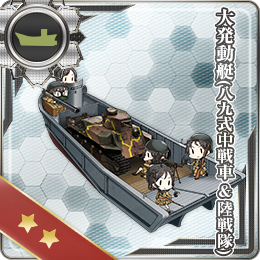
- T89 - 1.67 ~ 1.72
- If MAX improvement, 2 ~ 2.09x
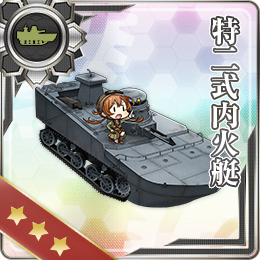
- T2 Tank - 2.39 ~ 2.42x
- If MAX improvement, 3.14 ~ 3.32x
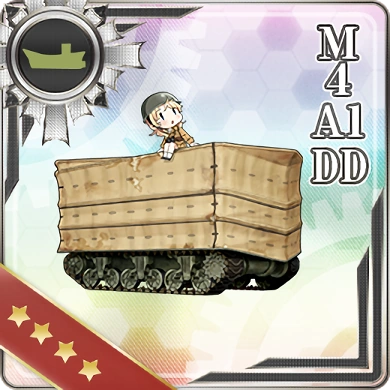
- M4A1- 2.54x
- Dive bombers also have bonus damage against her
- 1DB = 1.4x
- 2DB = 2.4 ~ 2.44
- Type 2 12cm
- Anchorage Water Demon is a normal surface ship, but also takes bonus damage from anti-installation equipment, which are the followings (ordered from least to most effective).
- LBAS
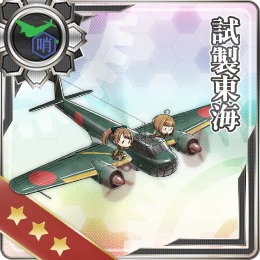
- If you have Prototype Toukai available, it is recommended to send a Land Base to Node F.
- LBAS Range of 8 is required to be sent to Node J.
- On Last Dance, there is no Air Power at the boss. It is thus possible to run 4 LBAS bombers to the boss for Last Dance.
- If you have Prototype Toukai
Part 2: Unlock Boss Node U
Hard: A+ Rank Node O twice, S-Rank Node K & E, AS Air Defense twice.
- It is recommended to do the Air Defense requirement last as the next section of unlocking (Starting point) also requires Air Defense. This is to save resources.
Normal: A+ Rank Node O & E, S-Rank Node K.
Easy: B+ Rank Node O, A+ Rank Nodes E & K.
- Nodes O & K can be reached by using a fleet with 4 (F)BB(V)+CV(B/L). Using any more will result in a detour to H
- Node E can be reached with either Single Fleet or TCF. Single Fleet is recommended as it has access to vanguard formation, and has higher base shelling accuracy compared to TCF.
Part 3: Unlock Start Point #2 & Shortcut
Requirements:
- S Rank Node T
- Twice for Hard
- Once for Casual/Easy/Medium
- AS on Nodes D R
- Required for at least Easy+. No test on Casual yet.
- Use Single Fleet for D
- AS only on D for easy mode.
- Required for at least Easy+. No test on Casual yet.
- A+ Rank Node U twice.
- Twice for Hard
- Once for Casual/Easy/Medium
- Obtain AS via LBAS Air Defense once.
- Required for Medium/Hard
- Not required for Casual/Easy
Part 4: Chip Anzio Princess to Last Dance
- Please be advised that to use the Start Point #2 you have opened up, you may only access it via Carrier Task Force or Transport Combined Fleet.
Part 5: Unlock Debuff on Anzio Princess
- Boss Gauge must be on Last Dance before requirements are made, and any requirements done in prior will not count.
- Unlike all previous Gimmicks, you will not hear the 'Quest Completion' Sound Effect upon return to Home after completing each requirements below. Instead upon the completion of the Final Requirement, you will hear the Boss' Voiceline "チッ…ナマイキッ!" while still in the Map, and you will not retreat automatically.
- Due to this fact, it is highly recommended that you play with the Game Volume On (With Headphones/Earphones), and pay attention to the Sound to not miss this, as otherwise you will have no way of finding out whether the Debuff has activated without actually visiting the Boss Node.
- The Boss debuff audio may not play if ending the debuff step on air defense node D. To check Boss debuff manually, sortie to the boss and notice her introduction CG. If the eyes are purple, the boss is without debuff. If the eyes are orange, the boss has been debuffed.
Requirements:
- A+ Rank Node J with Single fleet/TCF and O with STF/CTF.
- Required for all difficulties.
- Obtain AS on Node D
- Required for Easy+
- Obtain AS on Air Defense once.
- Required for Medium+
- Obtain AS on Node H with STF and A+ rank Node E with Single fleet.
- Hard Only
Part 6: Defeat Anzio Princess
Compositions & Routes – Carrier Task Force
- 2 D F G M L K R U - Reaches boss with no ammo penalty
- Possible composition: 2 (F)BB / 2 CV(B) / 0-2 CA(V) / 0-2 AV + 1 CL / 2 DD / 1-2 CA / 1-2 CLT / 0-1 FBB
- For slow speed fleets (F)BB(V)+CV(L/B)≤ 4
- For fast speed fleets (F)BB(V)+CV(L/B)≤ 5
- An additional CV(L/B) can be included in exchange for an additional node at H and small ammo penalty. Adding another BB is not recommended as it will route to P.
- This fleet has high combat potential, but the escort fleet may have difficulties at G and K due to CTF vs single fleet shelling order.
- Pre-boss support expedition is highly recommended.
- Utilizing FBB will increase combat power and durability of the 2nd fleet, especially against enemy torpedoes.
- Bringing CLT helps stabilize G and K nodes, and they can also act as finishers at the boss node
- 2 D F G H M L Q K R U - Reaches boss with ~8% damage penalty from ammo
- 1 Akitsushima / 2 (F)BB / 3 CV(B) + 1 CL / 2 DD / 1 CAV / 2 FBB
- 2nd fleet CAV cannot be substituted with CA
- 1 FBB in the 2nd fleet may be substituted with CA or CLT
- This fleet takes a slightly longer route but can bring 2 battleships in the escort fleet.
- 1 Akitsushima / 2 (F)BB / 3 CV(B) + 1 CL / 2 DD / 1 CAV / 2 FBB

Compositions & Routes – Surface Task Force
- 1 A F G M L K R U - Reaches boss with ~28% ammo penalty
- 2 (F)BB / 1 CV(B) / 0-3 CAV / 0-2 AV/ 0-1 AO + 1 CL / 2 DD / 2 CA / 1 CLT
- AO is recommended to reduce ammo and fuel penalties at the boss node
- They can also double as anti-land base, or for increasing air power
- AO is recommended to reduce ammo and fuel penalties at the boss node
LBAS – Utilization
- LBAS requires 7+ range to reach boss node. Possible usages are as followed:
- 0-1 base of Prototype Toukai to attack Node F
- 2-3 bases of 3 Bombers + 1 Fighter to Node U (Pre Final)
- 2-3 bases of 4 Bombers to Node U (Final)
Boss Node Battle
- Anzio Princess has high armor near the night battle damage cap (339 on hard last form). The general approach against this is to try to sink or destroy all other enemies before night battle occurs. Then, use multiple attacks at or close to the night damage cap preferably with historical post-cap modifiers to score either low armor rolls or critical hits to deal large damage to her.
- There are a wide variety of historical post-cap bonuses that can be utilized. Notable ships:
- CV: American carriers
are ideal due to their post-cap damage bonus and high slot capacity- Ark Royal is also a good option, although her capacity is somewhat lower and the map is rife with anti-air enemies
- BB: Nelson and Warspite have high damage modifiers
- Although not historically relevant, Nagato Kai Ni and Mutsu Kai Ni can equip bonus equipment and have high modifiers on their special attacks
- FBB: Iowa has a high damage modifier and is able to be placed in either the main or escort fleet
- CA: Zara and Pola are available CAs with historical bonuses, and due to their innate long range are good for leading shelling at preboss and boss nodes
- For Prinz Eugen, although less potent in day battle, she can be used for either double attack or TCI
- DD: For escort TCI, Jervis, Johnston, and Fletcher are viable options due to post-cap bonuses, which put their damage above typical TCI ships like Ayanami
- CV: American carriers
- Anzio Princess herself is a surface ship with no special equipment weaknesses known. But the rest of the boss main fleet contains 4 installations, as well as Anchorage Water Demon Vacation Mode who shares many weaknesses with installations
- Thus, the approach is to bring many ships with anti-installation equipment in the allied main fleet
- For AV and DD, combining Type 2 Amphibious Tanks with WG42 as well as Daihatsu Landing Craft (Type 89 Medium Tank & Landing Force) or M4A1 DD will result in high damage to all enemies besides Anzio Princess
- For battleships, AP shells will increase damage against Turret Imps
- Type 3 shell will increase damage against Airfield Princess, Supply Depot Princess Vacation Mode
- Nagato Kai Ni can equip the M4A1 DD or other landing craft, which has a large post-cap bonus against installations
- Mutsu Kai Ni can equip Type 2 Amphibious Tanks but not other landing crafts, but it still provides considerable bonuses
- For heavy cruisers, Type 3 shells with double attack artillery spotting is ideal
- For carriers, equipping dive bombers that disable attacking installations can be desirable
- Up to two dive bombers will give post-cap bonus against Anchorage Water Demon Vacation Mode, with high probability to target her.
- Thus, the approach is to bring many ships with anti-installation equipment in the allied main fleet
- The escort fleet engages the enemy escort fleet in the day and is usually responsible for finishing the boss off during night battle
- On Hard, the escort is fairly bulky (Ta, Tsu and Na flagships) and clearing any remnants after opening phases is not always trivial
- If using CTF, for route safety and damage output in the day bringing 1-2 ships equipped for day double attacks is advisable
- Otherwise, TCI, or possibly night DA for CLTs, is preferred
- Night bonus equipment (searchlight, star shell, night scout) are good to have to increase cut in effectiveness
- During chipping, opening ASW can help stabilize safety on route to the boss node, but during final kill phase damage it should be balanced against damage output at the boss node


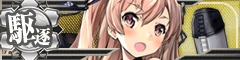

Friend Fleets

NOTE: friend fleets are disabled by default! Please toggle it on before proceeding!
Friend fleet must be manually toggled from the Home port (see the image) in order for it to appear at the boss node. You can request for a stronger friend fleet at the price of 6 flamethrowers; however, the definition of "stronger fleet" is still unknown.
J

E-3 J, E-3 U, Regular, Powerful
| Ship | Lv. | Equipment | |||||
|---|---|---|---|---|---|---|---|
| 58 |   |
29 | 47 | 67 | 61 | 50 | |
| 57 | |
29 | 50 | 57 | 75 | 50 |
E-3 J, Powerful
| Ship | Lv. | Equipment | |||||
|---|---|---|---|---|---|---|---|
| 70 |    |
49 | 60 | 66 | 65 | 47 | |
| 76 |   |
32 | 49 | 79 | 49 | 49 | |
| 76 | |
32 | 50 | 79 | 49 | 49 |
E-3 J, Powerful
| Ship | Lv. | Equipment | |||||
|---|---|---|---|---|---|---|---|
| 77 |   |
32 | 48 | 79 | 49 | 49 | |
| 77 | |
32 | 49 | 79 | 49 | 49 |
U
E-3 U, Regular, Powerful
| Ship | Lv. | Equipment | |||||
|---|---|---|---|---|---|---|---|
| 52 |     |
48 | 27 | 0 | 67 | 58 | |
| 55 |    |
52 | 72 | 61 | 70 | 68 | |
| 57 |  |
29 | 50 | 57 | 75 | 50 | |
| 56 | |
29 | 48 | 65 | 57 | 46 |
E-3 U, Powerful
| Ship | Lv. | Equipment | |||||
|---|---|---|---|---|---|---|---|
| 56 | |
52 | 68 | 70 | 60 | 75 | |
| 55 | |
52 | 72 | 61 | 70 | 68 | |
| 52 | |
48 | 27 | 0 | 67 | 58 | |
| 70 |  |
49 | 60 | 75 | 65 | 47 | |
| 63 |  |
32 | 52 | 76 | 58 | 49 | |
| 61 |  |
32 | 52 | 78 | 59 | 49 |
E-3 U, Regular, Powerful
| Ship | Lv. | Equipment | |||||
|---|---|---|---|---|---|---|---|
| 56 | |
52 | 68 | 70 | 60 | 75 | |
| 55 | |
52 | 72 | 61 | 70 | 68 | |
| 58 | |
29 | 47 | 67 | 61 | 50 | |
| 57 | |
29 | 50 | 57 | 75 | 50 |
E-3 U, Powerful
| Ship | Lv. | Equipment | |||||
|---|---|---|---|---|---|---|---|
| 56 | |
52 | 68 | 70 | 60 | 75 | |
| 55 | |
52 | 72 | 61 | 70 | 68 | |
| 70 | |
49 | 60 | 75 | 65 | 47 | |
| 63 | |
32 | 52 | 76 | 58 | 49 | |
| 62 | |
32 | 50 | 75 | 58 | 49 |

E-3 J, E-3 U, Regular, Powerful
| Ship | Lv. | Equipment | |||||
|---|---|---|---|---|---|---|---|
| 58 | |
29 | 47 | 67 | 61 | 50 | |
| 57 | |
29 | 50 | 57 | 75 | 50 |
E-3 U, Regular, Powerful
| Ship | Lv. | Equipment | |||||
|---|---|---|---|---|---|---|---|
| 70 | |
49 | 60 | 75 | 65 | 47 | |
| 77 | |
32 | 48 | 79 | 49 | 49 | |
| 75 | |
~/31 | 49 | 79 | 49 | 49 | |
| 74 | |
~/31 | 49 | 77 | 49 | 48 |
E-3 U, Regular, Powerful
| Ship | Lv. | Equipment | |||||
|---|---|---|---|---|---|---|---|
| 77 |  |
32 | 48 | 79 | 49 | 49 | |
| 75 | |
~/31 | 49 | 79 | 49 | 49 | |
| 74 |  |
~/31 | 49 | 77 | 49 | 48 |
E-3 U, Powerful
| Ship | Lv. | Equipment | |||||
|---|---|---|---|---|---|---|---|
| 95 |   |
82 | 106 | 0 | 98 | 93 | |
| 85 |  |
71 | 50 | 0 | 82 | 70 | |
| 55 | |
~/52 | 72 | 61 | 70 | 68 | |
| 56 | |
~/52 | 68 | 70 | 60 | 75 | |
| 70 | |
49 | 60 | 75 | 65 | 47 | |
| 88 |    |
31 | 53 | 90 | 72 | 50 |
E-3 U, Powerful
| Ship | Lv. | Equipment | |||||
|---|---|---|---|---|---|---|---|
| 95 | |
82 | 106 | 0 | 98 | 93 | |
| 70 | |
49 | 60 | 75 | 65 | 47 | |
| 69 |  |
39 | 25 | 0 | 34 | 33 | |
| 55 | |
~/52 | 72 | 61 | 70 | 68 | |
| 56 | |
~/52 | 68 | 70 | 60 | 75 | |
| 88 | |
~/31 | 53 | 90 | 72 | 50 |
LBAS Flight Range
If in doubt, use tooltips to check sample sizes.
Enemy patterns
Lua error in package.lua at line 80: module 'Module:Collection/EnemyShips' not found. Lua error in package.lua at line 80: module 'Module:Collection/EnemyShips' not found. Lua error in package.lua at line 80: module 'Module:Collection/EnemyShips' not found. Lua error in package.lua at line 80: module 'Module:Collection/EnemyShips' not found. Lua error in package.lua at line 80: module 'Module:Collection/EnemyShips' not found. Lua error in package.lua at line 80: module 'Module:Collection/EnemyShips' not found. Lua error in package.lua at line 80: module 'Module:Collection/EnemyShips' not found. Lua error in package.lua at line 80: module 'Module:Collection/EnemyShips' not found. Lua error in package.lua at line 80: module 'Module:Collection/EnemyShips' not found. Lua error in package.lua at line 80: module 'Module:Collection/EnemyShips' not found. Lua error in package.lua at line 80: module 'Module:Collection/EnemyShips' not found. Lua error in package.lua at line 80: module 'Module:Collection/EnemyShips' not found. Lua error in package.lua at line 80: module 'Module:Collection/EnemyShips' not found. Lua error in package.lua at line 80: module 'Module:Collection/EnemyShips' not found. Lua error in package.lua at line 80: module 'Module:Collection/EnemyShips' not found. Lua error in package.lua at line 80: module 'Module:Collection/EnemyShips' not found. Lua error in package.lua at line 80: module 'Module:Collection/EnemyShips' not found.
Lua error in package.lua at line 80: module 'Module:Collection/EnemyShips' not found. Lua error in package.lua at line 80: module 'Module:Collection/EnemyShips' not found. Lua error in package.lua at line 80: module 'Module:Collection/EnemyShips' not found. Lua error in package.lua at line 80: module 'Module:Collection/EnemyShips' not found. Lua error in package.lua at line 80: module 'Module:Collection/EnemyShips' not found. Lua error in package.lua at line 80: module 'Module:Collection/EnemyShips' not found. Lua error in package.lua at line 80: module 'Module:Collection/EnemyShips' not found. Lua error in package.lua at line 80: module 'Module:Collection/EnemyShips' not found. Lua error in package.lua at line 80: module 'Module:Collection/EnemyShips' not found. Lua error in package.lua at line 80: module 'Module:Collection/EnemyShips' not found. Lua error in package.lua at line 80: module 'Module:Collection/EnemyShips' not found. Lua error in package.lua at line 80: module 'Module:Collection/EnemyShips' not found. Lua error in package.lua at line 80: module 'Module:Collection/EnemyShips' not found. Lua error in package.lua at line 80: module 'Module:Collection/EnemyShips' not found. Lua error in package.lua at line 80: module 'Module:Collection/EnemyShips' not found. Lua error in package.lua at line 80: module 'Module:Collection/EnemyShips' not found. Lua error in package.lua at line 80: module 'Module:Collection/EnemyShips' not found.
Lua error in package.lua at line 80: module 'Module:Collection/EnemyShips' not found. Lua error in package.lua at line 80: module 'Module:Collection/EnemyShips' not found. Lua error in package.lua at line 80: module 'Module:Collection/EnemyShips' not found. Lua error in package.lua at line 80: module 'Module:Collection/EnemyShips' not found. Lua error in package.lua at line 80: module 'Module:Collection/EnemyShips' not found. Lua error in package.lua at line 80: module 'Module:Collection/EnemyShips' not found. Lua error in package.lua at line 80: module 'Module:Collection/EnemyShips' not found. Lua error in package.lua at line 80: module 'Module:Collection/EnemyShips' not found. Lua error in package.lua at line 80: module 'Module:Collection/EnemyShips' not found. Lua error in package.lua at line 80: module 'Module:Collection/EnemyShips' not found. Lua error in package.lua at line 80: module 'Module:Collection/EnemyShips' not found. Lua error in package.lua at line 80: module 'Module:Collection/EnemyShips' not found. Lua error in package.lua at line 80: module 'Module:Collection/EnemyShips' not found. Lua error in package.lua at line 80: module 'Module:Collection/EnemyShips' not found. Lua error in package.lua at line 80: module 'Module:Collection/EnemyShips' not found. Lua error in package.lua at line 80: module 'Module:Collection/EnemyShips' not found. Lua error in package.lua at line 80: module 'Module:Collection/EnemyShips' not found.
Lua error in package.lua at line 80: module 'Module:Collection/EnemyShips' not found. Lua error in package.lua at line 80: module 'Module:Collection/EnemyShips' not found. Lua error in package.lua at line 80: module 'Module:Collection/EnemyShips' not found. Lua error in package.lua at line 80: module 'Module:Collection/EnemyShips' not found. Lua error in package.lua at line 80: module 'Module:Collection/EnemyShips' not found. Lua error in package.lua at line 80: module 'Module:Collection/EnemyShips' not found. Lua error in package.lua at line 80: module 'Module:Collection/EnemyShips' not found. Lua error in package.lua at line 80: module 'Module:Collection/EnemyShips' not found. Lua error in package.lua at line 80: module 'Module:Collection/EnemyShips' not found. Lua error in package.lua at line 80: module 'Module:Collection/EnemyShips' not found. Lua error in package.lua at line 80: module 'Module:Collection/EnemyShips' not found. Lua error in package.lua at line 80: module 'Module:Collection/EnemyShips' not found. Lua error in package.lua at line 80: module 'Module:Collection/EnemyShips' not found. Lua error in package.lua at line 80: module 'Module:Collection/EnemyShips' not found. Lua error in package.lua at line 80: module 'Module:Collection/EnemyShips' not found. Lua error in package.lua at line 80: module 'Module:Collection/EnemyShips' not found. Lua error in package.lua at line 80: module 'Module:Collection/EnemyShips' not found.