No edit summary Tag: rte-source |
m (Protected "Summer 2017 Event/E-2": I just put something here ([edit=sysop] (indefinite) [move=sysop] (indefinite))) |
||
| (45 intermediate revisions by 19 users not shown) | |||
| Line 7: | Line 7: | ||
|en = The Crossing of Ri Lanka |
|en = The Crossing of Ri Lanka |
||
|jp = リランカを越えて |
|jp = リランカを越えて |
||
| − | |romaji = |
+ | |romaji = Ri Lanka o koete |
|tag = E2 |
|tag = E2 |
||
|mechanics = Ship Locking@Events/Mechanics#Ship_Locking, Abyssal Combined Fleet@Abyssal Combined Fleet |
|mechanics = Ship Locking@Events/Mechanics#Ship_Locking, Abyssal Combined Fleet@Abyssal Combined Fleet |
||
| ⚫ | |||
| − | <!-- |
||
| − | |transport = true |
||
| − | --> |
||
| ⚫ | |||
| − | |hp_easy = 1,100 |
||
| − | |hp_medium = 1,350 |
||
| − | |hp_hard = 1,440 |
||
|show_kills = true |
|show_kills = true |
||
| − | |kills_all = |
+ | |kills_all = 7 |
| − | |kills_easy = |
+ | |kills_easy = |
| − | |kills_medium = |
+ | |kills_medium = |
| − | |kills_hard = |
+ | |kills_hard = |
|reward_all = {{ShipBattleCardKai|Hatakaze}} |
|reward_all = {{ShipBattleCardKai|Hatakaze}} |
||
|reward_easy_1 = [[File:Food supply ship mamiya.png{{!}}50px{{!}}link=Fatigue]] |
|reward_easy_1 = [[File:Food supply ship mamiya.png{{!}}50px{{!}}link=Fatigue]] |
||
| Line 34: | Line 28: | ||
|reward_medium_3_x = 1 |
|reward_medium_3_x = 1 |
||
|reward_hard_1 = [[File:Food supply ship mamiya.png{{!}}50px{{!}}link=Fatigue]] |
|reward_hard_1 = [[File:Food supply ship mamiya.png{{!}}50px{{!}}link=Fatigue]] |
||
| − | |reward_hard_1_x = |
+ | |reward_hard_1_x = 2 |
|reward_hard_2 = {{EquipmentCardKai|Emergency Repair Goddess|size=50px}} |
|reward_hard_2 = {{EquipmentCardKai|Emergency Repair Goddess|size=50px}} |
||
|reward_hard_2_x = 1 |
|reward_hard_2_x = 1 |
||
| Line 41: | Line 35: | ||
|reward_hard_4 = {{EquipmentCardKai|Spitfire Mk.I|size=50px}} |
|reward_hard_4 = {{EquipmentCardKai|Spitfire Mk.I|size=50px}} |
||
|reward_hard_4_x = 1 |
|reward_hard_4_x = 1 |
||
| + | }} |
||
| − | |kills_easy = 5}} |
||
{{MapBranchingTable |
{{MapBranchingTable |
||
|title = E-2 Branching Rules |
|title = E-2 Branching Rules |
||
| − | |0 -> A/empty = |
+ | |0 -> A/empty = |
| + | * Meet all of the following requirements: |
||
| ⚫ | |||
| + | ** Fleet must contain DD |
||
| ⚫ | |||
| + | ** No SS(V) allowed |
||
| ⚫ | |||
|0 -> B = |
|0 -> B = |
||
| + | * Do not meet the requirements to go to either A or D. |
||
| ⚫ | |||
| ⚫ | |||
| ⚫ | |||
| + | * Meet all of the following requirements: |
||
| − | |0 -> D = * Amount of CV(L/B) ≧ 3 |
||
| ⚫ | |||
| + | ** Fleet must contain DD |
||
| + | ** Amount of CV(L/B) ≧ 3 '''OR''' Fleet contains SS(V) |
||
| − | |F -> J = * |
+ | |F -> J = * Do not meet the requirements to go to P. |
| − | |F -> P = |
+ | |F -> P = |
| + | * Meet all of the following requirements: |
||
| + | ** Amount of DD ≧ 3 |
||
| + | ** Amout of (F)BB(V) + CV(L/B) ≦ 1 |
||
| ⚫ | |||
| ⚫ | |||
|G/empty -> H,I = * Active Branching |
|G/empty -> H,I = * Active Branching |
||
| − | |J -> L = |
+ | |J -> L = |
| + | * Meet all of the following requirements: |
||
| − | |J -> M = * ??? |
||
| ⚫ | |||
| + | ** Amount of (F)BB(V) + CV(L/B) ≦ 3 |
||
| + | |J -> M/empty = * Do not meet the requirements to go to L. |
||
| + | |L -> K = * Do not meet the requirements to go to O, but pass the LoS check. |
||
| ⚫ | |||
| + | |L -> N/empty = * Fail the LoS check. |
||
| ⚫ | |||
| ⚫ | |||
| ⚫ | |||
| + | * Meet all of the following requirements: |
||
| ⚫ | |||
| − | + | ** Pass the LoS check |
|
| + | ** Amount of CV(B) ≦ 1 |
||
| ⚫ | |||
| + | ** Amount of (F)BB(V) ≦ 1 |
||
| + | ** No Slow BB(V) or CV(L) allowed (Hard) |
||
| + | ** No CA(V) allowed |
||
| + | ** No CLT allowed |
||
}} |
}} |
||
| Line 70: | Line 85: | ||
*This is a Single-Fleet Map. |
*This is a Single-Fleet Map. |
||
*Node B, C and K are submarine nodes. |
*Node B, C and K are submarine nodes. |
||
| − | *The Boss is a |
+ | *The Boss is a {{ShipLink|Heavy Cruiser Ne-Class/Flagship}} variant in an [[Combat/Abyssal Combined Fleet|Abyssal Combined Fleet]], utilizing Formation 4 (Line Ahead equivalent). |
| − | *There are many |
+ | *There are many {{ShipLink|Light Carrier Nu-Class/Kai Elite|Light Carrier Nu-Class/Kai Flagship|text=Light Carriers Nu-Class Kai Elite and Flagship}} throughout the Map. Please have approximately 250~270 Air Power from the Start Point to have enough Fighter Power by the time you reach the Boss node. |
| + | **The Aerial Node has a formation that requires at least 310 Air Power, but its effect on your fleet is less than the drawback of adding in too many fighters. |
||
====Unlocking Shortcut L to O==== |
====Unlocking Shortcut L to O==== |
||
* To unlock nodes P, Q and the shortcut L -> O, you need to at least obtain A-Rank victory on node I. |
* To unlock nodes P, Q and the shortcut L -> O, you need to at least obtain A-Rank victory on node I. |
||
** A fleet of the following will be able to route north towards Node I: |
** A fleet of the following will be able to route north towards Node I: |
||
| − | **3 CV(B) 1 |
+ | ***'''3 CV(L/B)''' + 0-1 CA(V) + 0-1 (F)BB + 0-1 CL + '''1-2 DD''' + 0-1 SS(V) |
| + | ****'''Note:''' You need at least 3 CV(L/B) and at least 1 DD + 1 CL/DD. SS(V) can override this but do note that those surface nodes can cause you a retreat more often than success. |
||
| ⚫ | |||
| ⚫ | |||
| ⚫ | |||
| + | *<u>Regarding the Shortcut from L--> O</u> |
||
| ⚫ | |||
| − | *Using any Slow Ships, or having 3 or more FBB+CA(V)+CV(B) combined will direct you to L to K regardless of the shortcut being opened. |
+ | **Using any Slow Ships, or having 3 or more FBB+CA(V)+CV(B) combined will direct you to L to K regardless of the shortcut being opened. |
====Player-submitted Fleet==== |
====Player-submitted Fleet==== |
||
| + | *{{Event/Route|A|blue|C|red|F|red|J|orange|L|red|O|red}} (shortcut utilized) |
||
| − | *1 FBB 1 CV 1 CVL 1 CL 2 DD (Shortcut utilized) |
||
| − | *1 FBB 1 CV 1 CVL 1 |
+ | **1 FBB 1 CV 1 CVL 1 CL 2 DD |
| + | * {{Event/Route|A|blue|C|red|F|red|J|orange|L|red|K|red|O|red}} |
||
| ⚫ | |||
| + | *{{Event/Route|D|red|E|red|G|blue|I|red}} (for unlocking shortcut) |
||
| ⚫ | |||
Latest revision as of 05:34, 6 November 2017
InformationEdit
|
The Crossing of Ri Lanka
リランカを越えて | |
|
| |
 | |
| Information | |
| Special Mechanics | Ship Locking Abyssal Combined Fleet |
| Boss gauge (HQ 120) |
All: 1440 HP |
| Kills required |
All: 7 |
| Rewards | |
All:
Casual:
Easy:
 1 1 1 1Medium:
1 1 1 1 1Hard:
211 1 1 | |
| E-2 Branching Rules | ||
|---|---|---|
| Nodes | Rules | |
| Start | A |
|
B |
| |
D |
| |
F |
J |
|
P |
| |
G |
H |
|
I | ||
J |
L |
|
M |
| |
L |
K |
|
N |
| |
O |
| |
Map Guide
- This is a Single-Fleet Map.
- Node B, C and K are submarine nodes.
- The Boss is a Heavy Cruiser Ne-Class Flagship variant in an Abyssal Combined Fleet, utilizing Formation 4 (Line Ahead equivalent).
- There are many Light Carriers Nu-Class Kai Elite and Flagship
throughout the Map. Please have approximately 250~270 Air Power from the Start Point to have enough Fighter Power by the time you reach the Boss node.- The Aerial Node has a formation that requires at least 310 Air Power, but its effect on your fleet is less than the drawback of adding in too many fighters.

Unlocking Shortcut L to O
- To unlock nodes P, Q and the shortcut L -> O, you need to at least obtain A-Rank victory on node I.
- A fleet of the following will be able to route north towards Node I:
- 3 CV(L/B) + 0-1 CA(V) + 0-1 (F)BB + 0-1 CL + 1-2 DD + 0-1 SS(V)
- Note: You need at least 3 CV(L/B) and at least 1 DD + 1 CL/DD. SS(V) can override this but do note that those surface nodes can cause you a retreat more often than success.
- 3 CV(L/B) + 0-1 CA(V) + 0-1 (F)BB + 0-1 CL + 1-2 DD + 0-1 SS(V)
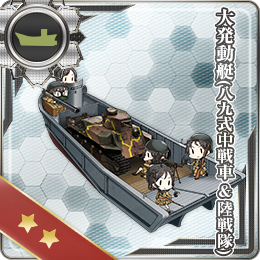
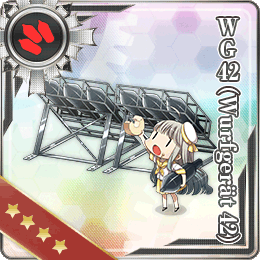
- Node I has Harbour Summer Princess and Artillery Imp. Please bring your Daihatsu Tanks
 and WG42 (Wurfgerät 42).
- A fleet of the following will be able to route north towards Node I:
- Regarding the Shortcut from L--> O
- Using any Slow Ships, or having 3 or more FBB+CA(V)+CV(B) combined will direct you to L to K regardless of the shortcut being opened.


Player-submitted Fleet
- A C F J L O (shortcut utilized)
- 1 FBB 1 CV 1 CVL 1 CL 2 DD
- A C F J L K O
- 1 FBB 1 CV 1 CVL 1 CA 1 CL 1 DD
- D E G I (for unlocking shortcut)
- 3 CV(L/B) 1 (F)BB 2 DD
Enemy patterns

Lua error in package.lua at line 80: module 'Module:Collection/EnemyShips' not found. Lua error in package.lua at line 80: module 'Module:Collection/EnemyShips' not found. Lua error in package.lua at line 80: module 'Module:Collection/EnemyShips' not found. Lua error in package.lua at line 80: module 'Module:Collection/EnemyShips' not found. Lua error in package.lua at line 80: module 'Module:Collection/EnemyShips' not found. Lua error in package.lua at line 80: module 'Module:Collection/EnemyShips' not found. Lua error in package.lua at line 80: module 'Module:Collection/EnemyShips' not found. Lua error in package.lua at line 80: module 'Module:Collection/EnemyShips' not found. Lua error in package.lua at line 80: module 'Module:Collection/EnemyShips' not found. Lua error in package.lua at line 80: module 'Module:Collection/EnemyShips' not found. Lua error in package.lua at line 80: module 'Module:Collection/EnemyShips' not found. Lua error in package.lua at line 80: module 'Module:Collection/EnemyShips' not found. Lua error in package.lua at line 80: module 'Module:Collection/EnemyShips' not found. Lua error in package.lua at line 80: module 'Module:Collection/EnemyShips' not found. Lua error in package.lua at line 80: module 'Module:Collection/EnemyShips' not found. Lua error in package.lua at line 80: module 'Module:Collection/EnemyShips' not found. Lua error in package.lua at line 80: module 'Module:Collection/EnemyShips' not found.
Lua error in package.lua at line 80: module 'Module:Collection/EnemyShips' not found. Lua error in package.lua at line 80: module 'Module:Collection/EnemyShips' not found. Lua error in package.lua at line 80: module 'Module:Collection/EnemyShips' not found. Lua error in package.lua at line 80: module 'Module:Collection/EnemyShips' not found. Lua error in package.lua at line 80: module 'Module:Collection/EnemyShips' not found. Lua error in package.lua at line 80: module 'Module:Collection/EnemyShips' not found. Lua error in package.lua at line 80: module 'Module:Collection/EnemyShips' not found. Lua error in package.lua at line 80: module 'Module:Collection/EnemyShips' not found. Lua error in package.lua at line 80: module 'Module:Collection/EnemyShips' not found. Lua error in package.lua at line 80: module 'Module:Collection/EnemyShips' not found. Lua error in package.lua at line 80: module 'Module:Collection/EnemyShips' not found. Lua error in package.lua at line 80: module 'Module:Collection/EnemyShips' not found. Lua error in package.lua at line 80: module 'Module:Collection/EnemyShips' not found. Lua error in package.lua at line 80: module 'Module:Collection/EnemyShips' not found. Lua error in package.lua at line 80: module 'Module:Collection/EnemyShips' not found. Lua error in package.lua at line 80: module 'Module:Collection/EnemyShips' not found. Lua error in package.lua at line 80: module 'Module:Collection/EnemyShips' not found.
Lua error in package.lua at line 80: module 'Module:Collection/EnemyShips' not found. Lua error in package.lua at line 80: module 'Module:Collection/EnemyShips' not found. Lua error in package.lua at line 80: module 'Module:Collection/EnemyShips' not found. Lua error in package.lua at line 80: module 'Module:Collection/EnemyShips' not found. Lua error in package.lua at line 80: module 'Module:Collection/EnemyShips' not found. Lua error in package.lua at line 80: module 'Module:Collection/EnemyShips' not found. Lua error in package.lua at line 80: module 'Module:Collection/EnemyShips' not found. Lua error in package.lua at line 80: module 'Module:Collection/EnemyShips' not found. Lua error in package.lua at line 80: module 'Module:Collection/EnemyShips' not found. Lua error in package.lua at line 80: module 'Module:Collection/EnemyShips' not found. Lua error in package.lua at line 80: module 'Module:Collection/EnemyShips' not found. Lua error in package.lua at line 80: module 'Module:Collection/EnemyShips' not found. Lua error in package.lua at line 80: module 'Module:Collection/EnemyShips' not found. Lua error in package.lua at line 80: module 'Module:Collection/EnemyShips' not found. Lua error in package.lua at line 80: module 'Module:Collection/EnemyShips' not found. Lua error in package.lua at line 80: module 'Module:Collection/EnemyShips' not found. Lua error in package.lua at line 80: module 'Module:Collection/EnemyShips' not found.