InformationEdit
|
Decisive Battle! The Battle of the Santa Cruz Islands
決戦!南太平洋海戦 | |
 | |
 | |
| Information | |
| Boss gauge (HQ 120) |
Easy: ? HP Medium: ? HP Hard: 4080 HP +5280 HP +6216 HP |
| Rewards | |
All:
Casual:
Easy:
Medium:
 1 1Hard:
1 1 1 | |
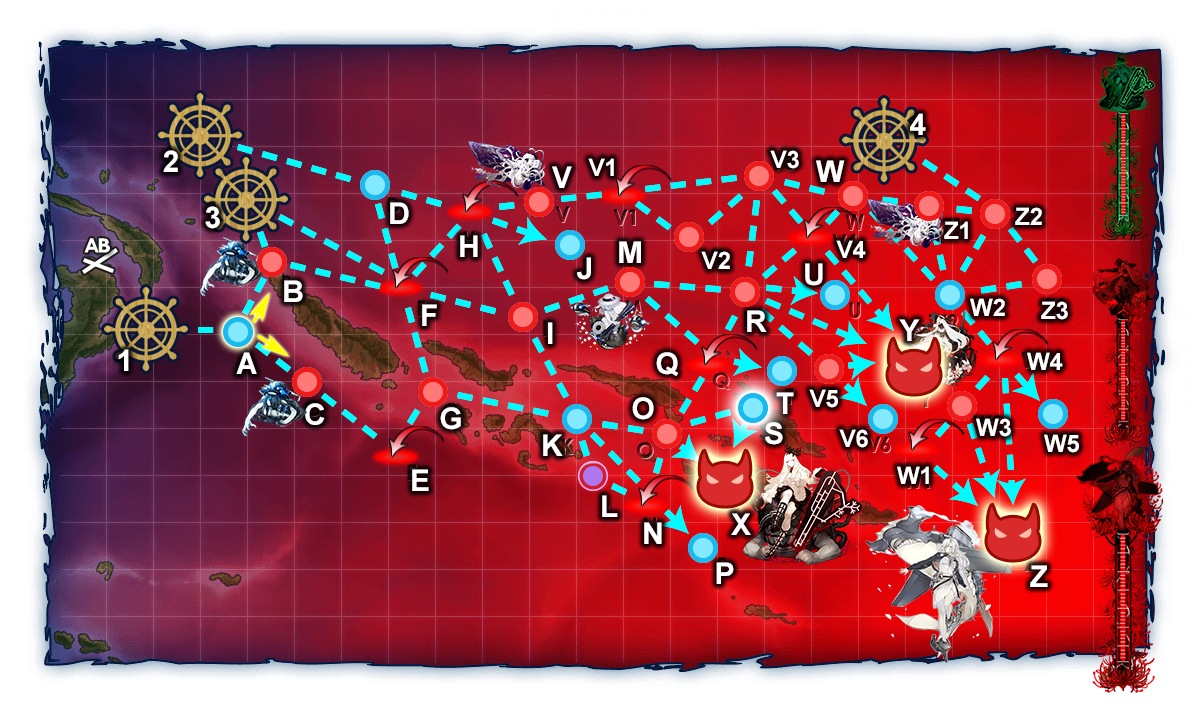
| E-7 Branching Rules | ||
|---|---|---|
| Nodes | Rules | |
| Start | 1 |
|
2 |
| |
3 |
| |
4 |
| |
3 |
B |
|
F |
| |
A |
B |
|
C | ||
D |
F |
|
H |
| |
F |
G |
|
H |
| |
I |
| |
H |
I |
|
J |
| |
V |
| |
I |
K |
|
M |
| |
K |
L |
|
N |
| |
O |
| |
M |
Q |
|
R |
| |
N |
O |
|
P |
| |
O |
S |
|
X |
| |
Q |
O |
|
R |
| |
T |
| |
V1 |
V2 |
|
V3 |
| |
V3 |
V4 |
|
R |
| |
W |
| |
V4 |
W |
|
Y |
| |
R |
U |
|
V4 |
| |
V5 |
| |
Y |
| |
V5 |
V6 |
|
Y |
| |
Z2 |
W2 |
|
Z1 |
| |
Z3 |
| |
Z1 |
W |
|
W2 |
| |
W4 |
W3 |
|
W5 |
| |
Z |
| |
W3 |
W1 |
|
Z |
| |


Map Progression[]
")
")
")
")
")
")
Map Bonuses[]
DISCLAIMER: This information is based on user submitted data and is subject to revisions as more data is gathered. Any version of the ship receives the bonus regardless of remodel.
| Mapwide (Applicable to all ships listed below) | 1.1x | ||||||||
|---|---|---|---|---|---|---|---|---|---|
| Advance Force (X) | |||||||||
| Ship | Node | ||||||||
| O | X | R | Y | W | Z | ||||
| 1.375x | 1.265x | 1.1x | 1.21x | ||||||
| Vanguard Group (Y) | |||||||||
| 1.265x | 1.375x | 1.155x | 1.265x | ||||||
| Carrier Force (Z) | |||||||||
| 1.1x | 1.21x | 1.265x | 1.375x | ||||||
| Miscellaneous (Y/Z) | |||||||||
| 1.1x | 1.32x | 1.1x | 1.265x | ||||||
| Special Case | |||||||||
| 1.265x | 1.375x | 1.155x | 1.518x | ||||||
| Note: Kazagumo's bonus is expected to be a bug as Makigumo/Akigumo were the ones who scuttled the Hornet. | |||||||||
Additionally, the following equipment has additional multiplicative bonuses in specific nodes.
Note: Unlike E4, multiple Muratas equipped will not give a bigger bonus.
| Equipment Bonuses | R | X | Y | Z |
|---|---|---|---|---|
|
1.17x | - | 1.22x | 1.3x |
|
- | 1.25x | - | 1.12x 1.15x (Kumano Only) |
|
- | 1.1x | - | 1.17x |
| Debuff Modifier (Multiplicative with above; Applies to All Ships) | ||||
| Only when attacking South Pacific Aircraft Carrier Princess |
1.1x | |||

Hard Mode Ship Locks[]
E-7 has 3 unique locks for Hard Mode, with each lock applied depending on Fleet Type:
 1st Lock: Combined Fleet (STF/TCF)
- 2nd Lock: Combined Fleet (CTF)
- 3rd Lock: Single Fleet
Ships with different tags will not be able to sortie together.
While tags will still be applied while doing lower difficulties below Hard, they will not be enforced and all ships are able to be used.
Boss Gauge 1: Destroy Lycoris Princess[]
- Surface Task Force: 2(F)BB(V) 0-2CA(V) 0-2AV 0-3DD 0-3CL + 1CL 2-4DD 0-2 CA(V) 0-2 CLT (Fast)
- Route:F I K N O X
- 4 DD required
- At least 4 Radars with 5+ LoS required
- I Node (at any stage) and O Node (except during final kill phases) may contain torpedo squadrons in Vanguard Formation
- Enemy ships will have high evasion in vanguard, so some skew towards accuracy over firepower when selecting equipment is recommended
- One full seaplane fighter carrier ship and at least one AACI ship recommended for increasing pass rate at the F and N air raids, as well as reducing damage taken at the boss
- More seaplanes are required for achieving AS at the boss on higher difficulties, but artillery spotting is not highly important to achieve over bringing more anti-LB setups in the main fleet
- The boss node has Lycoris Princess, 3 Supply Depot Princess B and an Artillery Imp (on Medium+)
- 2-3 ships (AV, CL or DD) with synergy anti-installation setups recommended in main fleet
- If combining highly upgraded Special Type 2 Amphibious Tank and Daihatsu Landing Craft (Type 89 Medium Tank & Landing Force) on a ship with map (historical) bonus, a Surface Radar can be used over anti-installation rockets/mortars to increase accuracy and fulfill routing requirements
- For ships without historical bonus, or for setups lacking upgrades, extra damage from anti-installation rockets is recommended
- Ships in the escort fleet will not fight installations until night battle, so double attack setups can be as effective as single attack anti-installation setups
- 2-3 ships (AV, CL or DD) with synergy anti-installation setups recommended in main fleet
- For Last Dance (on Hard), the boss formation has 3 Destroyer Na-Class Late Model II Elite which use opening torpedo attacks. LB Attack Aircraft will be shot down at a high rate, so boss support shelling is highly recommended.
Gimmick 1: Unlocking the 2nd Boss Node[]
Do the following after destroying the first boss gauge to unlock the 2nd boss node
| Unlock Requirements | |||||||
|---|---|---|---|---|---|---|---|
| Difficulty | E | F | H | J | R | LB Defense | |
| Hard | AS | AS | AS | Reach | S | AS x2 | |
| Medium | AS | AS | - | - | S | AS x1 | |
| Easy | AS | - | - | - | S | AS x1 | |
| Casual | - | - | - | - | - | - | |
F, H, J
- CTF: 2CV 1CVL + 1CL 2DD
- AACI recommended
- Slow required
- Route: D F H J
- LB Defense can be done simultaneously
E
- Single fleet: 4+ SSV
- Single fleet: 2CV 4DE
- Unremodeled low level CV can be used if locks are an issue
- OASW recommended for C node submarines
- Route: A C E
- LB Defense can be done simultaneously, but is unlikely to trigger
R
- STF: 3+ BB, no CV(L/B) & Fast fleet
- Ex. 2BB 2CA 1CAV 1CL/AV + 1CL 4DD 1FBB
- Route: F I M R
- Toukai base to M + OASW recommended
- LB Defense can be done simultaneously
LB Defense
- Single sub (low level recommended)
- Route: A C E G
- May take multiple attempts to get the air raid to occur
Boss Gauge 2: Aircraft Carrier Summer Princess[]
Depleting the Boss Gauge[]
Carrier Task Force: 2CV(L/B) or less, 2 (F)BB(V) or less, 4+ DD & Fast Fleet
- Ex. 2CV 2FBB 0-2CAV 0-1 AV + 1 CL 4 DD 1 CA(V)
- Ex. 2CV 0-2CAV 0-1AV 1DD + 2FBB 1CL 3DD
- Route: D H V V1 V3 V4 Y
- Node V is a submarine node
- OASW and 1 base of Toukais recommended for chipping runs
- H V1 V4 are air raids
- Atlanta Kai with full AACI setup recommended to reduce chance of damage as well as to reduce plane counts at the boss
- V3 is the only surface battle before the boss, but it does contain fairly dangerous ships like Nu-class Flagship Kai and Ru-class Flagship BB (on Hard)
- Using Kongou-class BBs or South Dakota in the escort helps stabilze the route, and if using two Kongou-class BBs their special night battle attack is enabled for the boss
- Alternatively, shelling support can be used to increase pass rate
- The boss fleet at Y is led by Aircraft Carrier Summer Princess (880 HP 239 Armor on hard)
- There's also Battleship Summer Princess (530 HP 168 Armor on hard) and Ne Class Kai Summer Mode (470 HP 244 Armor on hard)
- The boss on Hard also contains the formidable Destroyer Na-Class Late Model II Elite which has high anti-air capabilities and also performs opening torpedo strikes strong enough to chuuha/taiha carriers and battleships
- During chipping LBAS and opening airstrikes can be used to some effect to reduce potential damage from them
- If aiming for S ranks for drop farming purposes, boss shelling support can be cost-effective for dealing with the escort
- Fleet Recommendations
- CV(B)
- To deal with the boss fleet's relatively high bulk, carriers with high bonus multipliers and high capacity are recommended (Akagi Kai Ni, Saratoga Mk.II mod.2 are the two most suited, Zuikaku Kai Ni/A is also an option) with 2-3 bomber setups
- High plane capacity is needed due to the multiple preboss nodes which combined with the high AA of the boss may deplete smaller bomber slots at high rates
- It's recommended to use primarily bombers that have some kind of AA resist
- High plane capacity is needed due to the multiple preboss nodes which combined with the high AA of the boss may deplete smaller bomber slots at high rates
- To deal with the boss fleet's relatively high bulk, carriers with high bonus multipliers and high capacity are recommended (Akagi Kai Ni, Saratoga Mk.II mod.2 are the two most suited, Zuikaku Kai Ni/A is also an option) with 2-3 bomber setups
- Main Fleet CAV and/or AV
- Used for air power, since high airpower is needed due to the various preboss air battles and boss having fairly high air power as well
- Kumano-class Kai Ni CAVs as well as Nisshin are recommended due to capacity and Fast speed
- FBB
- Can be used as main fleet damage dealers or in the escort fleet to help stabilize escort performance
- South Dakota is notable because of high multiplier, good stats (even before Kai) and not needing to be used for E6
- Typically Kongou Kai Ni C is seen here, however disregarding E6 locks Hiei Kai Ni C and Kirishima Kai Ni have better damage output
- If using Kongou Kai Ni C and Hiei Kai Ni C in the escort together, their high night battle damage can be very useful with their special attack
- While they have some trouble dealing with Ne Kai and Aircraft Carrier Summer Princess, FBBs with historical bonus can clear the softer enemies at the boss relatively consistently
- CL
- Highly recommended to be Altanta due to the amount of air battles on the route and importance of anti-air at the boss
- DD
- At least 1 OASW ship is recommended (can double as a searchlight holder)
- Remaining DDs should be historical ships outfitted for TCI
- Escort CA(V)
- Highly recommended to use Suzuya Kai Ni due to her high historical bonus
- Can carry night recon with DA setup, allowing for good damage at the surface nodes and against the boss escorts in day battle
- CV(B)
- Land Base Setup
- 1 base toukais to V
- 2 bases 1 LB Recon 2 LBAA 1 LB Fighter to Y (Range 7)
Destroying the Boss Gauge (Last Dance)[]
- Ex. 2FBB 2CV 1-2CAV 0-1AV + 1CL 4DD 1CA(V)
- Typical setup with 4 heavy hitters in main fleet
- Ex. South Dakota 2CV 2-3CAV 0-1AV + Kongou/Hiei Kai Ni C 1CL 4DD
- Utilizes Kongou-class Kai Ni C for day & night battle escort damage over a historical CA(V)
- Ex. 1FBB 2CV Ise-class Kai Ni 1-2CAV 0-1AV + 1CL 4DD 1CA(V)
- Sacrifices a historical battleship position for an Ise-class K2 BBV with more air power, potentially allowing for more bombers on the carriers
- Ex. Nagato Kai Ni, South Dakota Kai, 2CV 1-2CAV 0-1AV + 1CL 4DD 1CA(V)
- Can output high damage with Nagato's special attack but very reliant on good engagement forms (damage is quite mediocre in head-on or worse, and the combined fleet formation damage modifiers are lower affecting all attacks)
- Nagato's special attack activation rate does depend on the 2nd ship's level
- Route: Same as above (still Fast required)
- Notable changes from chipping (on Hard) are the later two air raids are fixed to more difficult formations, and there's guaranteed 1 So Flagship in the V fleet
- On hard, ASW aerial support is recommended to decrease threat at V node since using Toukais is not recommended
- ASW support typically consists of 2 CVL (Junyou Kai Ni and Hiyou Kai are ideal) and 2 high capacity CVs (Intrepid Kai, Kaga Kai, Taihou Kai are good picks)
- Carriers are fully equipped with high ASW stat planes
- CVL can equip autogyros and Type 3 Liason which on top of high ASW stat have a bonus of not being shot down like carrier-based bombers
- For bauxite conservation consider bringing one small slot of a fighter with ASW stat since there is a carrier at V3
- Only planes deal damage in ASW aerial support so other equipments are not needed
- The hard boss fleet gains a second bulky Aircraft Carrier Summer Princess and two more Destroyer Na-Class Late Model II Elite, leading to a boss with frighteningly high air power and anti-air capabilities, as well as several tanky targets
- It's not uncommon to see LBAS deal no damage even under Air Denial state
- Please refer to the section in E-4 3rd Boss on Final Kill Plane Rank Conservation for those inclined
- To help deal with the threat of the Na-Class Late Model II destroyers, strong and accurate boss shelling support is recommended.
- The following firepower are needed to reach support shelling cap for BB/CV:
- BB
- Parallel: 147, Head-on: 185
- CV
- Parallel: 52, Head-on: 77 (For a single 10 Divebomber stat plane)
- Parallel: 39, Head-on: 64 (For two 10 Divebomber stat planes)
- BB
- Equipment accuracy, Ship Level, Ship Luck and sparkling state all affect accuracy
- Recommended ships for shelling support
- Musashi Kai Ni (Can reach head-on cap with 1 gun + 4 radars)
- Akagi Kai Ni/Kai Ni E (Extra slot for another radar and high base firepower)
- Nagato Kai Ni (High luck, high firepower. Can reach head-on cap with 2 guns and 2 radar)
- Warspite Kai (High luck, relatively high firepower)
- Nelson Kai (High firepower, allowing for guns with more accuracy to be used. Decent luck.)
- Mutsu Kai Ni (Not good luck, but high firepower. Can reach head-on cap with 2 guns 2 radar)
- Hiryuu Kai Ni (High luck, high firepower. Can reach head-on cap with 1 bomber 3 radars)
- The following firepower are needed to reach support shelling cap for BB/CV:
- Land Base Setup
- On hard 3 bases to boss recommended for reducing air power requirements, depleting enemy bombers, and increasing damage potential
- 3 bases 1 LB Recon 2 LBAA 1 LB Fighter
- (more detailed setups TBD)
Gimmick 2: Unlocking the 3rd Boss Node[]
Do the following to unlock the 3rd boss node
| Unlock Requirements | |||||||
|---|---|---|---|---|---|---|---|
| Difficulty | X | H | V1 | V4 | LB Defense | ||
| Hard | A | AS | AS | AS | AS x2 | ||
| Medium | A | ? | AS | - | AS x1 | ||
| Easy | A | AS | - | - | - | ||
| Casual | - | - | - | - | - | ||
Note:
- 3rd boss node unlocking requirements can be done during clearing the 2nd boss gauge
H, V1 and V4
- Same composition as for previous boss gauge, and likely already done during the previous boss gauge
LB Defense
- Single sub (low level recommended)
- Route: A C E G
- May take multiple attempts for the air raid to occur
X (First Boss)
- Same composition as for first boss gauge
- Possible but not particularly recommended to be combined with LB Defense
Gimmick 3: Unlocking the 4th Start Point[]
Do the following to unlock the 4th Starting Point after the 3rd boss node is unlocked
| Unlock Requirements | |||||||
|---|---|---|---|---|---|---|---|
| Difficulty | X | Y | V4 | W | Z | ||
| Hard | A x2 | A x2 | AS x2 | S x2 | A x3 | ||
| Medium | A x1 | A x1 | AS x2 | S x2 | A x2 | ||
| Easy | A x1 | A x1 | - | - | A x2 | ||
| Casual | A x1 | A x1 | - | - | A x1 | ||
X (First Boss)
- Same composition as for first boss gauge
Y (Second Boss)
Can be done either with Carrier Task Force or Surface Task Force
- Carrier Task Force
- Ex. 2CV 1CVL 2(F)BB(V) 1AV/CAV + 1CL 4DD 1CA(V)
- Slow required
- Routes: D H V V1 V3 R V5 Y
- Composition can be similar to 2nd boss gauge final kill comp with 1 CAV/AV switched to slow CVL
- 780 air power recommended (Hard)
- Ex. 2CV 1CVL 2(F)BB(V) 1AV/CAV + 1CL 4DD 1CA(V)
- Surface Task Force
- Ex. 2FBB 2CA 1CAV 1CVL + 1CL 4DD 1CA
- Fast required
- Routes: F I M R Y
- Toukai base to M recommended
- Ex. 2FBB 2CA 1CAV 1CVL + 1CL 4DD 1CA
- LB Setup
- Similar to 2nd gauge setup
V4, W, and Z Combined
- Carrier Task Force: 2CV(B) 2(F)BB(V) 1-2CAV 0-1AV + 1CL 4DD 1CA(V)
- Fast required
- Routes: D H V V1 V3 V4 W W2 W4 Z
- Normal boss route + 1 extra air raid (V4)
- 1 OASW recommended w/ Toukai support (can double as SL holder)
- Mainly for fulfilling the V4 requirement, with the possibility of advancing to Z for A ranks
- 780 air power recommended (Hard)
- LB Setup
- 1 Toukai base to V
- 2 bases to Z (9 range): 1 Flying Boat 2 LBAA 1 LB Fighter per base
- First base 112 air power required on Hard for AD
W and Z
- Carrier Task Force: 2CV(B) 1CVL 1FBB 1-2CAV 0-1AV + 1CL 4DD 1CA(V)
- Fast required
- Routes: D H V V1 V3 W W2 W4 Z
- 1 OASW recommended w/ Toukai support (can double as SL holder)
- 650 air power recommended (Hard)
- LB Setup
- 1 Toukai base to V
- 2 bases to Z (9 range): 1 Flying Boat 2 LBAA 1 LB Fighter per base
- First base 112 air power required on Hard for AD
Boss Gauge 3: South Pacific Aircraft Carrier Princess from 4th Start[]
There are a many approaches towards the boss route, with trade-offs between routing, power at boss, air power, escort strength, and main fleet strength. Admirals are advised to find best the approach that fits their fleet and equipment situation.
Fleet Types[]
Slow CTF (Nagato K2 Special Attack), 4 DD Escort
- Nagato Kai Ni, Mutsu Kai Ni, Shoukaku Kai Ni A, Zuikaku Kai Ni A, 1 CVL, 1 AV/CAV + 1CL 4DD 1CA(V)
- Routes: Z2 Z1 W2 W4 Z
- Maximizes main fleet power at the boss, but at the expense of the escort fleet's survival rate
Slow CTF (Nagato K2 Special Attack), 3 DD Escort
- Nagato Kai Ni, Mutsu Kai Ni, Shoukaku Kai Ni A, Zuikaku Kai Ni A, 1 CVL, 1 DD + 1CL 3DD 2CA(V)
- Routes: Z2 Z1 W2 W4 Z
- Sacrifices air power capacity in the main fleet by replacing a SPF carrier with a DD, but has a stronger/more durable escort with 2 (presumably) historical CA(V)
- Main Fleet DD can be used to block undesired Friend Fleets (Fletcher/Johnston) since they will contribute very little in actual battle
Slow CTF (Nagato K2 Special Attack), Not through submarine node
- Nagato Kai Ni, Mutsu Kai Ni, Shoukaku Kai Ni A, Zuikaku Kai Ni A, 2(CAV or AV)+ 1CL 2 DD, 3CA(V)
- Routes: Z2 Z3 W2 W4 Z
- There are two advantages of this route. For one, it is that you can counter both Z2 and Z3 with support shelling. For two, it is easy to defend our torp-cut in attack ships against boss-escort fleet. This composition has a stronger/more durable escort with 2 or 3 (presumably) historical CA(V) too.
- Up to two seaplane fighter mules can include in your main fleet, thus it is easy to earn your Air Power. Atlanta is desirable as escort part CL.
Fast CTF, Nagato K2 Special Attack
- Nagato Kai Ni, South Dakota Kai, Shoukaku Kai Ni A , Zuikaku Kai Ni A, 1-2 CAV, 0-1 AV + 1CL 2-3DD 0-1 CLT 2CA(V)
- Routes: Z2 W2 W4 Z
- Bypasses the submarine node, but at the cost of Nagato's special attack power
Fast CTF, 2 Fast Battleships in Main
- Shoukaku Kai Ni/Kai Ni A , Zuikaku Kai Ni/Kai Ni A, 2 FBB, 1-2 CAV, 0-1 AV + 1CL 2-3DD 0-1 CLT 2CA(V)
- Routes: Z2 W2 W4 Z
- For those without access to Nagato-class K2. Concentrates power in main fleet
Fast CTF, Kongou-class Kai Ni C Special Attack
- Shoukaku Kai Ni/Kai Ni A , Zuikaku Kai Ni/Kai Ni A, 3-4 CA(V), 0-1 AV + Kongou Kai Ni C, Hiei Kai Ni C, 1 CL, 2 DD, 1 CA(V)
- Routes: Z2 W2 W4 Z
- For those without access to Nagato-class K2. Sacrifices main fleet firepower for a stronger escort
Fleet Setup Recommendations[]
- Nagato-class Kai Nis
- 1 Main Gun, AP Shell, T3 Shell, LOS 5+ Radar maximizes special attack damage
- If doing a Fast speed configuration, either the radar or T3 shell may be replaced with a boiler
- Keeping a radar favors special attack damage, and keeping a T3 shell boosts all attacks at the boss
- 2nd ship Mutsu Kai Ni may be replaced with South Dakota Kai, but is not recommended as the 2nd ship level matters for activation rate and the special attack will overall deal less damage
- FBBs
- In rough order of strength: Hiei Kai Ni C, Kirishima Kai Ni, South Dakota Kai, Kongou Kai Ni C, Haruna Kai Ni
- In Main Fleet: standard APCI setups
- In Escort Fleet: 2 Main Gun, 1 AP Shell, 1 T3 Shell setup recommended (see below if using Kongou-class Kai Ni C Special Attack)
- 2 shell setup maximizes night double attack damage
- Please see the sections on Kongou-class Kai Ni C Special Attack if utilizing it for setup information. Double Attack setup is not necessary on the Escort Flagship if using that approach
- Shoukaku/Zuikaku Kai Ni A
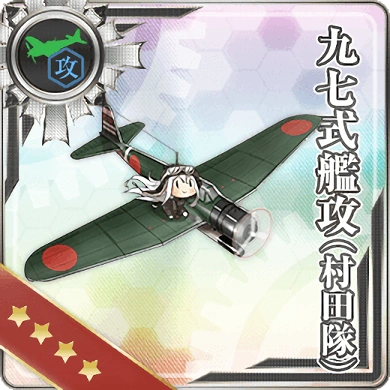
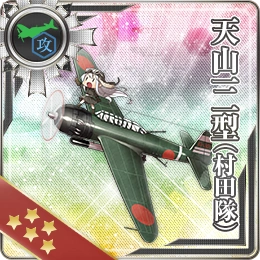
- Murata Torpedo Bomber
- Jet Fighter Bomber
- Kikka Kai has higher AA resist than Keiun Kai
- Provides Long Range on top of extra opening airstrike damage (which is significant with all the special modifiers Shoukaku-class can stack in this map)
- Dive Bomber (with AA resist)
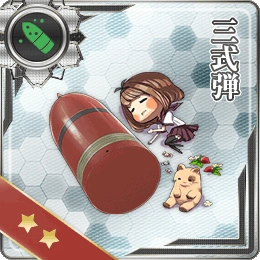
- Suisei (Egusa), Iwai Fighter Bomber, Suisei Model 12 (w/ Type 31 Photoelectric Fuze Bombs),
Suisei Model 12 (634 Air Group w/ Type 3 Cluster Bombs), Type 99 Dive Bomber (Egusa)
- Suisei (Egusa), Iwai Fighter Bomber, Suisei Model 12 (w/ Type 31 Photoelectric Fuze Bombs),
- Fighter
- Shoukaku/Zuikaku Kai Ni, and other CV(B)
- Murata Torpedo Bomber
- Torpedo Bomber (with AA resist)
- Murata or Tomonaga Tenzans/Type 97 Torpedo Bombers
- Dive Bomber (with AA resist)
- Fighter
- 3 Torpedo Bomber 1 Dive Bomber is also a consideration which sacrifices CVCI chance/damage for more critical damage, opening airstrike damage, and has higher chance of losing the dive bomber before shelling at the boss
- CVL
- Junyou Kai Ni (for slow fleets only) or Zuihou Kai Ni (not Kai Ni B)
- Junyou is more ammenable to Saiun loadout with higher air power potential in the top 3 slots compared to Zuihou
- Zuihou has a stronger bonus multiplier
- Murata Torpedo Bomber, Dive Bomber (with AA resist), Fighter, 2nd Fighter or Saiun
- Junyou Kai Ni (for slow fleets only) or Zuihou Kai Ni (not Kai Ni B)
- Main Fleet CAV & AVs
- For Fast AV Nisshin is the most practical. Slow fleets can consider using Commandant Teste instead
- 4 SPF is typical
- If air power is already sufficient, using a Seaplane Scout (with high accuracy value) is also a consideration for increased contact chance
- If using FBBs in 2nd fleet DA + 1 SPF is also a possible consideration
- Pola or Zara are possible substitutes but not recommended due to competing with carriers for shelling order
- CL
- Atlanta Kai
- Offers high rate of strong AACI. Since the boss and 2 of her escorts are normal carriers, their attacks (in day) can be disabled by emptying their bomber slots through LBAS + Air Battle + Fleet AA + AACI at relatively high chance
- Also helps at the preboss
- Low damage potential in escort shelling or at night
- GFCS Mk.37 must be used if utilizing her special 3 equip AACI setup(s) (i.e. don't equip SK or SK+SG Radars)
- Gotland Kai or Andra (and other 4 slot CLs)
- Used for OASW in compositions that cross the submarine node
- Can carry night battle equipment, including Type 96 150cm Searchlight if using Gotland
- Becomes a stronger option when using a DD in main fleet with AACI (Atlanta AACI is stronger and more consistent, though)
- Historical CL
- Atlanta Kai
- Escort Fleet CA(V)
- Kumano Kai Ni and (if a second heavy cruiser is needed) Suzuya Kai Ni are strongly recommended
- Day/Night DA + Type 3 Shell setup recommended for high damage in day shelling while offering postcap night DA damage
- TCI + Type 3 Shell historical setups are also possible, but considering the strengh of enemy ships in escort shelling phases they are not highly recommended
- Escort Fleet DDs
- Historical DDs with TCI setups recommended
- Yukikaze Kai, Naganami Kai Ni or other luckmodded DDs capable of approaching night battle (300) cap
- Makigumo, Akigumo, Hamakaze and Tanikaze are in the strongest Friend Fleets, so bringing them in the player fleet should be avoided if utilizing strong Friend Fleet support
- If lacking high luck historical DDs, historical DDs, especially Kazagumo Kai Ni, can be used with night battle cut-in setups regardless
- TCI setup
- Gun-Torpedo-Radar plus Mixed CI setup is an option to increase cut-in rate but max damage is significantly lower than pure TCI (due to lower multipliers, lower number of hits, and lack of equipment power)
- During chipping, 1+ OASW setups can be considered if crossing the sub node
- Tashkent Kai with 2 slot OASW + Star Shell and Searchlight is an option if using Atlanta as the CL and going through the sub node
- Historical DDs with TCI setups recommended
- CLT
- TCI setup
- Potentially can disable Na-class before their torpedo damage (not animation) is calculated, but odds are fairly low if using Cruising Formation 2 (Nagato Special Attack)
- Historical DDs can be stronger at day shelling, day closing torpedo, and night battle
Land Base Setup
- For chipping, 1 base of Toukais to Z1 (if using a composition going there)
- All other bases: to boss Z (9 range): 1 Flying Boat 2 LBAA 1 LB Fighter per base (maximizes LBAA damage)
- First base AD requirement: 112 (hard pre-final) 145 (hard final)
- Alternate base setup: 1st base AD, 2 bases AP for reducing air power needed by the main fleet for AS/AS+
- 1st base 1 Flying Boat, 2 Fighters, 1 LBAA
- 2nd base 1 Flying Boat, 3 Fighters
- 3rd base 1 Flying Boat, 2 Fighters, 1 LBAA
- It is highly recommended to utilize a 3rd party air battle simulator tool to determine base/fleet setup since air control states can affect the subsequent phases of battle significantly
- https://noro6.github.io/kcTools is the most comprehensive tool, and can estimate chances of emptying boss & allied carrier bomber slots
- https://aircalc.page.link/LXN7 Simple template for last dance fleet (Hard). Note allied fleet AA values are missing
- http://kancollecalc.jp/air_supremacy.html, built-in viewer tools, etc have some functionality
- https://noro6.github.io/kcTools is the most comprehensive tool, and can estimate chances of emptying boss & allied carrier bomber slots
- Like the 2nd boss, E6's second boss and E4's third boss before it, this boss node (at least on Hard) houses incredibly high anti-air potential (especially during the final kill phase) and even AA resist bombers will frequently be emptied from 18 to 0 in a single pass
Support Fleets
- See sections in "Boss Gauge 2: Aircraft Carrier Summer Princess" above for recommendations on ASW Support (if not using Toukai while crossing the sub node) as well as Boss Shelling Support
Final Kill Phase (Last Dance)[]
- There is a debuff gimmick that can be performed once the boss is in final kill range (see following section)
- The most notable change is the boss has two Aircraft Carrier Summer Princesses, raising air power requirements significantly (on Easy+)
- With the higher air power, land base setups become much more precise in air power requirements and loss of ranks may affect setup efficacy
- High ranks on all carrier-based bombers is recommended, but there are significant chances of lower size slots being emptied
- See section in E-4 3rd Boss on "Final Kill Plane Rank Conservation"
Gimmick 4 (Optional): Debuffing the 3rd Boss on Last Dance[]
Do the following to unlock the debuff after the boss gauge is in the final kill state (at or below 888 remaining). There is no indication all requirements have been completed until revisiting the boss (Boss sprite will change slightly).
| Unlock Requirements | |||||||||
|---|---|---|---|---|---|---|---|---|---|
| Difficulty | X | Y | Z2 | Z3 | W3 | N | Q | V1 | V4 |
| Hard | A x2 | A x2 | S | S x2 | S | AS | AS | AS | AS |
| Medium | A x1 | A x1 | S | S x1 (?) | - | - | AS | AS | AS |
| Easy | A x1 | A x1 | ? | S x1 (?) | - | - | - | AS | - |
| Casual | A x1 | A x1 | ? | S x1 (?) | - | - | - | - | - |
Recommended for completion on Hard. For other difficulties it is advised to gauge fleet strength before deciding to dedicate time/resources to completing the additional objectives. This grants a post-cap modifier on attacks against South Pacific Aircraft Carrier Princess.
Z2, Z3 and W3
- CTF: 2(F)BB(V) 2CV(B) 1CVL 1CAV/AV + 1FBB 1CL 4DD
- Fast Fleet
- Routes Z2 Z3 W2 W4 W3
- It's not recommended to advance to the boss afterwards
V1 and V4 (Combined)
- CTF: 2CV(B) 2CVL 1-2CAV 1AV + 1CL 4DD 1CA(V)
- Slow Fleet
- Routes D H V V1 V2 V3 R V4
- 4 CV(L/B) required to start at left start point
- Use Toukai and/or OASW against the sub node V, remaining land bases can be used against R node
V1 (if not combined with V4)
- CTF: 2(F)BB(V) 4CV(L/B) + 1CL 2DD 3XX
- Fast Fleet
- Routes D H V V1
- 4 CV(L/B) required to start at left start point
- Use Toukai and/or OASW against the sub node V
Y (2nd Boss, Surface Task Force)
- Same STF setup as from the previous gimmick
- STF: 2FBB 2CA 1CAV/AV 1CVL + 1CL 4DD 1CA
- Fast Fleet
- Routes F I M R Y
- LBAS: 1 fighter 1 LB recon 2 LBAA to boss (Range 7), can use 1 base for ASW at M
- Technically possible to do with CTF but not at all recommended
X (1st Boss)
- Same setup as previous phases
N
- STF: 2FBB 2CA(V) 1CL 1DD + 1CL 3DD 2CA/CLT
- 4 5+ LOS radars required
- Fast Fleet
- Routes F I K N
- LBAS: 3-4 Fighters 0-1 LB Scout to N (Range 5)
Q
- STF: 3 (F)BB(V) 2CA(V) 1CVL + 1CL 4DD 1CA/CLT
- Slow Fleet
- Routes F I M Q
- OASW recommended
- LBAS: 3-4 Fighters 0-1 LB Scout to Q (Range 5)
- Optionally 1 base of Toukai to M
V4 (if not combined with V1)
- STF: 3(F)BB(V) 2CA(V) 1CVL + 1CL 4DD 1CA/CLT
- Fast Fleet
- Routes F I M R V4
- OASW recommended
- LBAS: 3-4 Fighters 0-1 LB Scout to V4 (Range 6)
- Optionally 1 base of Toukai to M
Friend Fleets[]

NOTE: friend fleets are disabled by default! Please toggle it on before proceeding!
Friend fleet must be manually toggled from the Home port (see the image) in order for it to appear at the boss node. You can request for a stronger friend fleet at the price of 6 flamethrowers; however, the definition of "stronger fleet" is still unknown.
E-7 Y[]
E-7 Y, Regular, Powerful
| Ship | Lv. | Equipment | |||||
|---|---|---|---|---|---|---|---|
| 71 |   |
~/30 | 45 | 75 | 54 | 49 | |
| 79 |  |
~/31 | 69 | 87 | 71 | 50 | |
| 79 | |
~/31 | 60 | 81 | 72 | 52 |
E-7 Y, Regular, Powerful
| Ship | Lv. | Equipment | |||||
|---|---|---|---|---|---|---|---|
| 90 |    |
~/32 | 74 | 87 | 52 | 54 | |
| 89 | |
~/31 | 61 | 88 | 62 | 51 | |
| 82 |   |
~/30 | 49 | 79 | 49 | 49 | |
| 81 | |
~/30 | 49 | 79 | 54 | 49 |
E-7 Y, Powerful
| Ship | Lv. | Equipment | |||||
|---|---|---|---|---|---|---|---|
| 85 |    |
~/91 | 105 | 0 | 97 | 99 | |
| 89 |    |
37 | 60 | 86 | 91 | 54 | |
| 82 | |
~/34 | 55 | 72 | 90 | 52 |
E-7 Y, Powerful
| Ship | Lv. | Equipment | |||||
|---|---|---|---|---|---|---|---|
| 85 | |
~/91 | 105 | 0 | 100 | 99 | |
| 83 |   |
~/54 | 76 | 60 | 75 | 73 | |
| 89 | |
37 | 60 | 86 | 92 | 54 | |
| 82 | |
~/34 | 55 | 72 | 90 | 52 |
E-7 Y, Powerful
| Ship | Lv. | Equipment | |||||
|---|---|---|---|---|---|---|---|
| 85 | |
~/91 | 105 | 0 | 96 | 99 | |
| 90 |   |
~/89 | 68 | 0 | 94 | 85 | |
| 83 | |
~/54 | 76 | 60 | 75 | 73 | |
| 89 | |
37 | 60 | 86 | 92 | 54 | |
| 82 | |
~/34 | 55 | 72 | 90 | 52 |
E-7 Y, Regular, Powerful
| Ship | Lv. | Equipment | |||||
|---|---|---|---|---|---|---|---|
| 89 |    |
37 | 60 | 86 | 92 | 54 | |
| 82 | |
~/34 | 55 | 72 | 90 | 52 |
E-7 Y, Regular, Powerful
| Ship | Lv. | Equipment | |||||
|---|---|---|---|---|---|---|---|
| 83 | |
~/54 | 76 | 60 | 75 | 73 | |
| 89 | |
37 | 60 | 86 | 92 | 54 | |
| 82 | |
~/34 | 55 | 72 | 90 | 52 |
E-7 Y, Regular, Powerful
| Ship | Lv. | Equipment | |||||
|---|---|---|---|---|---|---|---|
| 90 |  |
31 | 52 | 90 | 70 | 50 | |
| 89 | |
~/31 | 53 | 90 | 72 | 50 | |
| 82 | |
~/34 | 55 | 72 | 90 | 52 | |
| 89 | |
37 | 60 | 86 | 92 | 54 |
E-7 Y, Regular, Powerful
| Ship | Lv. | Equipment | |||||
|---|---|---|---|---|---|---|---|
| 88 |  |
38 | 40 | 0 | 34 | 34 | |
| 66 |   |
18 | 12 | 88 | 0 | 21 | |
| 68 |  |
18 | 12 | 77 | 0 | 19 | |
| 48 | |
21 | 16 | 71 | 0 | 22 | |
| 47 | |
22 | 12 | 63 | 0 | 23 |


E-7 Y, Regular, Powerful
| Ship | Lv. | Equipment | |||||
|---|---|---|---|---|---|---|---|
| 79 | |
~/31 | 69 | 85 | 71 | 50 | |
| 79 | |
~/31 | 60 | 86 | 72 | 52 | |
| 71 | |
~/30 | 48 | 76 | 54 | 49 |
E-7 Z[]
E-7 Z, Powerful
| Ship | Lv. | Equipment | |||||
|---|---|---|---|---|---|---|---|
| 96 |      |
~/81 | 67 | 0 | 84 | 81 | |
| 94 |  |
~/79 | 50 | 0 | 79 | 79 | |
| 92 |  |
~/67 | 61 | 0 | 82 | 76 | |
| 91 | |
~/67 | 62 | 0 | 84 | 75 | |
| 73 |    |
~/32 | 44 | 79 | 59 | 49 | |
| 75 | |
~/33 | 64 | 88 | 65 | 53 |
E-7 Z, Powerful
| Ship | Lv. | Equipment | |||||
|---|---|---|---|---|---|---|---|
| 96 | |
~/81 | 67 | 0 | 84 | 81 | |
| 94 | |
~/79 | 50 | 0 | 79 | 79 | |
| 92 | |
~/67 | 65 | 0 | 82 | 76 | |
| 91 | |
~/67 | 61 | 0 | 84 | 75 | |
| 76 |  |
~/33 | 58 | 78 | 87 | 54 | |
| 76 | |
~/33 | 57 | 81 | 79 | 51 |
E-7 Z, Powerful
| Ship | Lv. | Equipment | |||||
|---|---|---|---|---|---|---|---|
| 96 | |
~/81 | 67 | 0 | 84 | 81 | |
| 94 | |
~/79 | 50 | 0 | 79 | 79 | |
| 82 |  |
40 | 29 | 0 | 39 | 49 | |
| 79 |   |
~/45 | 67 | 79 | 71 | 69 | |
| 81 |  |
~/30 | 49 | 79 | 49 | 49 | |
| 80 | |
~/30 | 49 | 79 | 48 | 49 |
E-7 Z, Powerful
| Ship | Lv. | Equipment | |||||
|---|---|---|---|---|---|---|---|
| 96 | |
~/81 | 67 | 0 | 84 | 81 | |
| 94 | |
~/79 | 50 | 0 | 79 | 79 | |
| 91 |   |
~/89 | 65 | 0 | 94 | 85 | |
| 57 |    |
~/91 | 109 | 0 | 104 | 108 | |
| 90 |  |
~/37 | 60 | 86 | 92 | 54 | |
| 79 |  |
~/34 | 55 | 72 | 90 | 52 |
E-7 Z, Regular, Powerful
| Ship | Lv. | Equipment | |||||
|---|---|---|---|---|---|---|---|
| 71 | |
~/30 | 48 | 75 | 54 | 49 | |
| 79 | |
~/31 | 68 | 87 | 71 | 50 | |
| 79 | |
~/31 | 60 | 86 | 72 | 52 |
E-7 Z, Powerful
| Ship | Lv. | Equipment | |||||
|---|---|---|---|---|---|---|---|
| 75 | |
~/91 | 105 | 0 | 92 | 99 | |
| 47 |  |
~/79 | 100 | 0 | 76 | 93 | |
| 90 |  |
~/37 | 60 | 86 | 92 | 54 | |
| 79 | |
~/34 | 55 | 72 | 89 | 52 |
E-7 Z, Powerful
| Ship | Lv. | Equipment | |||||
|---|---|---|---|---|---|---|---|
| 92 |     |
~/67 | 65 | 0 | 82 | 76 | |
| 91 | |
~/67 | 62 | 0 | 84 | 75 | |
| 82 |  |
40 | 29 | 0 | 39 | 49 | |
| 80 |  |
~/45 | 68 | 79 | 72 | 69 | |
| 81 |  |
~/30 | 49 | 79 | 49 | 49 | |
| 80 | |
~/30 | 49 | 79 | 48 | 49 |
E-7 Z, Powerful
| Ship | Lv. | Equipment | |||||
|---|---|---|---|---|---|---|---|
| 92 | |
~/67 | 65 | 0 | 82 | 76 | |
| 91 | |
~/67 | 62 | 0 | 84 | 75 | |
| 80 | |
~/45 | 68 | 79 | 72 | 69 | |
| 71 |  |
~/30 | 48 | 72 | 54 | 49 | |
| 79 | |
~/31 | 63 | 87 | 71 | 50 |
E-7 Z, Powerful
| Ship | Lv. | Equipment | |||||
|---|---|---|---|---|---|---|---|
| 92 | |
~/67 | 65 | 0 | 82 | 76 | |
| 91 | |
~/67 | 62 | 0 | 84 | 75 | |
| 57 |  |
~/91 | 109 | 0 | 104 | 108 | |
| 90 | |
~/37 | 60 | 86 | 92 | 54 | |
| 79 | |
~/34 | 55 | 72 | 90 | 52 |
E-7 Z, Regular, Powerful
| Ship | Lv. | Equipment | |||||
|---|---|---|---|---|---|---|---|
| 80 |  |
~/45 | 68 | 79 | 72 | 69 | |
| 84 |  |
31 | 59 | 88 | 78 | 50 | |
| 82 | |
30 | 49 | 79 | 49 | 49 | |
| 81 | |
30 | 49 | 79 | 49 | 49 | |
| 80 | |
30 | 49 | 74 | 48 | 49 |
E-7 Z, Regular, Powerful
| Ship | Lv. | Equipment | |||||
|---|---|---|---|---|---|---|---|
| 79 | |
~/31 | 69 | 85 | 71 | 50 | |
| 79 | |
~/31 | 60 | 81 | 69 | 52 | |
| 71 | |
~/30 | 48 | 76 | 54 | 49 |
E-7 Z, Powerful
| Ship | Lv. | Equipment | |||||
|---|---|---|---|---|---|---|---|
| 47 | |
~/79 | 100 | 0 | 76 | 93 | |
| 90 | |
~/37 | 60 | 86 | 92 | 54 | |
| 79 | |
~/34 | 55 | 72 | 90 | 52 |
LBAS Flight Range[]

Enemy patterns[]
If in doubt, use tooltips to check sample sizes.

Lua error in package.lua at line 80: module 'Module:Collection/EnemyShips' not found. Lua error in package.lua at line 80: module 'Module:Collection/EnemyShips' not found. Lua error in package.lua at line 80: module 'Module:Collection/EnemyShips' not found. Lua error in package.lua at line 80: module 'Module:Collection/EnemyShips' not found. Lua error in package.lua at line 80: module 'Module:Collection/EnemyShips' not found. Lua error in package.lua at line 80: module 'Module:Collection/EnemyShips' not found. Lua error in package.lua at line 80: module 'Module:Collection/EnemyShips' not found. Lua error in package.lua at line 80: module 'Module:Collection/EnemyShips' not found. Lua error in package.lua at line 80: module 'Module:Collection/EnemyShips' not found. Lua error in package.lua at line 80: module 'Module:Collection/EnemyShips' not found. Lua error in package.lua at line 80: module 'Module:Collection/EnemyShips' not found. Lua error in package.lua at line 80: module 'Module:Collection/EnemyShips' not found. Lua error in package.lua at line 80: module 'Module:Collection/EnemyShips' not found. Lua error in package.lua at line 80: module 'Module:Collection/EnemyShips' not found. Lua error in package.lua at line 80: module 'Module:Collection/EnemyShips' not found. Lua error in package.lua at line 80: module 'Module:Collection/EnemyShips' not found. Lua error in package.lua at line 80: module 'Module:Collection/EnemyShips' not found. Lua error in package.lua at line 80: module 'Module:Collection/EnemyShips' not found. Lua error in package.lua at line 80: module 'Module:Collection/EnemyShips' not found. Lua error in package.lua at line 80: module 'Module:Collection/EnemyShips' not found. Lua error in package.lua at line 80: module 'Module:Collection/EnemyShips' not found. Lua error in package.lua at line 80: module 'Module:Collection/EnemyShips' not found. Lua error in package.lua at line 80: module 'Module:Collection/EnemyShips' not found. Lua error in package.lua at line 80: module 'Module:Collection/EnemyShips' not found. Lua error in package.lua at line 80: module 'Module:Collection/EnemyShips' not found. Lua error in package.lua at line 80: module 'Module:Collection/EnemyShips' not found. Lua error in package.lua at line 80: module 'Module:Collection/EnemyShips' not found. Lua error in package.lua at line 80: module 'Module:Collection/EnemyShips' not found. Lua error in package.lua at line 80: module 'Module:Collection/EnemyShips' not found. Lua error in package.lua at line 80: module 'Module:Collection/EnemyShips' not found. Lua error in package.lua at line 80: module 'Module:Collection/EnemyShips' not found. Lua error in package.lua at line 80: module 'Module:Collection/EnemyShips' not found. Lua error in package.lua at line 80: module 'Module:Collection/EnemyShips' not found. Lua error in package.lua at line 80: module 'Module:Collection/EnemyShips' not found. Lua error in package.lua at line 80: module 'Module:Collection/EnemyShips' not found. Lua error in package.lua at line 80: module 'Module:Collection/EnemyShips' not found. Lua error in package.lua at line 80: module 'Module:Collection/EnemyShips' not found. Lua error in package.lua at line 80: module 'Module:Collection/EnemyShips' not found. Lua error in package.lua at line 80: module 'Module:Collection/EnemyShips' not found. Lua error in package.lua at line 80: module 'Module:Collection/EnemyShips' not found.
Lua error in package.lua at line 80: module 'Module:Collection/EnemyShips' not found. Lua error in package.lua at line 80: module 'Module:Collection/EnemyShips' not found. Lua error in package.lua at line 80: module 'Module:Collection/EnemyShips' not found. Lua error in package.lua at line 80: module 'Module:Collection/EnemyShips' not found. Lua error in package.lua at line 80: module 'Module:Collection/EnemyShips' not found. Lua error in package.lua at line 80: module 'Module:Collection/EnemyShips' not found. Lua error in package.lua at line 80: module 'Module:Collection/EnemyShips' not found. Lua error in package.lua at line 80: module 'Module:Collection/EnemyShips' not found. Lua error in package.lua at line 80: module 'Module:Collection/EnemyShips' not found. Lua error in package.lua at line 80: module 'Module:Collection/EnemyShips' not found. Lua error in package.lua at line 80: module 'Module:Collection/EnemyShips' not found. Lua error in package.lua at line 80: module 'Module:Collection/EnemyShips' not found. Lua error in package.lua at line 80: module 'Module:Collection/EnemyShips' not found. Lua error in package.lua at line 80: module 'Module:Collection/EnemyShips' not found. Lua error in package.lua at line 80: module 'Module:Collection/EnemyShips' not found. Lua error in package.lua at line 80: module 'Module:Collection/EnemyShips' not found. Lua error in package.lua at line 80: module 'Module:Collection/EnemyShips' not found. Lua error in package.lua at line 80: module 'Module:Collection/EnemyShips' not found. Lua error in package.lua at line 80: module 'Module:Collection/EnemyShips' not found. Lua error in package.lua at line 80: module 'Module:Collection/EnemyShips' not found. Lua error in package.lua at line 80: module 'Module:Collection/EnemyShips' not found. Lua error in package.lua at line 80: module 'Module:Collection/EnemyShips' not found. Lua error in package.lua at line 80: module 'Module:Collection/EnemyShips' not found. Lua error in package.lua at line 80: module 'Module:Collection/EnemyShips' not found. Lua error in package.lua at line 80: module 'Module:Collection/EnemyShips' not found. Lua error in package.lua at line 80: module 'Module:Collection/EnemyShips' not found. Lua error in package.lua at line 80: module 'Module:Collection/EnemyShips' not found. Lua error in package.lua at line 80: module 'Module:Collection/EnemyShips' not found. Lua error in package.lua at line 80: module 'Module:Collection/EnemyShips' not found. Lua error in package.lua at line 80: module 'Module:Collection/EnemyShips' not found. Lua error in package.lua at line 80: module 'Module:Collection/EnemyShips' not found. Lua error in package.lua at line 80: module 'Module:Collection/EnemyShips' not found. Lua error in package.lua at line 80: module 'Module:Collection/EnemyShips' not found. Lua error in package.lua at line 80: module 'Module:Collection/EnemyShips' not found. Lua error in package.lua at line 80: module 'Module:Collection/EnemyShips' not found. Lua error in package.lua at line 80: module 'Module:Collection/EnemyShips' not found. Lua error in package.lua at line 80: module 'Module:Collection/EnemyShips' not found. Lua error in package.lua at line 80: module 'Module:Collection/EnemyShips' not found. Lua error in package.lua at line 80: module 'Module:Collection/EnemyShips' not found. Lua error in package.lua at line 80: module 'Module:Collection/EnemyShips' not found.
Lua error in package.lua at line 80: module 'Module:Collection/EnemyShips' not found. Lua error in package.lua at line 80: module 'Module:Collection/EnemyShips' not found. Lua error in package.lua at line 80: module 'Module:Collection/EnemyShips' not found. Lua error in package.lua at line 80: module 'Module:Collection/EnemyShips' not found. Lua error in package.lua at line 80: module 'Module:Collection/EnemyShips' not found. Lua error in package.lua at line 80: module 'Module:Collection/EnemyShips' not found. Lua error in package.lua at line 80: module 'Module:Collection/EnemyShips' not found. Lua error in package.lua at line 80: module 'Module:Collection/EnemyShips' not found. Lua error in package.lua at line 80: module 'Module:Collection/EnemyShips' not found. Lua error in package.lua at line 80: module 'Module:Collection/EnemyShips' not found. Lua error in package.lua at line 80: module 'Module:Collection/EnemyShips' not found. Lua error in package.lua at line 80: module 'Module:Collection/EnemyShips' not found. Lua error in package.lua at line 80: module 'Module:Collection/EnemyShips' not found. Lua error in package.lua at line 80: module 'Module:Collection/EnemyShips' not found. Lua error in package.lua at line 80: module 'Module:Collection/EnemyShips' not found. Lua error in package.lua at line 80: module 'Module:Collection/EnemyShips' not found. Lua error in package.lua at line 80: module 'Module:Collection/EnemyShips' not found. Lua error in package.lua at line 80: module 'Module:Collection/EnemyShips' not found. Lua error in package.lua at line 80: module 'Module:Collection/EnemyShips' not found. Lua error in package.lua at line 80: module 'Module:Collection/EnemyShips' not found. Lua error in package.lua at line 80: module 'Module:Collection/EnemyShips' not found. Lua error in package.lua at line 80: module 'Module:Collection/EnemyShips' not found. Lua error in package.lua at line 80: module 'Module:Collection/EnemyShips' not found. Lua error in package.lua at line 80: module 'Module:Collection/EnemyShips' not found. Lua error in package.lua at line 80: module 'Module:Collection/EnemyShips' not found. Lua error in package.lua at line 80: module 'Module:Collection/EnemyShips' not found. Lua error in package.lua at line 80: module 'Module:Collection/EnemyShips' not found. Lua error in package.lua at line 80: module 'Module:Collection/EnemyShips' not found. Lua error in package.lua at line 80: module 'Module:Collection/EnemyShips' not found. Lua error in package.lua at line 80: module 'Module:Collection/EnemyShips' not found. Lua error in package.lua at line 80: module 'Module:Collection/EnemyShips' not found. Lua error in package.lua at line 80: module 'Module:Collection/EnemyShips' not found. Lua error in package.lua at line 80: module 'Module:Collection/EnemyShips' not found. Lua error in package.lua at line 80: module 'Module:Collection/EnemyShips' not found. Lua error in package.lua at line 80: module 'Module:Collection/EnemyShips' not found. Lua error in package.lua at line 80: module 'Module:Collection/EnemyShips' not found. Lua error in package.lua at line 80: module 'Module:Collection/EnemyShips' not found. Lua error in package.lua at line 80: module 'Module:Collection/EnemyShips' not found. Lua error in package.lua at line 80: module 'Module:Collection/EnemyShips' not found. Lua error in package.lua at line 80: module 'Module:Collection/EnemyShips' not found.
Lua error in package.lua at line 80: module 'Module:Collection/EnemyShips' not found. Lua error in package.lua at line 80: module 'Module:Collection/EnemyShips' not found. Lua error in package.lua at line 80: module 'Module:Collection/EnemyShips' not found. Lua error in package.lua at line 80: module 'Module:Collection/EnemyShips' not found. Lua error in package.lua at line 80: module 'Module:Collection/EnemyShips' not found. Lua error in package.lua at line 80: module 'Module:Collection/EnemyShips' not found. Lua error in package.lua at line 80: module 'Module:Collection/EnemyShips' not found. Lua error in package.lua at line 80: module 'Module:Collection/EnemyShips' not found. Lua error in package.lua at line 80: module 'Module:Collection/EnemyShips' not found. Lua error in package.lua at line 80: module 'Module:Collection/EnemyShips' not found. Lua error in package.lua at line 80: module 'Module:Collection/EnemyShips' not found. Lua error in package.lua at line 80: module 'Module:Collection/EnemyShips' not found. Lua error in package.lua at line 80: module 'Module:Collection/EnemyShips' not found. Lua error in package.lua at line 80: module 'Module:Collection/EnemyShips' not found. Lua error in package.lua at line 80: module 'Module:Collection/EnemyShips' not found. Lua error in package.lua at line 80: module 'Module:Collection/EnemyShips' not found. Lua error in package.lua at line 80: module 'Module:Collection/EnemyShips' not found. Lua error in package.lua at line 80: module 'Module:Collection/EnemyShips' not found. Lua error in package.lua at line 80: module 'Module:Collection/EnemyShips' not found. Lua error in package.lua at line 80: module 'Module:Collection/EnemyShips' not found. Lua error in package.lua at line 80: module 'Module:Collection/EnemyShips' not found. Lua error in package.lua at line 80: module 'Module:Collection/EnemyShips' not found. Lua error in package.lua at line 80: module 'Module:Collection/EnemyShips' not found. Lua error in package.lua at line 80: module 'Module:Collection/EnemyShips' not found. Lua error in package.lua at line 80: module 'Module:Collection/EnemyShips' not found. Lua error in package.lua at line 80: module 'Module:Collection/EnemyShips' not found. Lua error in package.lua at line 80: module 'Module:Collection/EnemyShips' not found. Lua error in package.lua at line 80: module 'Module:Collection/EnemyShips' not found. Lua error in package.lua at line 80: module 'Module:Collection/EnemyShips' not found. Lua error in package.lua at line 80: module 'Module:Collection/EnemyShips' not found. Lua error in package.lua at line 80: module 'Module:Collection/EnemyShips' not found. Lua error in package.lua at line 80: module 'Module:Collection/EnemyShips' not found. Lua error in package.lua at line 80: module 'Module:Collection/EnemyShips' not found. Lua error in package.lua at line 80: module 'Module:Collection/EnemyShips' not found. Lua error in package.lua at line 80: module 'Module:Collection/EnemyShips' not found. Lua error in package.lua at line 80: module 'Module:Collection/EnemyShips' not found. Lua error in package.lua at line 80: module 'Module:Collection/EnemyShips' not found. Lua error in package.lua at line 80: module 'Module:Collection/EnemyShips' not found. Lua error in package.lua at line 80: module 'Module:Collection/EnemyShips' not found. Lua error in package.lua at line 80: module 'Module:Collection/EnemyShips' not found.