InformationEdit
|
Across the Gibraltar
ジブラルタルを越えて | |
 | |
 | |
| Information | |
| Boss gauge (HQ 120) |
Casual: 1500 HP + 2800 HP Easy: 1500 HP + 2800 HP Medium: 2600 HP + 3700 HP Hard: 3000 HP + 3950 HP |
| Kills required |
Casual: 3 + 4 |
| Rewards | |
All:
Casual:
 Nothing NothingEasy:
 1 1 1 1Medium:
 121 121 1 1Hard:
1311 1 1 | |
| E-2A Branching Rules | ||
|---|---|---|
| Nodes | Rules | |
| Start | 1 |
|
2 |
| |
B |
A |
|
D | ||
C |
E |
|
G |
| |
E |
H |
|
I |
| |
M |
| |
D |
F |
|
G |
| |
J |
G |
|
K |
| |
L |
| |
G |
I |
|
K |
| |
I |
K |
|
K |
M |
|
| E-2B Branching Rules | ||
|---|---|---|
| Nodes | Rules | |
| Start | 1 |
|
2 |
| |
O |
P |
|
R |
| |
T |
Q |
|
U |
| |
V |
| |
Q |
S |
|
V |
| |

Map Guide[]
- This is a combined fleet map.
- There are 2 boss nodes on this map. The 1st boss at node N must be defeated before the 2nd part of the map is unlocked.
- The first boss is an installation type enemy. Prepare Anti-Installation equipment to take it down.
- The 2nd boss is a high armour Abyssal Princess in an abyssal combined fleet
- Two Land Base Aerial Support squadrons are available for sortie (see range below).
Map progression[]
")
")
Ship Bonuses[]
The following ships have bonuses on E2: Template:Ambox/Disclaimer
Mapwide
- German, French, Italian - 1.1x
- British - 1.15x
Node K
- British - 1.25x
- Ark Royal - 1.55x
Node O R
- Zara - 1.2x
- Ark Royal - 1.43x
Node T
- Italian - 1.2x
- Pola, Italia, Roma - 1.4x (vs BBH)
Node V
- German, French - 1.1x
- British - 1.15x
- Italian - 1.25x
- Jervis - 1.4x
- Ark Royal - 1.43x
- Aqulia - 1.76x
Part 1: Defeating the boss at Node N[]
- The routing for this part will depend on the type of combined fleet you sortie to the map.
- The boss needs to be killed 3 times in Casual/Easy and 4 times in Medium/Hard.
- Tips
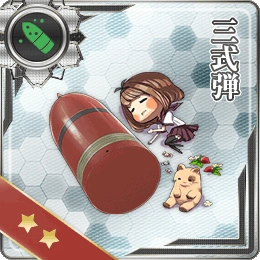
- The boss is Harbour Summer Princess escorted by Supply Depot Princess. The easily accessible Anti-installation equipment, Type 3 Shell
 , is crucial against these two. It is recommended to have 3-5 T3 Shells for this situation.
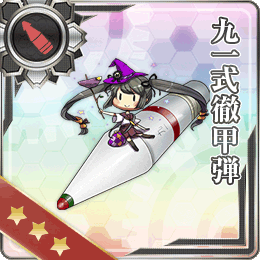
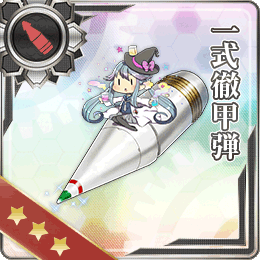
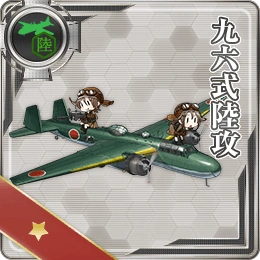
 - There are also 0-2 Artillery Imp depending on difficulty against which Type 3 Shells are not effective. To easily deal with them you should equip your BBs with an AP Shell or use LBAS bombers such as Type 96 Land-based Attack Aircraft if available. Alternatively variants of Daihatsu Landing Craft are also effective against Arty Imps, especially if used in a "nuke" setup against Supply Depot Princess together with aType 2 Tank and an Anti-Ground Equipment. The list of ship that can equip Daihatsus and the Type 2 Tank is down below.
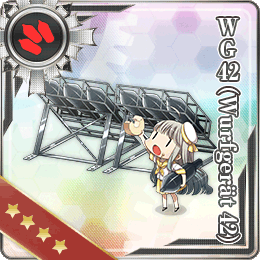
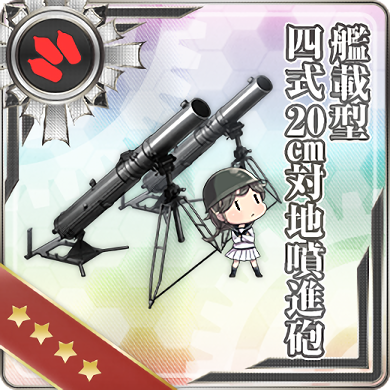
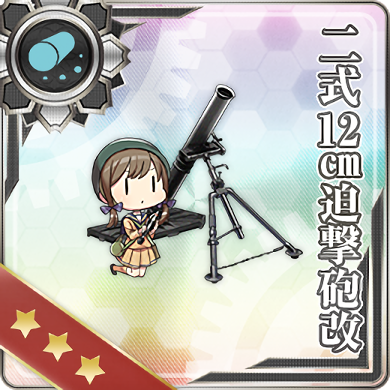
- WG42 is decent against both Artillery Imp and the boss and can be equipped on CL/DD but are hard to obtain. However, if you did clear E-1 in Easy+ you will have access to 1-2 Type 2 12cm Mortar Kai and if you cleared Hard you also obtained a 20cm AG Rocket Launcher. They are less effective than WG42 but can still damage them.
- WG42
- 1 PT Imp Pack also exists on every difficulty and can be a nuisance. They are extremely difficult to sink despite their low HP and it is recommended to use Support Expedition (or Land-base) against them. Otherwise, specific ship setup (Anti-PT-Imp setup) are required to accurately sink them. (Please click [Expand] to the right)
- The boss is Harbour Summer Princess escorted by Supply Depot Princess. The easily accessible Anti-installation equipment, Type 3 Shell


- At least two different types of equipment must be combined to see significant boosts to accuracy.
- Skilled lookouts give very high boost to accuracy, and reaching very high accuracy is hard without them
- Stacking multiple of other types (without skilled lookouts) can give somewhat high accuracy. For instance, two secondary guns and one machine gun
- Applicable equipment types
- Skilled Lookouts
- Small main guns
- Secondary guns
- AA/machine guns
- Seaplane scouts/bombers
- Skilled Lookouts
- Typically destroyers are used as anti-PT imp because they usually want to have small main guns equipped regardless, however CL, AV, CA(V), BB(V) are also sometimes used as well depending on the circumstances
- Equipping more different types of equipment will increase accuracy greatly, but some types (guns, machine guns) will increase accuracy further if two of the same type are equipped, albeit less than equipping an additional type instead.
- Some equipment types give extra firepower bonuses against PT Imp Packs, namely the main/secondary guns. For very high probability of sinking in one hit, at least one gun-type equipment effective against PT Imp Packs is usually needed.
| Ships that can equip Tanks | |||||
|---|---|---|---|---|---|
| Ship | 
|

|
Ship |
|
|
| Destroyer (DD) | |||||
| Yes | Yes | Yes | Yes | ||
| Yes | Yes | Yes | Yes | ||
| Yes | Yes | Yes | Yes | ||
| Yes | Yes | Yes | Yes | ||
| Yes | Yes | Yes | Yes | ||
| Yes | No | Yes | No | ||
| Yes | No | Yes | No | ||
| Yes | No | Yes | No | ||
| Yes | No | ||||
| No | Yes | No | Yes | ||
| No | Yes | No | Yes | ||
| No | Yes | No | Yes | ||
| Light Cruiser (CL) | |||||
| Yes | Yes | Yes | Yes | ||
| Yes | Yes | Yes | Yes | ||
| Yes | Yes | Yes | Yes | ||
| Yes | Yes | Yes | No | ||
| No | Yes | No | Yes | ||
| Aviation Cruiser (CAV) | |||||
| Yes | Yes | ||||
| Battleship (BB) | |||||
| Yes | Yes | No | Yes | ||
| Seaplane Tender (AV) | |||||
| Yes | Yes | Yes | Yes | ||
| Yes | Yes | Yes | Yes | ||
| Yes | Yes | Yes | Yes | ||
| Yes | No | Yes | Yes | ||
| Fleet Oiler (AO) | |||||
| Yes | Yes | Yes | Yes | ||
| Amphibious Assault Ship (LHA) | |||||
| Yes | Yes | Yes | Yes | ||
| Ship |
|
|
Ship |
|
|
| [Edit] | |||||
- Compositions & Routes
- Transport Combined Fleet
- Route:B A C E M N
- No BBV allowed
- The CVL for a Transport Combined Fleet must have a base ASW stat that is not 0. Currently this is true for the four following ships: Gambier Bay, Taiyou, Shinyou, or Zuihou Kai Ni B. If you don't have any of these four ships, 2 CAVs could be considered instead.
- 1CVL 1CAV 4DD and 2CA(V) 1CL 3DD
- 1CVL 1CAV 4DD and 1CA(V) 2CL 3DD
- Surface Task Force
- If you have Nagato Kai Ni/Mutsu Kai Ni, Nelson, Colorado, it is safe to lock Nagato/Mutsu here as British (Nelson) and U.S. (Colorado) have bonus in E-3. However, Phase 2 requires your Nagato/Mutsu to be fast in order to follow the shortest route, otherwise you will need to face an additional air-node.
- Route:B A C E I K M N
- This route allows to bring your heaviest ships. Defeat the boss with an all out attack
- 4(F)BB(V) 2CVL and 1FBB 2CA(V) 1CL 2DD
- 4(F)BB(V) 2CVL and 2CA(V) 0-1CLT 1CL 2-3DD
- 4(F)BB(V) 1CV(L/B) 1CA(V) and 2CA(V) 0-1CLT 1CL 2-3DD
- Route:B D F J G I K M N
- This route as well allows to bring your heaviest ships. Defeat the boss with an all out attack
- 4(F)BB(V) 2CVL and 1FBB 2CA(V) 1CL 2DD
- 4(F)BB(V) 2CVL and 2CA(V) 0-1CLT 1CL 2-3DD
- 4(F)BB(V) 1CV(L/B) 1CA(V) and 2CA(V) 0-1CLT 1CL 2-3DD
- CVL ≤ 1 and no CV should avoid the submarine node I (Requires further testing).
- Route:B D G K M N
- Route for a relatively light STF that avoids multiple nodes, but might have trouble at K.
- Fleet must be Fast speed.
- Maximum (F)BB(V) + CV(L/B) combined ≤ 2 and if a (F)BB(V) is in the fleet only a CVL is allowed.
- 2(F)BB(V) 4CA(V) and 2CA(V) 0-1CLT 1CL 2-3DD
- B D F J K M N
- A middle way between the light and heavy STF routes. There is a LoS check at J
- Fleet must be Fast speed.
- Maximum (F)BB(V) + CV(L/B) combined ≤ 4 and maximum 2 CV(L/B) are allowed.
- 3(F)BB(V) 1CV(L/B) 2CA(V) and 2CA(V) 0-1CLT 1CL 2-3DD
- 2(F)BB(V) 2CVL 2CA(V) and 2CA(V) 0-1CLT 1CL 2-3DD
- Transport Combined Fleet


Part 2: Defeating Abyssal Mediterranean Princess at Node V[]

- Compositions & Routes - Surface Task Force
- OPTV - Reaches boss with no damage penalty from ammo
- 2 (F)BB (1 CV(B) or 2 CVL) 0-3 CA(V) 0-3 CL/DD 0-1 AV and 1 CL 2 DD 3 XX(DD,CA,CLT)
- in which CA(V)+(F)BB(V)+CV(L/B) ≤ 6 and (F)BB(V)+CV(L/B) ≤ 3
- All Fast
- As this route passes through the sub node instead of a surface battle, less ammo is used and there is no damage penalty at the boss
- Since this composition will pass through a submarine node (P), an ASW gear on a DD or CL can be considered for greater stability in reaching the boss, especially on hard difficulty
- During the final kill phase in hard difficulty, the submarine node is locked to line abreast formation, so ASW equipment is much less necessary
- 2 (F)BB (1 CV(B) or 2 CVL) 0-3 CA(V) 0-3 CL/DD 0-1 AV and 1 CL 2 DD 3 XX(DD,CA,CLT)
- OPTQV - Reaches boss with no damage penalty from ammo
- 2 BB (1 CV(B) or 2 CVL) 0-3 CA(V) 0-3 CL/DD 0-1 AV and 1 CL 2 DD 3 XX(DD,CA,CLT)
- in which CA(V)+(F)BB(V)+CV(L/B) ≤ 6 and (F)BB(V)+CV(L/B) ≤ 3
- As this route passes through the sub node instead of a surface battle, less ammo is used
- In exchange for an enemy air raid node before the boss (i.e. less fuel), special attack ships such as Nagato or Nelson can be used without needing speed-boosting equipment.
- Since this composition will pass through a submarine node (P), an ASW gear on a DD or CL can be considered for greater stability in reaching the boss, especially on hard difficulty
- During the final kill phase in hard difficulty, the submarine node is locked to line abreast formation, so ASW equipment is much less necessary
- 2 BB (1 CV(B) or 2 CVL) 0-3 CA(V) 0-3 CL/DD 0-1 AV and 1 CL 2 DD 3 XX(DD,CA,CLT)
- ORTV - Reaches boss with ~20% damage penalty from ammo
- 2 (F)BB (1 CV(B) or 2 CVL) 0-3 CA(V) 0-3 CL/DD and 1 CL 2 DD 3 XX(DD,CA,CLT)
- in which amount of CA(V)+(F)BB(V)+CV(L/B) ≤ 7
- All Fast
- An additional heavy cruiser, carrier or battleship can be brought in exchange for going through a PT Imp node
- It is recommended that node shelling support is used, and/or some of the CA/CL/DD in the main fleet be equipped with Anti-PT Imp setups to assist in sinking them before the torpedo phase
- 2 (F)BB (1 CV(B) or 2 CVL) 0-3 CA(V) 0-3 CL/DD and 1 CL 2 DD 3 XX(DD,CA,CLT)
- ORTQV - Reaches boss with ~28% damage penalty from ammo
- 3 (F)BB ([1 BBV 1 CV(B)] or 2 CVL) 0-1 AO 0-1 CAV and 1 CL 2 DD 3 XX(DD,CA,CLT)
- Disregards any speed and composition restriction for higher firepower setup
- Since the route involves more fuel and ammo consumption, on higher difficulties an AO is recommended for use of underway replenishment consumable items to have higher damage and evasion at the boss node
- OPTV - Reaches boss with no damage penalty from ammo
- General Notes
- Up to 3 CLT are useful in this phase for greater stability in getting to the boss and damage output at the boss node
- In E-3 all bosses and most important end nodes contain installations, reducing (but not eliminating) the utility of CLTs in that map
- Due to the scaling of accuracy and critical damage with multiple high proficiency bombers on top of historical bonuses enjoyed by Ark Royal and Aquila, it is recommended to equip as many bombers to those carriers as possible. This boosts damage at the boss node and also increases consistency in reaching the boss
- For smaller slots, it's helpful to equip special squadrons which have high resistance to enemy AA (Murata, Tomonaga, etc.)
- As a result, it's desirable to equip a number of Seaplane Fighters to other main fleet ships (CAV and/or AV) to maintain air power
- It is recommended to bring some Torpedo Cut-in (TCI) ships due to the boss's high armor
- Common notable composition picks
- CV: Aquila or Ark Royal due to historical bonuses
- Fast BB: Italia, Roma, Kongou and/or Bismarck due to historical ship bonuses and innate fast speed
- Slow BB: Nagato Kai Ni + Mutsu Kai Ni for special attack extra damage
- If using Nagato and Mutsu in E3, Nelson can be utilized here instead.
- CLT: Kiso (to save Kitakami for E3) Ooi (especially if having multiple), Kitakami (especially if having multiple)
- Escort fleet CA: Prinz Eugen due to high base luck for TCI, other high luck CAs
- DD: Ayanami, Yukikaze, and other high luck high attack DDs due to suitability for TCI. Also Akizuki-class DDs for AACI and ASW or anti-PT
- It is strongly recommended to reserve Jervis and to a lesser degree Johnston for E3
- AV: Chitose/Chiyoda (due to not being ships suited for E3), duplicate Commandant Testes
- Up to 3 CLT are useful in this phase for greater stability in getting to the boss and damage output at the boss node
Friend Fleets[]
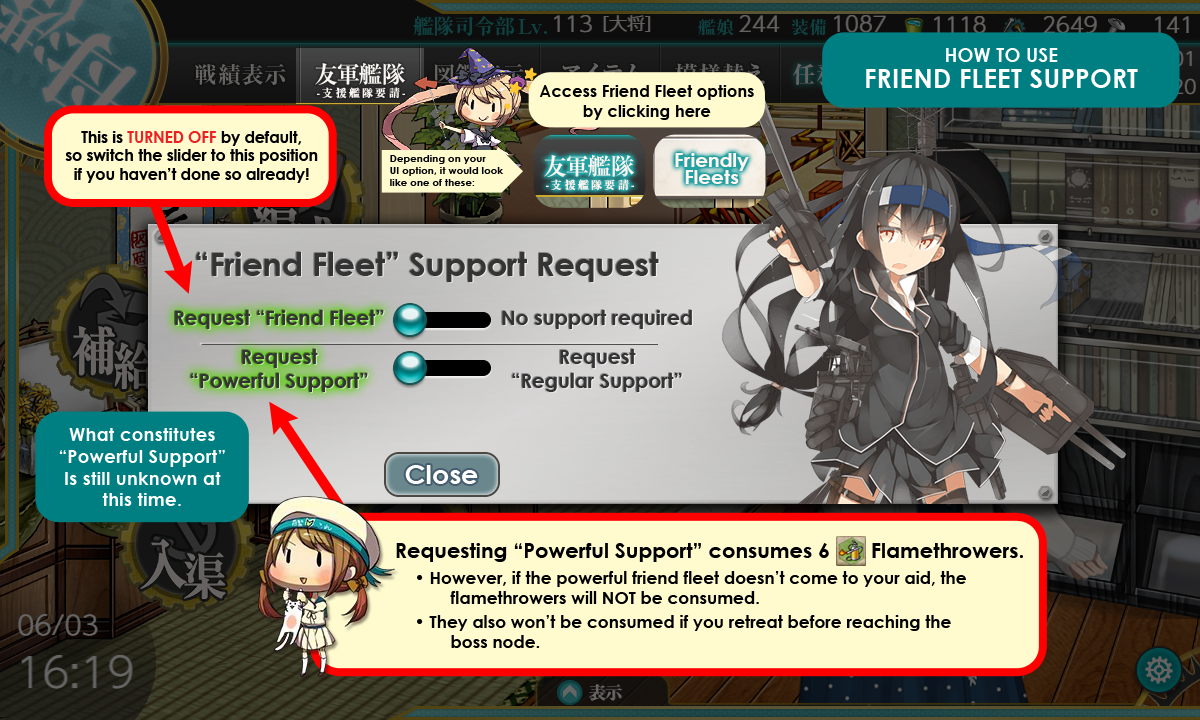

NOTE: friend fleets are disabled by default! Please toggle it on before proceeding!
Friend fleet must be manually toggled from the Home port (see the image) in order for it to appear at the boss node. You can request for a stronger friend fleet at the price of 6 flamethrowers; however, the definition of "stronger fleet" is still unknown.


E-2 V, Powerful
| Ship | Lv. | Equipment | |||||
|---|---|---|---|---|---|---|---|
| 77 |    |
69 | 58 | 0 | 95 | 90 | |
| 90 | |
89 | 62 | 0 | 94 | 85 | |
| 78 |    |
35 | 54 | 72 | 91 | 52 | |
| 71 | |
34 | 55 | 72 | 90 | 52 |
E-2 V, Regular, Powerful
| Ship | Lv. | Equipment | |||||
|---|---|---|---|---|---|---|---|
| 95 |    |
86 | 98 | 42 | 89 | 88 | |
| 77 |    |
32 | 48 | 79 | 49 | 49 | |
| 77 | |
32 | 49 | 79 | 49 | 49 |
E-2 V, Regular, Powerful
| Ship | Lv. | Equipment | |||||
|---|---|---|---|---|---|---|---|
| 85 |   |
45 | 68 | 79 | 72 | 69 | |
| 77 |    |
32 | 48 | 79 | 49 | 49 | |
| 77 | |
32 | 49 | 79 | 49 | 49 |


LBAS Flight Range[]

If in doubt, use tooltips to check sample sizes.
Enemy patterns[]

Lua error in package.lua at line 80: module 'Module:Collection/EnemyShips' not found. Lua error in package.lua at line 80: module 'Module:Collection/EnemyShips' not found. Lua error in package.lua at line 80: module 'Module:Collection/EnemyShips' not found. Lua error in package.lua at line 80: module 'Module:Collection/EnemyShips' not found. Lua error in package.lua at line 80: module 'Module:Collection/EnemyShips' not found. Lua error in package.lua at line 80: module 'Module:Collection/EnemyShips' not found. Lua error in package.lua at line 80: module 'Module:Collection/EnemyShips' not found. Lua error in package.lua at line 80: module 'Module:Collection/EnemyShips' not found. Lua error in package.lua at line 80: module 'Module:Collection/EnemyShips' not found. Lua error in package.lua at line 80: module 'Module:Collection/EnemyShips' not found. Lua error in package.lua at line 80: module 'Module:Collection/EnemyShips' not found. Lua error in package.lua at line 80: module 'Module:Collection/EnemyShips' not found. Lua error in package.lua at line 80: module 'Module:Collection/EnemyShips' not found. Lua error in package.lua at line 80: module 'Module:Collection/EnemyShips' not found. Lua error in package.lua at line 80: module 'Module:Collection/EnemyShips' not found. Lua error in package.lua at line 80: module 'Module:Collection/EnemyShips' not found. Lua error in package.lua at line 80: module 'Module:Collection/EnemyShips' not found.
Lua error in package.lua at line 80: module 'Module:Collection/EnemyShips' not found. Lua error in package.lua at line 80: module 'Module:Collection/EnemyShips' not found. Lua error in package.lua at line 80: module 'Module:Collection/EnemyShips' not found. Lua error in package.lua at line 80: module 'Module:Collection/EnemyShips' not found. Lua error in package.lua at line 80: module 'Module:Collection/EnemyShips' not found. Lua error in package.lua at line 80: module 'Module:Collection/EnemyShips' not found. Lua error in package.lua at line 80: module 'Module:Collection/EnemyShips' not found. Lua error in package.lua at line 80: module 'Module:Collection/EnemyShips' not found. Lua error in package.lua at line 80: module 'Module:Collection/EnemyShips' not found. Lua error in package.lua at line 80: module 'Module:Collection/EnemyShips' not found. Lua error in package.lua at line 80: module 'Module:Collection/EnemyShips' not found. Lua error in package.lua at line 80: module 'Module:Collection/EnemyShips' not found. Lua error in package.lua at line 80: module 'Module:Collection/EnemyShips' not found. Lua error in package.lua at line 80: module 'Module:Collection/EnemyShips' not found. Lua error in package.lua at line 80: module 'Module:Collection/EnemyShips' not found. Lua error in package.lua at line 80: module 'Module:Collection/EnemyShips' not found. Lua error in package.lua at line 80: module 'Module:Collection/EnemyShips' not found.
Lua error in package.lua at line 80: module 'Module:Collection/EnemyShips' not found. Lua error in package.lua at line 80: module 'Module:Collection/EnemyShips' not found. Lua error in package.lua at line 80: module 'Module:Collection/EnemyShips' not found. Lua error in package.lua at line 80: module 'Module:Collection/EnemyShips' not found. Lua error in package.lua at line 80: module 'Module:Collection/EnemyShips' not found. Lua error in package.lua at line 80: module 'Module:Collection/EnemyShips' not found. Lua error in package.lua at line 80: module 'Module:Collection/EnemyShips' not found. Lua error in package.lua at line 80: module 'Module:Collection/EnemyShips' not found. Lua error in package.lua at line 80: module 'Module:Collection/EnemyShips' not found. Lua error in package.lua at line 80: module 'Module:Collection/EnemyShips' not found. Lua error in package.lua at line 80: module 'Module:Collection/EnemyShips' not found. Lua error in package.lua at line 80: module 'Module:Collection/EnemyShips' not found. Lua error in package.lua at line 80: module 'Module:Collection/EnemyShips' not found. Lua error in package.lua at line 80: module 'Module:Collection/EnemyShips' not found. Lua error in package.lua at line 80: module 'Module:Collection/EnemyShips' not found. Lua error in package.lua at line 80: module 'Module:Collection/EnemyShips' not found. Lua error in package.lua at line 80: module 'Module:Collection/EnemyShips' not found.
Lua error in package.lua at line 80: module 'Module:Collection/EnemyShips' not found. Lua error in package.lua at line 80: module 'Module:Collection/EnemyShips' not found. Lua error in package.lua at line 80: module 'Module:Collection/EnemyShips' not found. Lua error in package.lua at line 80: module 'Module:Collection/EnemyShips' not found. Lua error in package.lua at line 80: module 'Module:Collection/EnemyShips' not found. Lua error in package.lua at line 80: module 'Module:Collection/EnemyShips' not found. Lua error in package.lua at line 80: module 'Module:Collection/EnemyShips' not found. Lua error in package.lua at line 80: module 'Module:Collection/EnemyShips' not found. Lua error in package.lua at line 80: module 'Module:Collection/EnemyShips' not found. Lua error in package.lua at line 80: module 'Module:Collection/EnemyShips' not found. Lua error in package.lua at line 80: module 'Module:Collection/EnemyShips' not found. Lua error in package.lua at line 80: module 'Module:Collection/EnemyShips' not found. Lua error in package.lua at line 80: module 'Module:Collection/EnemyShips' not found. Lua error in package.lua at line 80: module 'Module:Collection/EnemyShips' not found. Lua error in package.lua at line 80: module 'Module:Collection/EnemyShips' not found. Lua error in package.lua at line 80: module 'Module:Collection/EnemyShips' not found. Lua error in package.lua at line 80: module 'Module:Collection/EnemyShips' not found.