InformationEdit
|
The Wind of Genova
ジェノヴァの風 | |
 | |
 | |
| Information | |
| Boss gauge (HQ 120) |
Casual: 220 TP + 3500 HP Easy: 220 TP + 3500 HP Medium: 280 TP + 3500 HP Hard: 400 TP + 3500 HP |
| Rewards | |
All:
Casual:
Easy:
 1 1 1 1Medium:
12 1 1 5⋆ 5⋆Hard:
1315⋆ 5⋆ 5⋆ | |
| Branching Rules Part 1 | ||
|---|---|---|
| Nodes | Rules | |
1 |
A |
|
B | ||
D | ||
B |
C |
|
D |
| |
D |
E |
|
F | ||
H | ||
F |
G |
|
H | ||
H |
I |
|
J | ||
K |
L |
|
M |
| |
| Branching Rules Part 2 | ||
|---|---|---|
| Nodes | Rules | |
| Start | 1 |
|
2 |
| |
Q |
P |
|
R | ||
P |
N |
|
O | ||
| Branching Rules Part 3 | ||
|---|---|---|
| Nodes | Rules | |
| Start | 1 |
|
2 |
| |
Q |
P |
|
R | ||
T | ||
W | ||
P |
N |
|
O | ||
T | ||
- NOTE
- Part 3 is based on having the alternate route (see below) unlocked. Those who did not unlock it may divert from the mentioned routing below.
Historical Fleet: Armistice of Cassibile
The Italian Navy during the 2nd World War.


Members of the historical fleet will enjoy a damage bonus of around 1.2 ~ 1.3x at V L O S T U. In addition, it has been confirmed that there is no historical routing
For HARD MODE: E-5 ship lock
E-5 routing depends on European ships (all foreign ships excluding US ships) which includes Italians
. On hard mode, you will need 6 and a combination of at least 4 French + German ship for best routing at 2nd phase of E-5; check your requirement on E-5 tab for other difficulty. You can have an additional 6 for Phase 1 but this is not necessary. Pola, Zara, and Prinz Eugen are the only 3 historical CA available and can provide a lot of flexibility in ship composition.

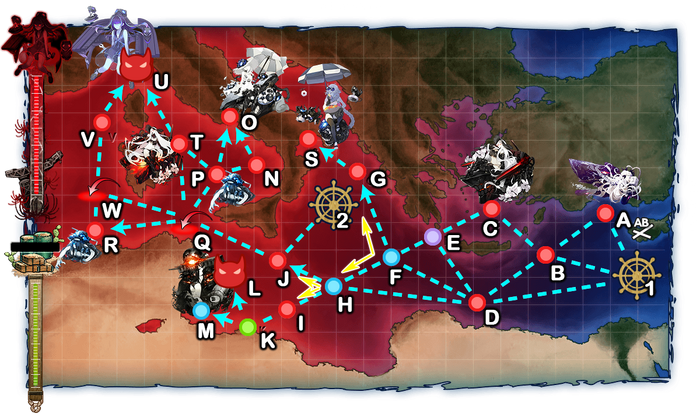
Map Guide
NOTE: Not all these steps may apply to lower difficulties.
- It has been confirmed that there is no historical routing, but all Italian ships have bonus damage (see above) in this map.
- LBAS: 3 are available, but only 2 for attacking; the other one is for defending. An air raid will happen in this map.
- Phase 1: Assault the TP gauge with Transport Combined Fleet (TCF)
- As experienced in E-2, you should already know how TP phase works. However, to assert assumption for assured victory is less likely as Battleship summer princess is presented as boss. As such, it is recommended to aim for A-rank victory (sinking at least 8 of 12 enemy ships) instead of S-rank. There are two ways to tackle this phase: TCF and Single fleet
- LBAS: Boss node requires a range of 6. 1 fighter 3 bombers or 4 bombers if you do not have the range; try to obtain at least AD if you went for 1 fighter.
- It should be noted that TCF has a noticeable lower accuracy than both STF/CTF, consider using node support if you are really struggling against D. Unlike E-2, this phase has carriers. For TCF, there are three methods in handling this:
- Fight under AS or lower. Equipping CAV and/or BBV with seaplane bombers or fighters. The former gives barely any air power and can be easily wiped by Light Cruiser Tsu-Class Elite at I while the latter is un-craftable, and - unless obtained from their relative quests/improvements - is most reasonably obtainable at this moment from Pola Kai that drops in E-2; Zara Due also has it but she needs blueprint. To contest AS, you will need at least 2-3 seaplane fighters for Medium+ but it is possible with just 1 at some composition in Easy (and even Medium).
- Additionally, bringing a BBV will route you to an additional battle at B
- Fight under AS or lower. Using Transport Escort CVL, which are those with ASW stats. There are currently 4 ships that fit that criteria: Zuihou Kai Ni B requires at least level 80, Taiyou (needs level 30) drops in E-3, Gambier Bay is still lost, and Shinyou is handed to you from E-3 with ASW stat since level 1.
- Fight under AP/AD/AI. AS is not everything. Only your BBV/CAV benefits from artillery spotting and you won't get much out of contact bonus unless you bring CVL. AP will negate the two aforementioned bonuses from both side. If you cannot obtain AD, don't bother bringing Night Recon as it will not trigger. For a summary, refer to this table from en.kancolle.wiki.
- Fight under AS or lower. Equipping CAV and/or BBV with seaplane bombers or fighters. The former gives barely any air power and can be easily wiped by Light Cruiser Tsu-Class Elite at I while the latter is un-craftable, and - unless obtained from their relative quests/improvements - is most reasonably obtainable at this moment from Pola Kai that drops in E-2; Zara Due also has it but she needs blueprint. To contest AS, you will need at least 2-3 seaplane fighters for Medium+ but it is possible with just 1 at some composition in Easy (and even Medium).
- Single fleet - Bring some AA guns to deal with PT Imps. Always go vanguard formation till boss.
- STF - an option for Easy and Casual players
- This option less viable to Medium/Hard players due to ship-locking and higher air power. Otherwise, this option allows Easy players to utilize STF
- You can now bring specifically 1 CVL. Your main fleet will attack first making PT Imps more likely to be targeted by your escort fleet. The obvious downside is the two additional nodes in which one is a submarine node, and the slower TP depletion rate. Remember that this is TP Phase, consider bringing CL/DD on your main fleet to carry drums.


- A+ rank Q O R - See compositions below
- A+ rank S and G (?)

- The boss is accompanied by the same Depot Princess from E-2 that is delighted to see you again. The same method that you used against her prior can be used here. In LD, a CVL will appear. Your carrier might need to carry all fighter planes (fighter mule) in order to reach AS.
- LBAS: 2 Attack, 1 Defense OR 2 Attack 1 Retreat - All bombers
- Alternatively, you can add fighters into your LBAS and send them to boss however there is no fighter with 8 range meaning that at least 1 slot is needed for a scout plane (see link). This is not recommended and having all bombers will be more beneficial against sinking the boss escorts (especially PT Imp).
- Setting your third base to 'defense' can be a double-edge sword. Defending may protect your other bases but, depending on difficulty, you may lose a lot of resource as you will fight the air raid under AP due to its high fighter power. Letting your land bases get bombed without defending will cost you less resource if you are forced to retreat before reaching boss.
- For Hard mode, both side are equally hideous. Node T has CV Hime and two Ta-class that can send you home easily especially in double line. The other side (V) is elite Re-class. The silver lining is the possible echelon formation that makes V more tolerable. You are more likely to survive this node using Vanguard than the former. For Easy and below (also somewhat Medium), Re will be in her normal form which does not perform opening torpedo strike


Bonus against Dock Princess
The boss herself is not a pushover. However, it has been observed that the following equipment have post-cap modifier damage against Dock Princess. This make decision like bringing T3 shell a better option than AP shell
 in this phase:
- T3 shell
 : ~1.428
 - Ka-mi: 1.31 ~ 1.51
- Ka-mi (+max): 1.7 ~ 2.16
- Ka-mi
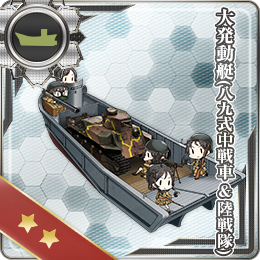
- T89: 1.37 ~ 2.18
- T89 (+max): 1.25 ~ 2.02
- T89
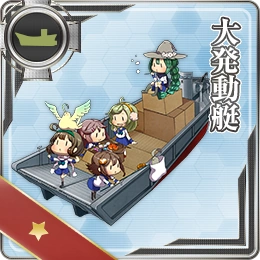
- Daihatsu: (+6): 1.22 ~ 2.11
- NOTE: The regular daihatsu IS NOT EFFECTIVE against Depot Princess; only the tank variants work.
- NOTE: The regular daihatsu
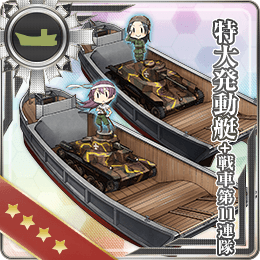
- 11th Tank Regiment: 1.64 ~ 1.86
- WG42: 1.46 ~ 1.47
- 11th Tank Regiment + WG42+ Ka-mi: 2.24 ~ 2.30
- 11th Tank Regiment + WG42 + Ka-mi (+max): 2.94 ~ 3.17
- 11th Tank Regiment
Composition
As mentioned in Map Guide. Please remember that these are early compositions that works. It is not in anyway optimal.
Phase 1
The focus of the first phase is the clearing of the TP gauge. The boss is located on node L. LoS requirement is around 10 for a combined fleet (possibly lower).
1 D H I K L
This is the shortest route possible to the first boss.
- 1CAV or 1AV or 1 Escort carrier, 1CL 4DD + 1-2CL 1CA(V) 3-4DD
- Escort Carrier (see definition in Map guide):
- 1-6DD (Single Fleet)
1 D H I K L or 1 B D H I K L
Not using a CL in the main fleet will cause random routing between B and D.
- 2CAV 4DD + 1-2CL 1CA(V) 3-4DD
- 1CVE 1CAV 4DD + 1-2CL 1CA(V) 3-4DD
1 B D H I K L
Completely disregards the possibility of the shortest route, allowing you bring a stronger fleet.
- 1CVE 1BBV 4DD + 1CL 2CA(V) 3DD
- 2BBV 4DD + 1CL 2CA(V) 3DD
1 A B D E F H I K L
Disregarding TCF entirely and bring STF. More viable for Easy and Casual players who don't have to deal with ship-lock.
- 1 CVL 5 XX + 1 CL 2 DD 3 XX
- XX cannot be CV(L/B) nor SS(V)
- XX cannot have (F)BB(V) ≥ 4
- You can bring all your CLTs here if you wish.
- The more drum carrier the faster, but now you can bring stronger force.
- (+)Your escort fleet also attack after main fleet, making it possible to add DD in your main fleet to deal with PT Imps.
- (-)You will be facing two additional nodes; one of the node is a submarine node with Submarine Summer Princess. Some OASW ship is recommended or Toukai if possible.

Phase 2
In the second phase, the focus is the unlocking of the 2nd boss.
2 J Q P O
A+ rank node O.
- 2(F)BB 1CV 3DD
- 1(F)BB 1CVL 1CV 3DD
- 1(F)BB 1CV 1CA 3DD
2 J Q R
A+ rank node R.
- 0-1DD 0DE 0SS(V) 5-6XX
- XX may not be DD, DE and SS(V)
- 2 BB 2 CV 2 DD
- Will no longer route here after boss node is unlocked.
Phase 3
The focus of the third and final phase is the destruction of the 2nd boss. Remember that while there is no historical routing, bringing Italian ships will be beneficial at the boss. There are two options: unlock the alternate route or do not unlock. Other than the first three compositions below, every other compositions only works if and only if you have the alternate route unlocked.
Not using the alternate route:
2 J Q T U
Fleets used to defeat the 2nd boss. Keep in mind that the use of Italian ships is recommended for bonus damage against the boss.
- 2(F)BB(V) 1CV 1CL 2DD
Using the alternate route:
1. Unlock nodes W and V through A+ rank nodes G and S:
1 A B D E F G S
Avoids node C, but has restrictions to the number of carriers you can use. Surface Task Force.
- 1CVL 5XX + 6XX
- XX may not be CVL, CV(B) or SS(V).
- Cannot bring more than 4(F)BB(V).
1 A B C E F G S
This option completely disregards the branching rules and allows you complete freedom as to how many carriers you want to bring.
- 6XX + 6XX
- Transport Escort does not work. You must use Carrier/Surface Task Force.
2. Defeat the boss at node U
2 J Q W V U
A small detour with an extra aerial node, but it does allow a CA over CL. If you have Zara or Pola, this is where you can use one of them (keep another for Phase 2 E-5); or use neither.
- 1CA 2(F)BB(V) 1CV 2DD
Considerations for this route:
- (-) Additional aerial node
- (-) Re class at node V vs CV Hime at node T
- (+) Additional CA vs CL for composition
2 J Q P T U
Submarine composition for chipping at the boss gauge. Unlikely to sink the boss.
- 6 SSV
- Exactly two submarines must be equipped with both WG42 (Wurfgerät 42) and Special Type 2 Amphibious Tanks (Ka-mi) or routing will differ
- This route can only be done IF AND ONLY IF you have the alternate route unlocked. Not having the alternate route unlocked will route you to O.
- Exactly two submarines must be equipped with both WG42 (Wurfgerät 42) and Special Type 2 Amphibious Tanks (Ka-mi) or routing will differ
Friend Fleets
E-4, Phase 2, U
| Ship | Lv. | Equipment | |||||
|---|---|---|---|---|---|---|---|
| 78 |   |
32 | 45 | 69 | 50 | 49 | |
| 72 |  |
32 | 47 | 63 | 50 | 43 | |
| 80 |   |
33 | 41 | 61 | 51 | 40 | |
| 84 |  |
33 | 36 | 51 | 50 | 28 |
E-4, Phase 2, U
| Ship | Lv. | Equipment | |||||
|---|---|---|---|---|---|---|---|
| 70 |   |
48 | 16 | 0 | 53 | 49 | |
| 88 |   |
62 | 68 | 35 | 75 | 67 | |
| 79 |  |
56 | 69 | 39 | 66 | 64 | |
| 82 |  |
29 | 50 | 63 | 60 | 50 | |
| 78 | |
29 | 38 | 62 | 48 | 45 |
E-4, Phase 2, U
| Ship | Lv. | Equipment | |||||
|---|---|---|---|---|---|---|---|
| 82 |   |
32 | 48 | 68 | 58 | 46 | |
| 74 |  |
35 | 24 | 54 | 34 | 39 | |
| 73 | |
35 | 24 | 43 | 51 | 40 | |
| 88 |   |
31 | 52 | 90 | 70 | 50 | |
| 85 |    |
39 | 66 | 68 | 69 | 56 | |
| 82 | |
29 | 50 | 63 | 60 | 50 |
E-4, Phase 2, U
| Ship | Lv. | Equipment | |||||
|---|---|---|---|---|---|---|---|
| 88 |   |
92 | 96 | 0 | 69 | 86 | |
| 87 | |
92 | 92 | 0 | 82 | 90 | |
| 82 | |
29 | 50 | 63 | 60 | 50 | |
| 78 | |
29 | 38 | 62 | 48 | 45 |
E-4, Phase 2, U
| Ship | Lv. | Equipment | |||||
|---|---|---|---|---|---|---|---|
| 88 |  |
62 | 68 | 35 | 75 | 67 | |
| 79 | |
56 | 69 | 39 | 66 | 64 | |
| 82 | |
29 | 50 | 63 | 60 | 50 | |
| 78 | |
29 | 38 | 62 | 48 | 45 |
Map Progression
")
")
")
")
LBAS Flight Range

If in doubt, use tooltips to check sample sizes.
Enemy patterns
_Banner.png)
Lua error in package.lua at line 80: module 'Module:Collection/EnemyShips' not found. Lua error in package.lua at line 80: module 'Module:Collection/EnemyShips' not found. Lua error in package.lua at line 80: module 'Module:Collection/EnemyShips' not found. Lua error in package.lua at line 80: module 'Module:Collection/EnemyShips' not found. Lua error in package.lua at line 80: module 'Module:Collection/EnemyShips' not found. Lua error in package.lua at line 80: module 'Module:Collection/EnemyShips' not found. Lua error in package.lua at line 80: module 'Module:Collection/EnemyShips' not found. Lua error in package.lua at line 80: module 'Module:Collection/EnemyShips' not found. Lua error in package.lua at line 80: module 'Module:Collection/EnemyShips' not found. Lua error in package.lua at line 80: module 'Module:Collection/EnemyShips' not found. Lua error in package.lua at line 80: module 'Module:Collection/EnemyShips' not found. Lua error in package.lua at line 80: module 'Module:Collection/EnemyShips' not found. Lua error in package.lua at line 80: module 'Module:Collection/EnemyShips' not found. Lua error in package.lua at line 80: module 'Module:Collection/EnemyShips' not found. Lua error in package.lua at line 80: module 'Module:Collection/EnemyShips' not found. Lua error in package.lua at line 80: module 'Module:Collection/EnemyShips' not found. Lua error in package.lua at line 80: module 'Module:Collection/EnemyShips' not found. Lua error in package.lua at line 80: module 'Module:Collection/EnemyShips' not found.
Lua error in package.lua at line 80: module 'Module:Collection/EnemyShips' not found. Lua error in package.lua at line 80: module 'Module:Collection/EnemyShips' not found. Lua error in package.lua at line 80: module 'Module:Collection/EnemyShips' not found. Lua error in package.lua at line 80: module 'Module:Collection/EnemyShips' not found. Lua error in package.lua at line 80: module 'Module:Collection/EnemyShips' not found. Lua error in package.lua at line 80: module 'Module:Collection/EnemyShips' not found. Lua error in package.lua at line 80: module 'Module:Collection/EnemyShips' not found. Lua error in package.lua at line 80: module 'Module:Collection/EnemyShips' not found. Lua error in package.lua at line 80: module 'Module:Collection/EnemyShips' not found. Lua error in package.lua at line 80: module 'Module:Collection/EnemyShips' not found. Lua error in package.lua at line 80: module 'Module:Collection/EnemyShips' not found. Lua error in package.lua at line 80: module 'Module:Collection/EnemyShips' not found. Lua error in package.lua at line 80: module 'Module:Collection/EnemyShips' not found. Lua error in package.lua at line 80: module 'Module:Collection/EnemyShips' not found. Lua error in package.lua at line 80: module 'Module:Collection/EnemyShips' not found. Lua error in package.lua at line 80: module 'Module:Collection/EnemyShips' not found. Lua error in package.lua at line 80: module 'Module:Collection/EnemyShips' not found. Lua error in package.lua at line 80: module 'Module:Collection/EnemyShips' not found.
Lua error in package.lua at line 80: module 'Module:Collection/EnemyShips' not found. Lua error in package.lua at line 80: module 'Module:Collection/EnemyShips' not found. Lua error in package.lua at line 80: module 'Module:Collection/EnemyShips' not found. Lua error in package.lua at line 80: module 'Module:Collection/EnemyShips' not found. Lua error in package.lua at line 80: module 'Module:Collection/EnemyShips' not found. Lua error in package.lua at line 80: module 'Module:Collection/EnemyShips' not found. Lua error in package.lua at line 80: module 'Module:Collection/EnemyShips' not found. Lua error in package.lua at line 80: module 'Module:Collection/EnemyShips' not found. Lua error in package.lua at line 80: module 'Module:Collection/EnemyShips' not found. Lua error in package.lua at line 80: module 'Module:Collection/EnemyShips' not found. Lua error in package.lua at line 80: module 'Module:Collection/EnemyShips' not found. Lua error in package.lua at line 80: module 'Module:Collection/EnemyShips' not found. Lua error in package.lua at line 80: module 'Module:Collection/EnemyShips' not found. Lua error in package.lua at line 80: module 'Module:Collection/EnemyShips' not found. Lua error in package.lua at line 80: module 'Module:Collection/EnemyShips' not found. Lua error in package.lua at line 80: module 'Module:Collection/EnemyShips' not found. Lua error in package.lua at line 80: module 'Module:Collection/EnemyShips' not found. Lua error in package.lua at line 80: module 'Module:Collection/EnemyShips' not found.
Lua error in package.lua at line 80: module 'Module:Collection/EnemyShips' not found. Lua error in package.lua at line 80: module 'Module:Collection/EnemyShips' not found. Lua error in package.lua at line 80: module 'Module:Collection/EnemyShips' not found. Lua error in package.lua at line 80: module 'Module:Collection/EnemyShips' not found. Lua error in package.lua at line 80: module 'Module:Collection/EnemyShips' not found. Lua error in package.lua at line 80: module 'Module:Collection/EnemyShips' not found. Lua error in package.lua at line 80: module 'Module:Collection/EnemyShips' not found. Lua error in package.lua at line 80: module 'Module:Collection/EnemyShips' not found. Lua error in package.lua at line 80: module 'Module:Collection/EnemyShips' not found. Lua error in package.lua at line 80: module 'Module:Collection/EnemyShips' not found. Lua error in package.lua at line 80: module 'Module:Collection/EnemyShips' not found. Lua error in package.lua at line 80: module 'Module:Collection/EnemyShips' not found. Lua error in package.lua at line 80: module 'Module:Collection/EnemyShips' not found. Lua error in package.lua at line 80: module 'Module:Collection/EnemyShips' not found. Lua error in package.lua at line 80: module 'Module:Collection/EnemyShips' not found. Lua error in package.lua at line 80: module 'Module:Collection/EnemyShips' not found. Lua error in package.lua at line 80: module 'Module:Collection/EnemyShips' not found. Lua error in package.lua at line 80: module 'Module:Collection/EnemyShips' not found.