(Map progression) |
m (→Phase 1: Sink the {{ShipLink|Heavy Cruiser Ne-class|text=Heavy Cruiser Ne-class Kai}}: I guess it's not needed any longer at this point, but whatever) |
||
| (26 intermediate revisions by 9 users not shown) | |||
| Line 1: | Line 1: | ||
| − | {{Event/MapPageHeader |
+ | {{Event/MapPageHeader}} |
| − | |form = |
||
| − | |spreadsheet = |
||
| − | |thread = |
||
| ⚫ | |||
{{Event/MapInfo |
{{Event/MapInfo |
||
|en = Clash! Battle of Surabaya |
|en = Clash! Battle of Surabaya |
||
|jp = 激突!スラバヤ沖海戦 |
|jp = 激突!スラバヤ沖海戦 |
||
| + | |tag = E-3 |
||
|romaji = Gekitotsu! Surabaya-oki kaisen |
|romaji = Gekitotsu! Surabaya-oki kaisen |
||
|mechanics = <!-- |
|mechanics = <!-- |
||
|transport = true |
|transport = true |
||
--> |
--> |
||
| − | |hp_easy = |
+ | |hp_easy = 1320 + 2460 |
| − | |hp_medium = |
+ | |hp_medium = 1800 + 2460 |
|hp_hard = 1950 + 2800 |
|hp_hard = 1950 + 2800 |
||
<!-- |
<!-- |
||
| Line 43: | Line 40: | ||
}} |
}} |
||
{{MapBranchingTable |
{{MapBranchingTable |
||
| + | |title = E-3 Branching Rules |
||
| ⚫ | |||
| + | |expand = true |
||
| + | |id = 46-3 |
||
| + | |order = I,F,B,G,J,L,Q,O |
||
| + | |0 -> 1 = * Carrier Task Force |
||
| − | <!-- |
||
| + | |0 -> 2 = * Transport Combined Fleet |
||
| − | map information content here |
||
| + | |0 -> 3 = * Surface Task Force |
||
| − | --> |
||
| + | |||
| + | |1 -> A = * Do not meet the requirements to go to B. |
||
| + | |1 -> B = * ??? |
||
| + | |||
| + | |A -> B = * ??? |
||
| + | |A -> D = * ??? |
||
| + | |||
| + | |D -> E = * Do not meet the requirements to go to G. |
||
| + | |D -> G = |
||
| + | * Meet '''ALL''' of the following requirements: |
||
| + | ** No CV(L). |
||
| + | ** No (F)BB(V). |
||
| ⚫ | |||
| + | ** Amount of CLT+CA(V)+AV ≤ 4 |
||
| + | |||
| + | |E -> F = * Do not meet the requirements to go to G. |
||
| + | |E -> G = |
||
| + | * Meet '''ALL''' of the following requirements: |
||
| + | ** No CV(B) |
||
| + | ** No (F)BB(V) '''OR''' fleet contains AO. |
||
| + | ** Amount of (F)BB(V) ≤ 1 |
||
| + | ** Amount of CVL ≤ 1 |
||
| + | ** Amount of CLT+CA(V)+AV ≤ 4 |
||
| + | |||
| + | |F -> G = |
||
| + | * Meet '''ALL''' of the following requirements: |
||
| + | ** Amount of (F)BB(V)+CVL ≤ 2 |
||
| + | ** Amount of (F)BB(V)+CV(B) ≤ 1 |
||
| + | ** Amount of CLT+CA(V)+AV ≤ 5 |
||
| + | |F -> I = * Do not meet the requirements to go to G. |
||
| + | |||
| + | |G -> H/empty = * Fleet contains AO, {{ShipLink|Akashi Kai}} or {{ShipLink|Akitsushima Kai}} |
||
| + | |G -> J = * Do not meet the requirements to go to H. |
||
| + | |||
| + | |H/empty -> J = * Do not meet the requirements to go to K. |
||
| + | |H/empty -> K/resource = |
||
| + | * Meet '''ALL''' of the following requirements: |
||
| + | ** No CV(B) |
||
| + | ** No (F)BB(V) or CV(L/B) '''OR''' fleet contains AO. |
||
| + | ** Amount of (F)BB(V)+CVL ≤ 1 |
||
| + | ** Amount of DD+DE ≥ 3 |
||
| + | ** After Part 1 is cleared, Surface Task Force is not allowed. |
||
| + | |||
| + | |J -> L/empty = |
||
| + | * Do not meet the requirements to go to M. |
||
| + | |J -> M = |
||
| + | * Meet '''ALL''' of the following requirements: |
||
| + | ** Pass the LoS check. |
||
| + | ** After Part 1 is cleared, only Transport Combined Fleet can go to M. |
||
| + | |||
| + | |L/empty -> N/empty = * Fail the LoS check. |
||
| + | |L/empty -> O = * Pass the LoS check. |
||
| ⚫ | |||
==Map Guide== |
==Map Guide== |
||
*This is a '''combined fleet''' map. |
*This is a '''combined fleet''' map. |
||
| − | *The map has 3 starting points. One in the |
+ | *The map has 3 starting points. One in the East, one in the North and the last one between those 2. |
**There are multiple submarine nodes on this map and you will pass through at least 1 of them no matter which point you start at. |
**There are multiple submarine nodes on this map and you will pass through at least 1 of them no matter which point you start at. |
||
*The map has 2 HP bar phases that need to be cleared for advancing to E-4. |
*The map has 2 HP bar phases that need to be cleared for advancing to E-4. |
||
| Line 62: | Line 115: | ||
Fall_2019_Event_E-3_Map.png{{!}}Map during the second HP phase at node O |
Fall_2019_Event_E-3_Map.png{{!}}Map during the second HP phase at node O |
||
|spacing=small|bordercolor=transparent|captionalign=center|hideaddbutton=true|widths=200}} |
|spacing=small|bordercolor=transparent|captionalign=center|hideaddbutton=true|widths=200}} |
||
| − | {{clear}} |
||
===Map Bonuses=== |
===Map Bonuses=== |
||
| + | {|class="wikitable" style="text-align: center; vertical-align: middle;" |
||
| − | The following bonuses are currently known for the first part of the map. |
||
| + | |- |
||
| − | *1.1x: |
||
| + | !colspan="3"|Ship |
||
| ⚫ | |||
| + | !colspan="2"|Damage Bonus |
||
| − | **DDs: {{ShipLink|Yuudachi}}, {{ShipLink|Inazuma}}, {{ShipLink|Ikazuchi}} |
||
| + | |- |
||
| − | *1.2x |
||
| + | !colspan="3"| Battle of Java Sea |
||
| − | **CAs: {{ShipLink|Ashigara}}, {{ShipLink|Haguro}}, {{ShipLink|Nachi}} |
||
| + | !colspan="2"| Mapwide |
||
| − | **CLs: {{ShipLink|Jintsuu}} |
||
| + | |- |
||
| − | **CVLs: {{ShipLink|Ryuujou}} |
||
| + | !{{ShipBattleCardKai|Myoukou/Kai Ni}} |
||
| − | **DDs: {{ShipLink|Murasame}}, {{ShipLink|Samidare}}, {{ShipLink|Kawakaze}}, {{ShipLink|Yamakaze}}, {{ShipLink|Ushio}}, {{ShipLink|Sazanami}}, {{ShipLink|Yukikaze}}, {{ShipLink|Tokitsukaze}}, {{ShipLink|Amatsukaze}} |
||
| + | !{{ShipBattleCardKai|Naka/Kai Ni}} |
||
| − | <br /> |
||
| + | !{{ShipBattleCardKai|Yuudachi/Kai Ni}} |
||
| − | Bonuses for the 2nd phase are still under investigation.<br /> |
||
| + | |colspan="2" rowspan="5"|1.1x |
||
| − | However, Yukikaze is suspected to recieve a damage bonus against the boss as she can deal upwards of 500 damage with a TCI even in hard mode where the {{ShipLink|Battleship Water Demon}} has 200 Armour.<br /> |
||
| + | |- |
||
| − | <br /> |
||
| + | !{{ShipBattleCardKai|Inazuma/Kai}} |
||
| + | !{{ShipBattleCardKai|Ikazuchi/Kai}} |
||
| + | !{{ShipBattleCardKai|Minegumo/Kai}} |
||
| + | |- |
||
| + | !{{ShipBattleCardKai|Harusame/Kai}} |
||
| + | !{{ShipBattleCardKai|Samidare/Kai}} |
||
| + | !{{ShipBattleCardKai|Chitose/Carrier Kai Ni}} |
||
| + | |- |
||
| + | !{{ShipBattleCardKai|Mizuho/Kai}} |
||
| + | |- |
||
| + | ! colspan="5"| |
||
| + | |- |
||
| + | !{{ShipBattleCardKai|Ashigara/Kai Ni}} |
||
| + | !{{ShipBattleCardKai|Haguro/Kai Ni}} |
||
| + | !{{ShipBattleCardKai|Nachi/Kai Ni}} |
||
| + | |colspan="2" rowspan="5"|1.2x |
||
| + | |- |
||
| + | !{{ShipBattleCardKai|Jintsuu/Kai Ni}} |
||
| + | !{{ShipBattleCardKai|Ryuujou/Kai Ni}} |
||
| + | |||
| + | |- |
||
| + | !{{ShipBattleCardKai|Murasame/Kai Ni}} |
||
| + | !{{ShipBattleCardKai|Kawakaze/Kai Ni}} |
||
| + | !{{ShipBattleCardKai|Yamakaze/Kai}} |
||
| + | |- |
||
| + | !{{ShipBattleCardKai|Ushio/Kai Ni}} |
||
| + | !{{ShipBattleCardKai|Sazanami/Kai}} |
||
| + | !{{ShipBattleCardKai|Yukikaze/Kai}} |
||
| + | |- |
||
| + | !{{ShipBattleCardKai|Tokitsukaze/Kai}} |
||
| + | !{{ShipBattleCardKai|Amatsukaze/Kai}} |
||
| + | !{{ShipBattleCardKai|Matsukaze/Kai}} |
||
| + | |- |
||
| + | |- |
||
| + | !colspan="3"| Node Modifiers |
||
| + | !colspan="2"| All above ships |
||
| + | |- |
||
| + | !colspan="3"|Boss Node {{Event/Route|O|Red}} |
||
| + | |colspan="2"| 1.32x |
||
| ⚫ | |||
| + | *Node {{Event/Route|O|Red}} bonus is flat and is not multiplicative with other historical bonuses. |
||
| + | *{{ShipLink|Yuudachi/Kai Ni|text=Yuudachi}} has a larger bonus in E6 and should be reserved for later. |
||
| + | |||
===Phase 1: Sink the {{ShipLink|Heavy Cruiser Ne-class|text=Heavy Cruiser Ne-class Kai}}=== |
===Phase 1: Sink the {{ShipLink|Heavy Cruiser Ne-class|text=Heavy Cruiser Ne-class Kai}}=== |
||
The Armour of the Ne Kai jumps from 144 in Easy Difficulty to 222 in Medium Difficulty and 255 in Hard difficulty. If you plan to do this map in higher difficulties prepare to lock ships with damage bonuses to take her down. |
The Armour of the Ne Kai jumps from 144 in Easy Difficulty to 222 in Medium Difficulty and 255 in Hard difficulty. If you plan to do this map in higher difficulties prepare to lock ships with damage bonuses to take her down. |
||
| Line 83: | Line 178: | ||
*Method 1: Transport Combined Fleet |
*Method 1: Transport Combined Fleet |
||
**Route: {{Event/Route|E|Red|G|Red|H|Blue|K|Green|M|Red}} |
**Route: {{Event/Route|E|Red|G|Red|H|Blue|K|Green|M|Red}} |
||
| − | **Formation: Akitsushima, 1CAV, 4DD + 1CL 2CA 3DD |
+ | **Formation: {{ShipLink|Akitsushima/Kai}}, 1CAV, 4DD + 1CL 2CA 3DD |
| + | ***'''Note: Akitsushima must be Kai in order to use this composition.''' |
||
***This is the shortest route to the boss. You start at the northern starting point and advance straight through 1 submarine battle and 1 surface battle. |
***This is the shortest route to the boss. You start at the northern starting point and advance straight through 1 submarine battle and 1 surface battle. |
||
***Akitsushima might be required for routing in the EOs as well. Consider carefully if you want to lock her here in case you don't own a dupe. |
***Akitsushima might be required for routing in the EOs as well. Consider carefully if you want to lock her here in case you don't own a dupe. |
||
| Line 89: | Line 185: | ||
***For chipping in higher difficulties consider sending LBAS to {{Event/Route|G|Red}} to increase the survival chance there. If your fleet is too weak to damage the boss reliably use boss support. |
***For chipping in higher difficulties consider sending LBAS to {{Event/Route|G|Red}} to increase the survival chance there. If your fleet is too weak to damage the boss reliably use boss support. |
||
***For the last kill focus all your power on the boss node to take it out. |
***For the last kill focus all your power on the boss node to take it out. |
||
| + | **Formation: 1AO 1CVE 4DD + 1CL 2CA 3DD |
||
| − | <br /> |
||
| + | ***Stronger than the above composition thanks to the CVE and it's airstrike. |
||
| + | ***Zuihou K2B is able to sink or heavily damage the boss during the day battle with a critical hit, however while it makes especially farming a bit easier that doesn't happen too often. |
||
*Method 2: Surface Task Force |
*Method 2: Surface Task Force |
||
| + | **Route: {{Event/Route|C|Blue|D|Red|G|Red|J|Red|M|Red}} |
||
| + | **Formation: 2CA(V) 2CL 2DD + 2CA(V)/CLT 1CL 3DD |
||
| + | ***This composition takes a longer route, advancing through 1 additional surface battle (compared to the TCF composition) in exchange for extra firepower at the boss node. |
||
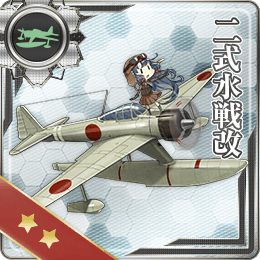
| + | ***Like the above composition, one ship should be carrying a {{EquipmentLink|Type 2 Seaplane Fighter Kai|text=seaplane fighter}} to secure AS+ across the map. One of the non-DD ships in this composition can be swapped for an AV should you want to use them for this purpose. |
||
| + | ***After clearing this map phase, this composition will no longer route to node {{Event/Route|M|Red}}; keep this in mind if you are looking to farm this boss. |
||
**Route: {{Event/Route|C|Blue|D|Red|E|Red|G|Red|J|Red|M|Red}} |
**Route: {{Event/Route|C|Blue|D|Red|E|Red|G|Red|J|Red|M|Red}} |
||
| + | **Formation: 1CVL 2CA(V) 1CL 2DD + 1CA(V) 1CL 1CLT 3DD or 1CVL 2CA(V) 1CL 2DD + 1CL 2CLT 3DD |
||
| − | **Formation: |
||
| + | ***This Formation routes through an additional submarine battle node compared to the STF without CVL. |
||
| − | <!-- |
||
| + | ***Easy Air Supremacy and opening airstrike thanks to the CVL. |
||
| − | Someone who used this method please fill in details about it |
||
| + | ***Surface nodes are easy to deal with and LBAS can be sent to the boss. |
||
| − | --> |
||
| + | ***However oASW ships are almost mandatory to deal with the 2 submarine nodes which will take away from your yasen attack power. |
||
| − | <br /> |
||
| + | |||
===Phase 2: Sink the {{ShipLink|Battleship Water Demon}}=== |
===Phase 2: Sink the {{ShipLink|Battleship Water Demon}}=== |
||
| − | If you've made it through the first boss the 2nd boss awaits you right away without any further unlocking required. With a sufficient number of historical ships this phase will feel easier to complete than the first part of the map. |
+ | If you've made it through the first boss the 2nd boss awaits you right away without any further unlocking required. With a sufficient number of historical ships this phase will feel easier to complete than the first part of the map. |
| + | |||
A certain number of historical ships might also be required to avoid certain pre-boss nodes, this is however still under investigation. |
A certain number of historical ships might also be required to avoid certain pre-boss nodes, this is however still under investigation. |
||
| Line 108: | Line 213: | ||
***A 2/2 or 1/3 Fighter/Bomber LBAS should be send to the boss node to reduce the enemy Air Power and allow you to obtain AS more easily |
***A 2/2 or 1/3 Fighter/Bomber LBAS should be send to the boss node to reduce the enemy Air Power and allow you to obtain AS more easily |
||
***TCI Yukikaze is recommended for taking out the boss at night, especially on last kill, when she turns into a {{ShipLink|Battleship Water Demon Kai|text=Battleship Water Demon Kai}} with 800HP on Easy+. |
***TCI Yukikaze is recommended for taking out the boss at night, especially on last kill, when she turns into a {{ShipLink|Battleship Water Demon Kai|text=Battleship Water Demon Kai}} with 800HP on Easy+. |
||
| + | ***800HP on Easy+ also means, you will be on your final run with 800 or less HP. If you do not want to finish the map on the current difficulty you are at, you have to reset the map as soon as you reach 800 or less overall HP left for boss. |
||
| + | |||
| + | ===LBAS Flight Range=== |
||
| + | [[File:Fall19_E3_LBAS.png|500px|center]] |
||
{{Event/MapPageFooter}} |
{{Event/MapPageFooter}} |
||
Latest revision as of 20:02, 13 January 2020
InformationEdit
|
Clash! Battle of Surabaya
激突!スラバヤ沖海戦 | |
 | |
 | |
| Information | |
| Boss gauge (HQ 120) |
Easy: 1320 + 2460 HP Medium: 1800 + 2460 HP Hard: 1950 + 2800 HP |
| Rewards | |
All:
Casual:
 Nothing NothingEasy:
 1 1Medium:
★+21Hard:
★+41 1 1 | |
| E-3 Branching Rules | ||
|---|---|---|
| Nodes | Rules | |
| Start | 1 |
|
2 |
| |
3 |
| |
1 |
A |
|
B |
| |
A |
B |
|
D |
| |
D |
E |
|
G |
| |
E |
F |
|
G |
| |
F |
I |
|
G |
| |
G |
H |
|
J |
| |
H |
J |
|
K |
| |
J |
L |
|
M |
| |
L |
N |
|
O |
| |

Map Guide[]
- This is a combined fleet map.
- The map has 3 starting points. One in the East, one in the North and the last one between those 2.
- There are multiple submarine nodes on this map and you will pass through at least 1 of them no matter which point you start at.
- The map has 2 HP bar phases that need to be cleared for advancing to E-4.
- Phase 1: Deplete the HP bar and kill Heavy Cruiser Ne-class Kai at M to unlock the 2nd boss node.
- Phase 2: At the 2nd boss node O you will face an abyssal combined fleet and have to sink Battleship Water Demon to clear the map.
- 1 LBAS is available to support you in E-3.

Map Progression[]
")
")
Map Bonuses[]
| Ship | Damage Bonus | |||
|---|---|---|---|---|
| Battle of Java Sea | Mapwide | |||
| 1.1x | ||||
| 1.2x | ||||
| Node Modifiers | All above ships | |||
| Boss Node O | 1.32x | |||
- Node O bonus is flat and is not multiplicative with other historical bonuses.
- Yuudachi has a larger bonus in E6 and should be reserved for later.
Phase 1: Sink the Heavy Cruiser Ne-class Kai[]
The Armour of the Ne Kai jumps from 144 in Easy Difficulty to 222 in Medium Difficulty and 255 in Hard difficulty. If you plan to do this map in higher difficulties prepare to lock ships with damage bonuses to take her down.
- Method 1: Transport Combined Fleet
- Route: E G H K M
- Formation: Akitsushima Kai, 1CAV, 4DD + 1CL 2CA 3DD
- Note: Akitsushima must be Kai in order to use this composition.
- This is the shortest route to the boss. You start at the northern starting point and advance straight through 1 submarine battle and 1 surface battle.
- Akitsushima might be required for routing in the EOs as well. Consider carefully if you want to lock her here in case you don't own a dupe.
- Akitsushima should carry a SPF to obtain Air Supremacy at all nodes.
- For chipping in higher difficulties consider sending LBAS to G to increase the survival chance there. If your fleet is too weak to damage the boss reliably use boss support.
- For the last kill focus all your power on the boss node to take it out.
- Formation: 1AO 1CVE 4DD + 1CL 2CA 3DD
- Stronger than the above composition thanks to the CVE and it's airstrike.
- Zuihou K2B is able to sink or heavily damage the boss during the day battle with a critical hit, however while it makes especially farming a bit easier that doesn't happen too often.
- Method 2: Surface Task Force
- Route: C D G J M
- Formation: 2CA(V) 2CL 2DD + 2CA(V)/CLT 1CL 3DD
- This composition takes a longer route, advancing through 1 additional surface battle (compared to the TCF composition) in exchange for extra firepower at the boss node.
- Like the above composition, one ship should be carrying a seaplane fighter
 to secure AS+ across the map. One of the non-DD ships in this composition can be swapped for an AV should you want to use them for this purpose.
 - After clearing this map phase, this composition will no longer route to node M; keep this in mind if you are looking to farm this boss.
- Route: C D E G J M
- Formation: 1CVL 2CA(V) 1CL 2DD + 1CA(V) 1CL 1CLT 3DD or 1CVL 2CA(V) 1CL 2DD + 1CL 2CLT 3DD
- This Formation routes through an additional submarine battle node compared to the STF without CVL.
- Easy Air Supremacy and opening airstrike thanks to the CVL.
- Surface nodes are easy to deal with and LBAS can be sent to the boss.
- However oASW ships are almost mandatory to deal with the 2 submarine nodes which will take away from your yasen attack power.
Phase 2: Sink the Battleship Water Demon[]
If you've made it through the first boss the 2nd boss awaits you right away without any further unlocking required. With a sufficient number of historical ships this phase will feel easier to complete than the first part of the map.
A certain number of historical ships might also be required to avoid certain pre-boss nodes, this is however still under investigation.
- Method: Surface Task Force
- Route: C D E G J L O
- Formation: 1CVL 2CA(V) 1CL 2DD + 1CA(V) 1CL 1CLT 3DD or 1CVL 2CA(V) 1CL 2DD + 1CL 2CLT 3DD
- 2 Submarine nodes and 2 Surface nodes await you before the boss.
- Using 3 ships equipped to perform oASW in your Escort Fleet is recommended and won't hinder you much in taking down the boss if your fleet is sufficiently strong.
- A 2/2 or 1/3 Fighter/Bomber LBAS should be send to the boss node to reduce the enemy Air Power and allow you to obtain AS more easily
- TCI Yukikaze is recommended for taking out the boss at night, especially on last kill, when she turns into a Battleship Water Demon Kai with 800HP on Easy+.
- 800HP on Easy+ also means, you will be on your final run with 800 or less HP. If you do not want to finish the map on the current difficulty you are at, you have to reset the map as soon as you reach 800 or less overall HP left for boss.

LBAS Flight Range[]

If in doubt, use tooltips to check sample sizes.
Enemy patterns[]

Lua error in package.lua at line 80: module 'Module:Collection/EnemyShips' not found. Lua error in package.lua at line 80: module 'Module:Collection/EnemyShips' not found. Lua error in package.lua at line 80: module 'Module:Collection/EnemyShips' not found. Lua error in package.lua at line 80: module 'Module:Collection/EnemyShips' not found. Lua error in package.lua at line 80: module 'Module:Collection/EnemyShips' not found. Lua error in package.lua at line 80: module 'Module:Collection/EnemyShips' not found. Lua error in package.lua at line 80: module 'Module:Collection/EnemyShips' not found. Lua error in package.lua at line 80: module 'Module:Collection/EnemyShips' not found. Lua error in package.lua at line 80: module 'Module:Collection/EnemyShips' not found. Lua error in package.lua at line 80: module 'Module:Collection/EnemyShips' not found. Lua error in package.lua at line 80: module 'Module:Collection/EnemyShips' not found. Lua error in package.lua at line 80: module 'Module:Collection/EnemyShips' not found. Lua error in package.lua at line 80: module 'Module:Collection/EnemyShips' not found. Lua error in package.lua at line 80: module 'Module:Collection/EnemyShips' not found. Lua error in package.lua at line 80: module 'Module:Collection/EnemyShips' not found.
Lua error in package.lua at line 80: module 'Module:Collection/EnemyShips' not found. Lua error in package.lua at line 80: module 'Module:Collection/EnemyShips' not found. Lua error in package.lua at line 80: module 'Module:Collection/EnemyShips' not found. Lua error in package.lua at line 80: module 'Module:Collection/EnemyShips' not found. Lua error in package.lua at line 80: module 'Module:Collection/EnemyShips' not found. Lua error in package.lua at line 80: module 'Module:Collection/EnemyShips' not found. Lua error in package.lua at line 80: module 'Module:Collection/EnemyShips' not found. Lua error in package.lua at line 80: module 'Module:Collection/EnemyShips' not found. Lua error in package.lua at line 80: module 'Module:Collection/EnemyShips' not found. Lua error in package.lua at line 80: module 'Module:Collection/EnemyShips' not found. Lua error in package.lua at line 80: module 'Module:Collection/EnemyShips' not found. Lua error in package.lua at line 80: module 'Module:Collection/EnemyShips' not found. Lua error in package.lua at line 80: module 'Module:Collection/EnemyShips' not found. Lua error in package.lua at line 80: module 'Module:Collection/EnemyShips' not found. Lua error in package.lua at line 80: module 'Module:Collection/EnemyShips' not found.
Lua error in package.lua at line 80: module 'Module:Collection/EnemyShips' not found. Lua error in package.lua at line 80: module 'Module:Collection/EnemyShips' not found. Lua error in package.lua at line 80: module 'Module:Collection/EnemyShips' not found. Lua error in package.lua at line 80: module 'Module:Collection/EnemyShips' not found. Lua error in package.lua at line 80: module 'Module:Collection/EnemyShips' not found. Lua error in package.lua at line 80: module 'Module:Collection/EnemyShips' not found. Lua error in package.lua at line 80: module 'Module:Collection/EnemyShips' not found. Lua error in package.lua at line 80: module 'Module:Collection/EnemyShips' not found. Lua error in package.lua at line 80: module 'Module:Collection/EnemyShips' not found. Lua error in package.lua at line 80: module 'Module:Collection/EnemyShips' not found. Lua error in package.lua at line 80: module 'Module:Collection/EnemyShips' not found. Lua error in package.lua at line 80: module 'Module:Collection/EnemyShips' not found. Lua error in package.lua at line 80: module 'Module:Collection/EnemyShips' not found. Lua error in package.lua at line 80: module 'Module:Collection/EnemyShips' not found. Lua error in package.lua at line 80: module 'Module:Collection/EnemyShips' not found.
Lua error in package.lua at line 80: module 'Module:Collection/EnemyShips' not found. Lua error in package.lua at line 80: module 'Module:Collection/EnemyShips' not found. Lua error in package.lua at line 80: module 'Module:Collection/EnemyShips' not found. Lua error in package.lua at line 80: module 'Module:Collection/EnemyShips' not found. Lua error in package.lua at line 80: module 'Module:Collection/EnemyShips' not found. Lua error in package.lua at line 80: module 'Module:Collection/EnemyShips' not found. Lua error in package.lua at line 80: module 'Module:Collection/EnemyShips' not found. Lua error in package.lua at line 80: module 'Module:Collection/EnemyShips' not found. Lua error in package.lua at line 80: module 'Module:Collection/EnemyShips' not found. Lua error in package.lua at line 80: module 'Module:Collection/EnemyShips' not found. Lua error in package.lua at line 80: module 'Module:Collection/EnemyShips' not found. Lua error in package.lua at line 80: module 'Module:Collection/EnemyShips' not found. Lua error in package.lua at line 80: module 'Module:Collection/EnemyShips' not found. Lua error in package.lua at line 80: module 'Module:Collection/EnemyShips' not found. Lua error in package.lua at line 80: module 'Module:Collection/EnemyShips' not found.