m (→TP Bar Depleting: wordiness) Tag: sourceedit |
がか (Message Wall | contribs) mNo edit summary |
||
| (32 intermediate revisions by 14 users not shown) | |||
| Line 19: | Line 19: | ||
|image = Fall_2015_E5_Banner.png |
|image = Fall_2015_E5_Banner.png |
||
|label1 = Mechanics |
|label1 = Mechanics |
||
| + | |value1 = [[Event#Ship_Locking|Ship locking]] (orange/green)<br/>[[Events#Debuffing_Mechanism|Debuffing Mechanism]]<br/>[[Fall_2015_Event/Info#New_mechanic:_Transport_off-load_Gauge|Transport off-load Gauge]]<br/>[[Event#Manual_Node_Selection|Node Selection]]<br/>[[Event#LoS_Check|LoS Check]]<br/>[[PT Imp Pack]]<br/>[[Fall_2015_Event/Info#Map_HP_dependent_on_HQ_level|HQ dependent Map HP]] |
||
| − | |value1 = |
||
| − | [[Event#Ship_Locking|Ship locking]] (orange/green)<br/> |
||
| − | [[Events#Debuffing_Mechanism|Debuffing Mechanism]]<br/> |
||
| − | [[Fall_2015_Event#Special_Mechanics|Transport off-load Gauge]]<br/> |
||
| − | [[Event#Manual_Node_Selection|Node Selection]]<br/> |
||
| − | [[Event#LoS_Check|LoS Check]]<br/> |
||
| − | [[PT Imp Pack]] |
||
|label2 = Boss gauge |
|label2 = Boss gauge |
||
| − | |value2 = Easy: 120 TP / 720 HP<br>Medium: 240 TP / 1000 HP<br>Hard: 360 TP / 1060 HP |
+ | |value2 = Easy: 120 TP / 720 HP<br>Medium: 240 TP / 1000 HP<br>Hard: 360 TP / 1060 HP<br>See also [[Fall_2015_Event/Info#Map_HP_dependent_on_HQ_level|this]] table |
|label3 = Kills required<br>(second gauge) |
|label3 = Kills required<br>(second gauge) |
||
|value3 = |
|value3 = |
||
| Line 45: | Line 39: | ||
<span style="color:#f00;">If you see long colored boxes and not round nodes, clear your cache to see the updated styles.</span> |
<span style="color:#f00;">If you see long colored boxes and not round nodes, clear your cache to see the updated styles.</span> |
||
* '''[[Sendai]], [[Kawakaze]], [[Shigure]], 1 CLT, 2 DD''' |
* '''[[Sendai]], [[Kawakaze]], [[Shigure]], 1 CLT, 2 DD''' |
||
| + | |||
<div style="padding:0px 0px 0px 50px;">{{Route |
<div style="padding:0px 0px 0px 50px;">{{Route |
||
|A|#777777; |
|A|#777777; |
||
| Line 56: | Line 51: | ||
* Only '''[[Shigure]]''' |
* Only '''[[Shigure]]''' |
||
| + | |||
<div style="padding:0px 0px 0px 50px;">{{Route |
<div style="padding:0px 0px 0px 50px;">{{Route |
||
|A|#777777; |
|A|#777777; |
||
| Line 66: | Line 62: | ||
|N|#FF0000; |
|N|#FF0000; |
||
}}</div> |
}}</div> |
||
| + | |||
* Only '''[[Sendai]]''' and '''[[Shigure]] OR''' '''[[Shigure]] '''and''' [[Kawakaze]]''' |
* Only '''[[Sendai]]''' and '''[[Shigure]] OR''' '''[[Shigure]] '''and''' [[Kawakaze]]''' |
||
| + | |||
<div style="padding:0px 0px 0px 50px;">{{Route |
<div style="padding:0px 0px 0px 50px;">{{Route |
||
|A|#777777; |
|A|#777777; |
||
| Line 77: | Line 75: | ||
|N|#FF0000; |
|N|#FF0000; |
||
}}</div> |
}}</div> |
||
| + | |||
* LoS check preboss when the gauge becomes red |
* LoS check preboss when the gauge becomes red |
||
| − | * 15 eLoS is enough for |
+ | * 15 eLoS {{cite}} is enough to guarantee 100% boss routing for Hard mode. With lower values than the threshold, deadend node M routing is possible at rates dependent on eLoS. |
| ⚫ | |||
===Tips=== |
===Tips=== |
||
| Line 85: | Line 85: | ||
===='''Fleet composition'''==== |
===='''Fleet composition'''==== |
||
| − | * For the branching at '''A C G J K L N''', the '''CLT''' can be replaced with '''CAV'''<ref>[https://www.facebook.com/oniisamasasuga/posts/1672747176275650 @oniisamasasuga on Facebook]</ref> |
+ | * For the branching at '''A C G J K L N''', the '''CLT''' can be replaced with '''CAV'''<ref name='onsFB'>[https://www.facebook.com/oniisamasasuga/posts/1672747176275650 @oniisamasasuga on Facebook]</ref> |
** Equip seaplane for LoS boost |
** Equip seaplane for LoS boost |
||
| − | ** Equip sanshiki for bonus against PT imp |
||
** Equip CA with 20.3(2) or similar strong variants |
** Equip CA with 20.3(2) or similar strong variants |
||
| Line 93: | Line 92: | ||
Defeating a certain amount of PT Imp Packs within the Map will weaken the Boss: Destroyer Water Demon. |
Defeating a certain amount of PT Imp Packs within the Map will weaken the Boss: Destroyer Water Demon. |
||
*[[#Gallery|The boss' voice and appearance changes after the weakening]] |
*[[#Gallery|The boss' voice and appearance changes after the weakening]] |
||
| − | '''During |
+ | '''During Boss-HP Depletion Stage:''' |
| − | *Sinking at least 30 [[PT Imp Pack]]s total within the Map in node H or L will weaken the Boss |
+ | * Sinking at least '''30''' [[PT Imp Pack]]s total within the Map in node H or L will weaken the Boss in TP-Bar phase{{cite}} |
| + | ** Other sources claim TP-Bar phase cannot be debuffed at all |
||
| − | '''During Boss HP Bar Depletion Stage:''' |
||
| − | * Sinking at least 15 [[PT Imp Pack]]s total within the Map in node H or L will weaken the Boss |
+ | * Sinking at least '''15''' [[PT Imp Pack]]s total within the Map in node H or L will weaken the Boss in HP-Bar phase |
| + | <!--Sources: Fujihita, Hayashi H. Wikiwiki claims it is 20, but given how frequently they have been completely wrong this event, we can ignore the Wikiwiki claim. Debuff KC3 screenshot: http://imgur.com/a/UhfA1; debuffed boss screenshots: http://i.imgur.com/R3KV2XG.png; http://i.imgur.com/SbQdUQI.png--> |
||
| ⚫ | |||
'''Other Notes to take on Debuffing''': |
'''Other Notes to take on Debuffing''': |
||
* Node H is the fastest and the most recommended node to defeat several PT Imp Packs easily. |
* Node H is the fastest and the most recommended node to defeat several PT Imp Packs easily. |
||
| − | * Recommended to use |
+ | * Recommended to use any two of the branching ships in the fleet to go '''A C E H''' and then retreat. |
| − | * The Debuffs between the TP-Bar and Boss HP Bar are SEPARATE. |
+ | * The Debuffs between the TP-Bar and Boss HP Bar are SEPARATE.{{cite}} |
| − | * If you have debuffed the boss during the TP-Bar stage, this will RESET once you enter the Boss HP Bar Depletion stage. |
||
| − | * You must sink the [[PT Imp Pack]]s during each stage separately for the debuff to take effect again. |
||
* Always remember generally the Debuff will reset at 5:00 AM JST. |
* Always remember generally the Debuff will reset at 5:00 AM JST. |
||
| + | * Unconfirmed report about no. of PT needed to debuff vary according to difficulty. |
||
==== TP Bar Depleting==== |
==== TP Bar Depleting==== |
||
* It is recommended to bring a CAV as they can equip Drum Canisters. |
* It is recommended to bring a CAV as they can equip Drum Canisters. |
||
** Although not required, you may try bringing at least 3 to 4 Drum Canisters to quickly deplete the TP Bar Gauge. |
** Although not required, you may try bringing at least 3 to 4 Drum Canisters to quickly deplete the TP Bar Gauge. |
||
| − | * LoS requirement does not until the appearance of the boss gauge. |
+ | * LoS requirement does not apply until the appearance of the boss gauge.{{cite}} |
* TP gauge does not reset |
* TP gauge does not reset |
||
| Line 117: | Line 115: | ||
==== '''General'''==== |
==== '''General'''==== |
||
| − | *For those having trouble sinking [[PT Imp Pack]], you can use: |
+ | *For those having trouble sinking [[PT Imp Pack]], you can use: |
| − | ** [[Type 3 Shell]] ( |
+ | ** [[Type 3 Shell]] (for CAs or other ships that can carry it)<ref name='onsFB'/>{{cite}} |
| − | ** [[12cm 30-tube Rocket Launcher]] on DDs |
+ | ** [[12cm 30-tube Rocket Launcher]] on DDs<ref name='onsFB'/>{{cite}} |
| − | ** Secondary guns (yellow) on your CL(T) |
+ | ** Secondary guns (yellow) on your CL(T)s |
| + | ** [[Type 98 Reconnaissance Seaplane (Night Recon)]] for Night Battle nodes; it has no effect in any other nodes unless Air Superiority or higher is granted (with a CAV). |
||
| − | + | * You may choose to use Support Expeditions for the Boss Node to get S Rank Victories more consistently. |
|
| − | + | ** Use of Aerial Support Expedition is viable for the Boss Node on lower difficulties as other than the Boss, the node doesn't have many heavy ships. |
|
| − | *** A recommended support fleet is 4cvls+2dds, bring 2 to 3 '''blue planes''' on cvls since damage of Aerial Support is different from Support shelling. And fulfill the rest of the slots with radars, be mindful that accuracy bonus for anti-air radar is halved for support expedition. |
||
| + | *** A recommended airstrike support fleet is 4 CVLs + 2DDs |
||
| ⚫ | |||
| + | *** Sparkling the flagship DD will virtually guarantee full trigger rate on boss. Sparkling carriers has little effect or no effect as morale has no effect on airstrikes. The DDs do not participate in airstrike support and thus any DD can be used.{{cite}} |
||
| ⚫ | |||
| + | *** Airstrike support is not recommended on Hard Final due to the higher survivability of Late Model Elite DDs. |
||
| + | ** On Hard Final, shelling support with 2 CAs + 2 DDs + 2 CVLs will deal sufficient damage to sink the DDs; airstrike support may fail to get kills as the Contact mechanic is unavailable to airstrike support expeditions. |
||
==== '''Trivia'''==== |
==== '''Trivia'''==== |
||
| Line 141: | Line 143: | ||
==Drop list== |
==Drop list== |
||
| − | |||
| − | <div style="width:96%; border:2px solid #aa5; background:#ffc; text-align:left; margin:15px auto 20px;"> |
||
| − | {| width="100%" |
||
| − | |For editors |
||
| − | |- |
||
| − | | |
||
| − | *See [[Template:DropList]] documentation for ship drop markup |
||
| − | |} |
||
| − | </div> |
||
| − | |||
| − | <span style="font-weight:normal;">Red ship names indicate notable drops.</span> |
||
| − | |||
| − | Click the small arrow next to the header cells on the first row to sort by ship types/names (Type/Ship) or group drops in that particular node together according to ship drop difficulty (A, B, C, etc.). You also can [[Wikipedia:Help:Sorting#Secondary_key|multi-sort]]. |
||
{{DropList |
{{DropList |
||
|nodes = B, D, F, G, H, I, J, L, N |
|nodes = B, D, F, G, H, I, J, L, N |
||
| Line 170: | Line 159: | ||
|Yahagi: N/Easy |
|Yahagi: N/Easy |
||
}} |
}} |
||
| − | Kawakaze, Arashi, Nowaki, Maikaze, Tanikaze drop in N node A Rank. |
+ | Kawakaze, Arashi, Nowaki, Maikaze, Tanikaze, Hamakaze drop in N node A Rank. |
{{:Fall 2015 Event/E-5/Enemy patterns}} |
{{:Fall 2015 Event/E-5/Enemy patterns}} |
||
[[Category:Events]] |
[[Category:Events]] |
||
Latest revision as of 00:13, 22 April 2018
Information
To enter the map, you need to have a CL flagship plus min. one DD, and at most CL + 4 DD + X. X can only be CA, CAV, CT, CLT, CL or DD.
|
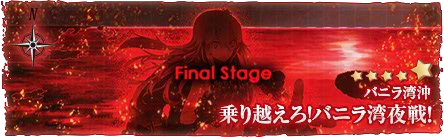
Overcome! Nightbattle of Vanilla Gulf! 乗り越えろ!バニラ湾夜戦! | |
 | |
| Title | |
| English | Overcome! Nightbattle of Vanilla Gulf! |
| Japanese | 乗り越えろ!バニラ湾夜戦! |
| Romaji | Norikoero! Vanilla-wan yasen! |
| Information | |
| Mechanics | Ship locking (orange/green) Debuffing Mechanism Transport off-load Gauge Node Selection LoS Check PT Imp Pack HQ dependent Map HP |
| Boss gauge | Easy: 120 TP / 720 HP Medium: 240 TP / 1000 HP Hard: 360 TP / 1060 HP See also this table |
| Kills required (second gauge) |
Easy: 3 kills (255 HP) Normal: 4 kills (255 HP) |
| Reward | Easy:  x1 x1Normal: |

Branching rules
If you see long colored boxes and not round nodes, clear your cache to see the updated styles.
- Only Shigure
- LoS check preboss when the gauge becomes red
- 15 eLoS [citation needed] is enough to guarantee 100% boss routing for Hard mode. With lower values than the threshold, deadend node M routing is possible at rates dependent on eLoS.
- wikiwiki give around 9
Tips
AS Values
- Anything above zero will result in Air Supremacy.
Fleet composition
- For the branching at A C G J K L N, the CLT can be replaced with CAV[1]
- Equip seaplane for LoS boost
- Equip CA with 20.3(2) or similar strong variants
Debuffing/Weakening
Defeating a certain amount of PT Imp Packs within the Map will weaken the Boss: Destroyer Water Demon.
During Boss-HP Depletion Stage:
- Sinking at least 30 PT Imp Packs total within the Map in node H or L will weaken the Boss in TP-Bar phase[citation needed]
- Other sources claim TP-Bar phase cannot be debuffed at all
- Sinking at least 15 PT Imp Packs total within the Map in node H or L will weaken the Boss in HP-Bar phase
Other Notes to take on Debuffing:
- Node H is the fastest and the most recommended node to defeat several PT Imp Packs easily.
- Recommended to use any two of the branching ships in the fleet to go A C E H and then retreat.
- The Debuffs between the TP-Bar and Boss HP Bar are SEPARATE.[citation needed]
- Always remember generally the Debuff will reset at 5:00 AM JST.
- Unconfirmed report about no. of PT needed to debuff vary according to difficulty.
TP Bar Depleting
- It is recommended to bring a CAV as they can equip Drum Canisters.
- Although not required, you may try bringing at least 3 to 4 Drum Canisters to quickly deplete the TP Bar Gauge.
- LoS requirement does not apply until the appearance of the boss gauge.[citation needed]
- TP gauge does not reset
Nodes
- I, J and L are Night Battle nodes
- H and L have Enemy patterns that can include PT Imp Packs.
General
- For those having trouble sinking PT Imp Pack, you can use:
- Type 3 Shell (for CAs or other ships that can carry it)[1][citation needed]
- 12cm 30-tube Rocket Launcher on DDs[1][citation needed]
- Secondary guns (yellow) on your CL(T)s
- Type 98 Reconnaissance Seaplane (Night Recon) for Night Battle nodes; it has no effect in any other nodes unless Air Superiority or higher is granted (with a CAV).
- You may choose to use Support Expeditions for the Boss Node to get S Rank Victories more consistently.
- Use of Aerial Support Expedition is viable for the Boss Node on lower difficulties as other than the Boss, the node doesn't have many heavy ships.
- A recommended airstrike support fleet is 4 CVLs + 2DDs
- Sparkling the flagship DD will virtually guarantee full trigger rate on boss. Sparkling carriers has little effect or no effect as morale has no effect on airstrikes. The DDs do not participate in airstrike support and thus any DD can be used.[citation needed]
- For more information about Aerial support damage calculation, see here (Japanese).
- Airstrike support is not recommended on Hard Final due to the higher survivability of Late Model Elite DDs.
- On Hard Final, shelling support with 2 CAs + 2 DDs + 2 CVLs will deal sufficient damage to sink the DDs; airstrike support may fail to get kills as the Contact mechanic is unavailable to airstrike support expeditions.
- Use of Aerial Support Expedition is viable for the Boss Node on lower difficulties as other than the Boss, the node doesn't have many heavy ships.
Trivia
- This map is based on the Battle of Vella Gulf
- Order of Battle - Battle of Vella Gulf
Gallery
")
References
Drop list
| Type | Ship? | B | D | F | G | H | I | J | L | N |
|---|---|---|---|---|---|---|---|---|---|---|
| CL | Agano | Easy+ | ||||||||
| DD | Arashi | Easy+ | ||||||||
| DD | Harusame | Easy+ | Easy+ | |||||||
| DD | Kawakaze | Easy+ | Easy+ | Easy+ | ||||||
| DD | Maikaze | Easy+ | ||||||||
| SS | Maruyu | Easy+ | ||||||||
| CA | Mikuma | Easy+ | ||||||||
| CL | Noshiro | Easy+ | ||||||||
| DD | Nowaki | Easy+ | Easy+ | Easy+ | ||||||
| CL | Sakawa | Easy+ | ||||||||
| DD | Tanikaze | Easy+ | ||||||||
| CL | Yahagi | Easy+ |
Kawakaze, Arashi, Nowaki, Maikaze, Tanikaze, Hamakaze drop in N node A Rank.
E-5 enemy patterns
- All fleets marked with * next to the node name are sourced from Poi-Statistics only, and are probably correct.
- All fleets with no symbol marks are confirmed either with an API source, screenshot source or two independent sources, and are guaranteed to be correct.
To increase the accuracy of symbol-marked fleets, please submit the relevant screenshots to this thread.

![]()
![]()
![]()
![]()
![]()
![]()
![]()
![]()
![]()
![]()
![]()
![]()
![]()
![]()
Lua error in package.lua at line 80: module 'Module:Collection/EnemyShips' not found.
Lua error in package.lua at line 80: module 'Module:Collection/EnemyShips' not found.
Lua error in package.lua at line 80: module 'Module:Collection/EnemyShips' not found.Lua error in package.lua at line 80: module 'Module:Collection/EnemyShips' not found.
Lua error in package.lua at line 80: module 'Module:Collection/EnemyShips' not found.
Lua error in package.lua at line 80: module 'Module:Collection/EnemyShips' not found.
Lua error in package.lua at line 80: module 'Module:Collection/EnemyShips' not found.-
Lua error in package.lua at line 80: module 'Module:Collection/EnemyShips' not found.
Lua error in package.lua at line 80: module 'Module:Collection/EnemyShips' not found.
Lua error in package.lua at line 80: module 'Module:Collection/EnemyShips' not found.
Lua error in package.lua at line 80: module 'Module:Collection/EnemyShips' not found.
Lua error in package.lua at line 80: module 'Module:Collection/EnemyShips' not found.
Lua error in package.lua at line 80: module 'Module:Collection/EnemyShips' not found.
![]()
![]()
![]()
![]()
![]()
![]()
![]()
![]()
![]()
![]()
![]()
![]()
![]()
![]()
Lua error in package.lua at line 80: module 'Module:Collection/EnemyShips' not found.
Lua error in package.lua at line 80: module 'Module:Collection/EnemyShips' not found.
Lua error in package.lua at line 80: module 'Module:Collection/EnemyShips' not found.
Lua error in package.lua at line 80: module 'Module:Collection/EnemyShips' not found.
Lua error in package.lua at line 80: module 'Module:Collection/EnemyShips' not found.
Lua error in package.lua at line 80: module 'Module:Collection/EnemyShips' not found.
Lua error in package.lua at line 80: module 'Module:Collection/EnemyShips' not found.
Lua error in package.lua at line 80: module 'Module:Collection/EnemyShips' not found.
Lua error in package.lua at line 80: module 'Module:Collection/EnemyShips' not found.
Lua error in package.lua at line 80: module 'Module:Collection/EnemyShips' not found.
Lua error in package.lua at line 80: module 'Module:Collection/EnemyShips' not found.
Lua error in package.lua at line 80: module 'Module:Collection/EnemyShips' not found.
Lua error in package.lua at line 80: module 'Module:Collection/EnemyShips' not found.
![]()
![]()
![]()
![]()
![]()
![]()
![]()
![]()
![]()
![]()
![]()
![]()
![]()
![]()
Lua error in package.lua at line 80: module 'Module:Collection/EnemyShips' not found.
Lua error in package.lua at line 80: module 'Module:Collection/EnemyShips' not found.
Lua error in package.lua at line 80: module 'Module:Collection/EnemyShips' not found.
Lua error in package.lua at line 80: module 'Module:Collection/EnemyShips' not found.
Lua error in package.lua at line 80: module 'Module:Collection/EnemyShips' not found.
Lua error in package.lua at line 80: module 'Module:Collection/EnemyShips' not found.
Lua error in package.lua at line 80: module 'Module:Collection/EnemyShips' not found.
Lua error in package.lua at line 80: module 'Module:Collection/EnemyShips' not found.
Lua error in package.lua at line 80: module 'Module:Collection/EnemyShips' not found.
Lua error in package.lua at line 80: module 'Module:Collection/EnemyShips' not found.
Lua error in package.lua at line 80: module 'Module:Collection/EnemyShips' not found.
Lua error in package.lua at line 80: module 'Module:Collection/EnemyShips' not found.
Lua error in package.lua at line 80: module 'Module:Collection/EnemyShips' not found.