InformationEdit
|
Operation 'Reclaim the Strait'
海峡奪還作戦 | |
 | |
 | |
| Information | |
| Boss gauge (HQ 120) |
Casual: 200 TP + 2300 HP Easy: 200 TP + 2300 HP Medium: 210 TP + 2600 HP Hard: 300 TP + 3000 HP |
| Rewards | |
|
Casual:
 1 1 1 1 2 2Easy:
 1222 1222Medium:
 1222 1222 1 1Hard:
13331 1 1 | |
| Branching Rules | ||
|---|---|---|
| Nodes | Rules | |
| Start | 1 |
|
2 |
| |
A |
B |
|
C |
| |
D |
F |
|
J |
| |
F |
E |
|
G | ||
G |
H |
|
I |
| |
K |
M |
|
N |
| |
M |
L |
|
O |
| |
Possible Warning
- These info are still pending. It is quite certain that Chikuma, Akagi, Kasumi, Souryuu, and Hiryuu have historical boosts on E-3. For every other possible historical ships, check the E-3 tab first; it is recommended that you avoid using them here if doing Medium or Hard Mode.


Map Guide
This is a single fleet map. This map is separated into two phase: TP and HP
- Transport phase's (TP) gauge can be depleted by reaching the boss node and obtaining at least A-rank; you DO NOT need to sink the boss
- Bring drums
 and/or daihatsu on ships that can carry them; for more info, see Mechanics under "Transport Load-Off".
- Despite this phase being more flexible in allowed ships, it is recommend that you go slow and steady for this phase. Fleet composition below and branching rules above can help in planning.
- 1 LBAS can be used.
- There are no carriers presented in this phase. You can go full bomber on boss node.
- A submarine can escort the surface fleet at node D. An OASW ship can be used to help in this issue; ignoring it is possible. You will also meet it in HP phase.
- Do not worry about node J; it does not exist in this phase.
- There is a LOS check from G -> I
- Exact value unknown
- LOS = 13 (e33) passes the check
- LOS = 10.5 (e33) fails the check
- Bring drums
- Once you deplete the TP bar, the 2nd boss along with her route and gauge will be revealed. You will start from a new starting position.
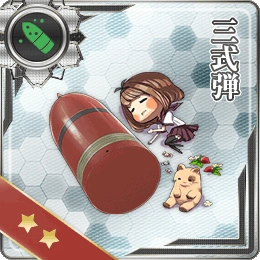
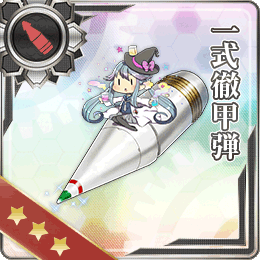
- The boss is an installation type; along with Airfield Princess, Type 3 Shell (Sanshiki, T3-Shell) is needed in order to damage them effectively. It is recommended that you equip your CAs with it. If you bring BB, you can choose between T3 or AP Shells. AP shell will be effective against your new nightmare, Artillery Imp; it is also weak against WG42, Daihatsu variants but sadly not Type 3 Shell. Luckily, it is not presented in casual difficulty.
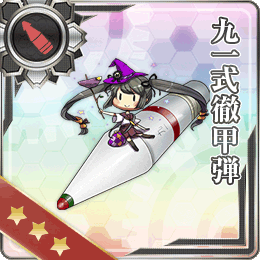
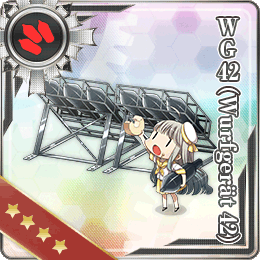
- For CL/DDs, it is possible to equip them with WG42, which you should have one if you did E-1 at least on Easy; there is no way to craft it. Additionally, some of them can carry Daihatsu variants too (see below). Fortunately, except Daihatsu Landing Craft and AP Shells, these equipment are also useful against the boss
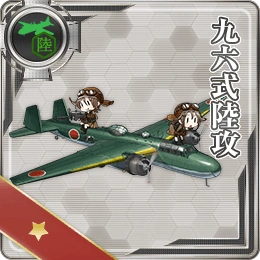
- You only need a range of 4 for your LBAS for the boss. Land-based Attack Aircraft (LBAA), will be effective against the boss and Artillery Imp. Type 96 Land-based Attack Aircraft and Type 3 Shell are both craftable. If you do not have any LBAA at all, dive bombers have bonus damage and are more effective against them than torpedo bombers; all of them have enough range to reach the boss. You can opt for 3 bombers 1 fighter to reduce some air power or full bombers.
- The boss is an installation type; along with Airfield Princess, Type 3 Shell


DD/CL Daihatsu/Tank Carriers
NOTE: Kuroshio Kai Ni and Shiratsuyu Kai Ni cannot carry Daihatsu Landing Craft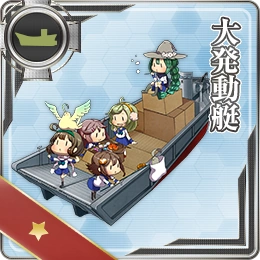 nor Daihatsu Landing Craft (Type 89 Medium Tank & Landing Force)
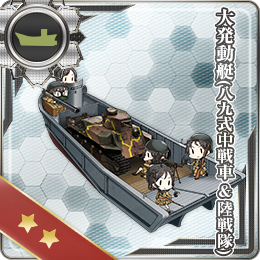 , only Special Type 2 Amphibious Tank
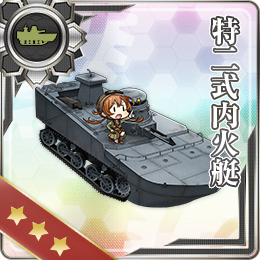 . All other DD/CL can at least carry Daihatsu Landing Craft.


| Ships that can equip Tanks | |||||
|---|---|---|---|---|---|
| Ship | 
|

|
Ship |
|
|
| Destroyer (DD) | |||||
| Yes | Yes | Yes | Yes | ||
| Yes | Yes | Yes | Yes | ||
| Yes | Yes | Yes | Yes | ||
| Yes | Yes | Yes | Yes | ||
| Yes | Yes | Yes | Yes | ||
| Yes | No | Yes | No | ||
| Yes | No | Yes | No | ||
| Yes | No | Yes | No | ||
| Yes | No | ||||
| No | Yes | No | Yes | ||
| No | Yes | No | Yes | ||
| No | Yes | No | Yes | ||
| Light Cruiser (CL) | |||||
| Yes | Yes | Yes | Yes | ||
| Yes | Yes | Yes | Yes | ||
| Yes | Yes | Yes | Yes | ||
| Yes | Yes | Yes | No | ||
| No | Yes | No | Yes | ||
| Aviation Cruiser (CAV) | |||||
| Yes | Yes | ||||
| Battleship (BB) | |||||
| Yes | Yes | No | Yes | ||
| Seaplane Tender (AV) | |||||
| Yes | Yes | Yes | Yes | ||
| Yes | Yes | Yes | Yes | ||
| Yes | Yes | Yes | Yes | ||
| Yes | No | Yes | Yes | ||
| Fleet Oiler (AO) | |||||
| Yes | Yes | Yes | Yes | ||
| Amphibious Assault Ship (LHA) | |||||
| Yes | Yes | Yes | Yes | ||
| Ship |
|
|
Ship |
|
|
| [Edit] | |||||
Compositions
Note: For both phases, ≥2 DD is required. Surprisingly, speed is irrelevant in both
- TP Phase
- A C D F G I
- 0-1 CL 2-4 DD 2-3 CA(V)
- Having 3 CA(V) will be better for HP phase than 2 CA(V) + 1CL.
- 2 DD 1 CAV 1 CA(V) + 1 fBB or 1 CA(V) + 1 CVL or 1 CA(V)
- This composition is strong while ignoring node B. It must be fBB and CVL (see branching rules). If you have CAV, fBB, CVL...and/or CV(L/B) (see below) to spare, this composition is recommended.
- For the reason why BBV is not recommended, see the branching rules from D to F
- 0-1 CL 2-4 DD 2-3 CA(V)
- A C D F G I
- HP Phase
- D F E K M O
- 0-1 CL 2-4 DD 2-3 CA(V)
- Same fleet from TP phase can be used
- 2DD 1CAV + 1 CV(L/B) or 1 CA(V) + 1fBB or 1 CA(V) + 1CV(L) or 1 CA(V)
- Replacing all CV(L/B) and fBB is possible. If kept, the 1 CAV is specific as you cannot have more than 3 (CA + f(BB)v + CV(L/B)); CAV does not count in this. If you are also replacing 1CVL because they are attacking submarine at D, keep in mind that (F)BB(V)+CV(B) ≤ 2 if you wish to route to M. CL is allowed if you wanted.
- For the reason why BBV is not recommended, see the branching rules from D to F
- 0-1 CL 2-4 DD 2-3 CA(V)
- D F E K M O
- Addendum:
- Avoid using European (possibly all foreign ships) for now. They might be needed for E-4 and E-5.phase.
- Also, avoid using historical ships needed for E-3 due to their potential bonus.
Map progression
")
")
LBAS Flight Range

If in doubt, use tooltips to check sample sizes.
Enemy patterns

Lua error in package.lua at line 80: module 'Module:Collection/EnemyShips' not found. Lua error in package.lua at line 80: module 'Module:Collection/EnemyShips' not found. Lua error in package.lua at line 80: module 'Module:Collection/EnemyShips' not found. Lua error in package.lua at line 80: module 'Module:Collection/EnemyShips' not found. Lua error in package.lua at line 80: module 'Module:Collection/EnemyShips' not found. Lua error in package.lua at line 80: module 'Module:Collection/EnemyShips' not found. Lua error in package.lua at line 80: module 'Module:Collection/EnemyShips' not found. Lua error in package.lua at line 80: module 'Module:Collection/EnemyShips' not found. Lua error in package.lua at line 80: module 'Module:Collection/EnemyShips' not found.
Lua error in package.lua at line 80: module 'Module:Collection/EnemyShips' not found. Lua error in package.lua at line 80: module 'Module:Collection/EnemyShips' not found. Lua error in package.lua at line 80: module 'Module:Collection/EnemyShips' not found. Lua error in package.lua at line 80: module 'Module:Collection/EnemyShips' not found. Lua error in package.lua at line 80: module 'Module:Collection/EnemyShips' not found. Lua error in package.lua at line 80: module 'Module:Collection/EnemyShips' not found. Lua error in package.lua at line 80: module 'Module:Collection/EnemyShips' not found. Lua error in package.lua at line 80: module 'Module:Collection/EnemyShips' not found. Lua error in package.lua at line 80: module 'Module:Collection/EnemyShips' not found.
Lua error in package.lua at line 80: module 'Module:Collection/EnemyShips' not found. Lua error in package.lua at line 80: module 'Module:Collection/EnemyShips' not found. Lua error in package.lua at line 80: module 'Module:Collection/EnemyShips' not found. Lua error in package.lua at line 80: module 'Module:Collection/EnemyShips' not found. Lua error in package.lua at line 80: module 'Module:Collection/EnemyShips' not found. Lua error in package.lua at line 80: module 'Module:Collection/EnemyShips' not found. Lua error in package.lua at line 80: module 'Module:Collection/EnemyShips' not found. Lua error in package.lua at line 80: module 'Module:Collection/EnemyShips' not found. Lua error in package.lua at line 80: module 'Module:Collection/EnemyShips' not found.
Lua error in package.lua at line 80: module 'Module:Collection/EnemyShips' not found. Lua error in package.lua at line 80: module 'Module:Collection/EnemyShips' not found. Lua error in package.lua at line 80: module 'Module:Collection/EnemyShips' not found. Lua error in package.lua at line 80: module 'Module:Collection/EnemyShips' not found. Lua error in package.lua at line 80: module 'Module:Collection/EnemyShips' not found. Lua error in package.lua at line 80: module 'Module:Collection/EnemyShips' not found. Lua error in package.lua at line 80: module 'Module:Collection/EnemyShips' not found. Lua error in package.lua at line 80: module 'Module:Collection/EnemyShips' not found. Lua error in package.lua at line 80: module 'Module:Collection/EnemyShips' not found.