m (→Cruisers) |
m (→Battleships) |
||
| (13 intermediate revisions by 3 users not shown) | |||
| Line 5: | Line 5: | ||
|Missing Information = Fit Gun table for BB, updated information and sources, quantified effects |
|Missing Information = Fit Gun table for BB, updated information and sources, quantified effects |
||
|Page Adopted = Tsubakura |
|Page Adopted = Tsubakura |
||
| + | }}''See also: [https://www.reddit.com/r/kancolle/wiki/intermediate#wiki_fit-gun_bonus Fit gun bonus - Reddit intermediate players' guide]'' |
||
| − | }} |
||
| − | |||
| − | ''See also: [https://www.reddit.com/r/kancolle/wiki/intermediate#wiki_fit-gun_bonus Fit gun bonus - Reddit intermediate players' guide]'' |
||
==Fit Bonus and Overweight Penalty== |
==Fit Bonus and Overweight Penalty== |
||
| Line 35: | Line 33: | ||
Battleships receives accuracy bonuses if the guns are fit and accuracy penalties if its overweight<ref>https://twitter.com/KanColle_STAFF/status/493648336142876674</ref>. How much bonus/penalty a ship receives, depends on the battleship class, the caliber and type of the gun and whether the battle takes place during day or night. |
Battleships receives accuracy bonuses if the guns are fit and accuracy penalties if its overweight<ref>https://twitter.com/KanColle_STAFF/status/493648336142876674</ref>. How much bonus/penalty a ship receives, depends on the battleship class, the caliber and type of the gun and whether the battle takes place during day or night. |
||
{| class="wikitable typography-xl-optout" style="text-align:center" |
{| class="wikitable typography-xl-optout" style="text-align:center" |
||
| − | ! |
+ | !'''Ship Class''' |
| − | !colspan="2"|{{EquipmentLink|30.5cm Triple Gun Mount|text=30.5cm}}<br>{{EquipmentLink|30.5cm Triple Gun Mount Kai|text=30.5cmK}} |
+ | !colspan="2"|{{EquipmentLink|35.6cm Twin Gun Mount|text=35.6cm}}<br />{{EquipmentLink|Prototype 35.6cm Triple Gun Mount|text=P35.6cm}}<br />{{EquipmentLink|35.6cm Twin Gun Mount (Dazzle Camouflage)|text=Dazzle}}<br />{{EquipmentLink|38cm Twin Gun Mount Kai|text=38cmK}}<br />{{EquipmentLink|30.5cm Triple Gun Mount|text=30.5cm}}<br />{{EquipmentLink|30.5cm Triple Gun Mount Kai|text=30.5cmK}}<br />{{EquipmentLink|38.1cm Mk.I Twin Gun Mount|text=38.1cm}}<br />{{EquipmentLink|38.1cm Mk.I/N Twin Gun Mount Kai|text=38.1cm/N}} |
| − | !colspan="2"|{{EquipmentLink| |
+ | !colspan="2"|{{EquipmentLink|38cm Quadruple Gun Mount|text=38cm四}}<br />{{EquipmentLink|38cm Quadruple Gun Mount Kai|text=38cmK四}} |
| − | !colspan="2"|{{EquipmentLink| |
+ | !colspan="2"|{{EquipmentLink|381mm/50 Triple Gun Mount|text=381mm}}<br />{{EquipmentLink|381mm/50 Triple Gun Mount Kai|text=381mmK}} |
| − | !colspan="2"|{{EquipmentLink| |
+ | !colspan="2"|{{EquipmentLink|41cm Twin Gun Mount|text=41cm}}<br />{{EquipmentLink|Prototype 41cm Triple Gun Mount|text=P41cm}}<br />{{EquipmentLink|41cm Triple Gun Mount Kai|text=41cmK}}<br />{{EquipmentLink|41cm Triple Gun Mount Kai Ni|text=41cmK2}} |
| − | !colspan="2"|{{EquipmentLink| |
+ | !colspan="2"|{{EquipmentLink|16inch Triple Gun Mount Mk.7|text=16inch}}<br />{{EquipmentLink|16inch Triple Gun Mount Mk.7 + GFCS|text=16inch + GFCS}} |
| − | !colspan="2"|{{EquipmentLink|16inch Triple Gun Mount |
+ | !colspan="2"|{{EquipmentLink|16inch Mk.I Triple Gun Mount|text=16inch Mk.I}} |
| + | !colspan="2"|{{EquipmentLink|16inch Mk.I Triple Gun Mount + AFCT Kai|text=16inch + <br /> AFCT Kai}} |
||
| + | !colspan="2"|{{EquipmentLink|16inch Mk.I Triple Gun Mount Kai + FCR Type 284|text=16inch Kai + <br />FCR Type 284}} |
||
!colspan="2"|{{EquipmentLink|Prototype 46cm Twin Gun Mount|text=P46cm}} |
!colspan="2"|{{EquipmentLink|Prototype 46cm Twin Gun Mount|text=P46cm}} |
||
!colspan="2"|{{EquipmentLink|46cm Triple Gun Mount|text=46cm}} |
!colspan="2"|{{EquipmentLink|46cm Triple Gun Mount|text=46cm}} |
||
!colspan="2"|{{EquipmentLink|46cm Triple Gun Mount Kai|text=46cmK}} |
!colspan="2"|{{EquipmentLink|46cm Triple Gun Mount Kai|text=46cmK}} |
||
| − | !colspan="2"|{{EquipmentLink|Prototype 51cm Twin Gun Mount|text=P51cm}}<br>{{EquipmentLink|51cm Twin Gun Mount|text=51cm}} |
+ | !colspan="2"|{{EquipmentLink|Prototype 51cm Twin Gun Mount|text=P51cm}}<br />{{EquipmentLink|51cm Twin Gun Mount|text=51cm}} |
|- |
|- |
||
| + | |{{ShipLink|Гангут|text=Гангут Class|link_class=Gangut}} |
||
| − | !Day |
||
| + | |style="background-color:#81C784" colspan="2"| +7 <br /> '''30.5cm:''' +10 |
||
| − | !Night |
||
| + | |colspan="2"|0 |
||
| − | !Day |
||
| + | |colspan="2"|0 |
||
| − | !Night |
||
| + | |style="background-color:#E57373" colspan="2"|-7 |
||
| − | !Day |
||
| + | |style="background-color:#FFCDD2" colspan="2"|-3 |
||
| − | !Night |
||
| + | |style="background-color:#E57373" colspan="2"|-10? |
||
| − | !Day |
||
| + | |style="background-color:#E57373" colspan="2"|?? |
||
| − | !Night |
||
| + | |style="background-color:#E57373" colspan="2"|?? |
||
| − | !Day |
||
| + | |style="background-color:#E57373" colspan="2"|-10 |
||
| − | !Night |
||
| + | |style="background-color:#E57373" colspan="2"|-18 |
||
| − | !Day |
||
| + | |style="background-color:#E57373" colspan="2"|?? |
||
| − | !Night |
||
| + | |style="background-color:#888888" colspan="2"|N/A |
||
| − | !Day |
||
| − | !Night |
||
| − | !Day |
||
| − | !Night |
||
| − | !Day |
||
| − | !Night |
||
| − | !Day |
||
| − | !Night |
||
|- |
|- |
||
|{{ShipLink|Kongou|Hiei|Kirishima|Haruna|text=Kongou Class|link_class=Kongou}} |
|{{ShipLink|Kongou|Hiei|Kirishima|Haruna|text=Kongou Class|link_class=Kongou}} |
||
| − | |style="background-color:#81C784" colspan=" |
+ | |style="background-color:#81C784" colspan="2"|+7 |
| − | |colspan="2"| |
+ | |colspan="2"|0 |
| − | |style="background-color:#FFCDD2" |
+ | |style="background-color:#FFCDD2" colspan="2"|-2 |
| + | |style="background-color:#EF9A9A" colspan="2"|-5 |
||
| − | |0 |
||
| − | |style="background-color:#EF9A9A" colspan="2"| |
+ | |style="background-color:#EF9A9A" colspan="2"|-5 |
| − | |style="background-color:#EF9A9A" colspan="2"| |
+ | |style="background-color:#EF9A9A" colspan="2"|-5 |
| − | |style="background-color:# |
+ | |style="background-color:#EF9A9A" colspan="2"|-6 |
| − | |style="background-color:# |
+ | |style="background-color:#FFCDD2" colspan="2"|-3 |
| − | |style="background-color:#E57373" colspan="2"| |
+ | |style="background-color:#E57373" colspan="2"|-7 |
| + | |style="background-color:#E57373" colspan="2"|-10 |
||
| + | |style="background-color:#E57373" colspan="2"|-10? |
||
|style="background-color:#888888" colspan="2"|N/A |
|style="background-color:#888888" colspan="2"|N/A |
||
|- |
|- |
||
|{{ShipLink|Bismarck|text=Bismarck Class|link_class=Bismarck}} |
|{{ShipLink|Bismarck|text=Bismarck Class|link_class=Bismarck}} |
||
| − | |style="background-color:#A5D6A7" colspan=" |
+ | |style="background-color:#A5D6A7" colspan="2"| +4 |
| − | |colspan="2"| |
+ | |colspan="2"|0 |
| − | |style="background-color:#C8E6C9"| + |
+ | |style="background-color:#C8E6C9" colspan="2"| +1 |
| + | |style="background-color:#EF9A9A" colspan="2"|-5 |
||
| − | |0 |
||
| − | |style="background-color:# |
+ | |style="background-color:#FFCDD2" colspan="2"|-5 |
| − | |style="background-color:# |
+ | |style="background-color:#EF9A9A" colspan="2"|-5 |
| − | |style="background-color:# |
+ | |style="background-color:#EF9A9A" colspan="2"|?? |
| − | |style="background-color:# |
+ | |style="background-color:#EF9A9A" colspan="2"|?? |
| − | |colspan="2"| |
+ | |style="background-color:#E57373" colspan="2"|-7 |
| + | |style="background-color:#E57373" colspan="2"|-10 |
||
| + | |style="background-color:#E57373" colspan="2"|?? |
||
|style="background-color:#888888" colspan="2"|N/A |
|style="background-color:#888888" colspan="2"|N/A |
||
|- |
|- |
||
| − | |{{ShipLink| |
+ | |{{ShipLink|Littorio|Roma|text=Vittorio Veneto Class|link_class=Vittorio Veneto}} |
| − | |style="background-color:#81C784" colspan="2"| +7 |
||
|style="background-color:#A5D6A7" colspan="2"| +4 |
|style="background-color:#A5D6A7" colspan="2"| +4 |
||
|colspan="2"|0 |
|colspan="2"|0 |
||
| + | |style="background-color:#C8E6C9" colspan="2"| +1 |
||
| − | |0 |
||
| + | |style="background-color:#EF9A9A" colspan="2"|-5 |
||
| − | |0 |
||
| − | |style="background-color:# |
+ | |style="background-color:#FFCDD2" colspan="2"|-5 |
| − | |style="background-color:# |
+ | |style="background-color:#EF9A9A" colspan="2"|-5 |
| − | |style="background-color:# |
+ | |style="background-color:#EF9A9A" colspan="2"|?? |
| − | |style="background-color:# |
+ | |style="background-color:#EF9A9A" colspan="2"|?? |
| − | |colspan="2"| |
+ | |style="background-color:#E57373" colspan="2"|-7 |
| + | |style="background-color:#E57373" colspan="2"|-10 |
||
| + | |style="background-color:#E57373" colspan="2"|?? |
||
|style="background-color:#888888" colspan="2"|N/A |
|style="background-color:#888888" colspan="2"|N/A |
||
|- |
|- |
||
|{{ShipLink|Richelieu|text=Richelieu Class|link_class=Richelieu}} |
|{{ShipLink|Richelieu|text=Richelieu Class|link_class=Richelieu}} |
||
| − | |style="background-color:#A5D6A7" colspan=" |
+ | |style="background-color:#A5D6A7" colspan="2"|+4 |
| − | |style="background-color:#A5D6A7" colspan="2"| |
+ | |style="background-color:#A5D6A7" colspan="2"|+5 |
| − | |style="background-color:#FFCDD2" |
+ | |style="background-color:#FFCDD2" colspan="2"|-2 |
| + | |style="background-color:#EF9A9A" colspan="2"|-5 |
||
| − | |0 |
||
| − | |style="background-color:#EF9A9A" colspan="2"| |
+ | |style="background-color:#EF9A9A" colspan="2"|-5 |
| − | |style="background-color:#E57373" colspan="2"| |
+ | |style="background-color:#E57373" colspan="2"|-7 |
| − | |style="background-color:#E57373" colspan="2"| |
+ | |style="background-color:#E57373" colspan="2"|-14? |
| − | |style="background-color:#E57373" colspan="2"| |
+ | |style="background-color:#E57373" colspan="2"|-8 |
| − | |colspan="2"| |
+ | |style="background-color:#E57373" colspan="2"|-7 |
| + | |style="background-color:#E57373" colspan="2"|-10 |
||
| + | |style="background-color:#E57373" colspan="2"|?? |
||
|style="background-color:#888888" colspan="2"|N/A |
|style="background-color:#888888" colspan="2"|N/A |
||
|- |
|- |
||
| − | |{{ShipLink| |
+ | |{{ShipLink|Iowa|text=Iowa Class|link_class=Iowa}} |
| − | |style="background-color:#A5D6A7" colspan=" |
+ | |style="background-color:#A5D6A7" colspan="2"|+4 |
| + | |colspan="2"|0 |
||
| + | |style="background-color:#FFCDD2" colspan="2"|-2 |
||
| + | |style="background-color:#EF9A9A" colspan="2"|-5 |
||
| + | |style="background-color:#A5D6A7" colspan="2"|0 <br /> '''Married:''' +5 |
||
|colspan="2"|?? |
|colspan="2"|?? |
||
| + | |colspan="2"|?? |
||
| − | |style="background-color:#C8E6C9"| +2 |
||
| + | |colspan="2"|?? |
||
| − | |0 |
||
| − | |style="background-color:#E57373" colspan="2"| |
+ | |style="background-color:#E57373" colspan="2"|-7 |
| − | |style="background-color:# |
+ | |style="background-color:#E57373" colspan="2"|-10 |
| − | |style="background-color:#E57373" colspan="2"| |
+ | |style="background-color:#E57373" colspan="2"|?? |
| − | |style="background-color:#E57373" colspan="2"| -10 |
||
| − | |colspan="2"|? |
||
|style="background-color:#888888" colspan="2"|N/A |
|style="background-color:#888888" colspan="2"|N/A |
||
|- |
|- |
||
| − | |{{ShipLink| |
+ | |{{ShipLink|Warspite|text=Queen Elizabeth Class|link=Warspite}} |
| − | |style="background-color:#A5D6A7" colspan=" |
+ | |style="background-color:#A5D6A7" colspan="2"|+6 <br /> '''38.1 cm:''' +8 |
|colspan="2"|?? |
|colspan="2"|?? |
||
| − | |style="background-color:# |
+ | |style="background-color:#C8E6C9" colspan="2"|+2 |
| + | |style="background-color:#C8E6C9" colspan="2"|+2 |
||
| − | |0 |
||
| − | |style="background-color:# |
+ | |style="background-color:#FFCDD2" colspan="2"|-2? |
| − | |style="background-color:#A5D6A7" colspan="2"| |
+ | |style="background-color:#A5D6A7" colspan="2"|+5 |
| − | |style="background-color:# |
+ | |style="background-color:#A5D6A7" colspan="2"|?? |
| − | |style="background-color:# |
+ | |style="background-color:#A5D6A7" colspan="2"|+4 |
| − | |colspan="2"| |
+ | |style="background-color:#FFCDD2" colspan="2"|-3 |
| + | |style="background-color:#E57373" colspan="2"|-10 |
||
| + | |style="background-color:#E57373" colspan="2"|?? |
||
|style="background-color:#888888" colspan="2"|N/A |
|style="background-color:#888888" colspan="2"|N/A |
||
|- |
|- |
||
| − | |{{ShipLink| |
+ | |{{ShipLink|Nelson|text=Nelson Class|link=Nelson}} |
| − | | |
+ | |colspan="2"|?? |
|colspan="2"|?? |
|colspan="2"|?? |
||
| − | |style="background-color:#C8E6C9"| +2 |
||
| − | |0 |
||
| − | |style="background-color:#C8E6C9" colspan="2"| +2 |
||
|colspan="2"|0 |
|colspan="2"|0 |
||
| − | |style="background-color:# |
+ | |style="background-color:#C8E6C9" colspan="2"| +3 |
| − | | |
+ | |colspan="2"|?? |
| − | |colspan="2"| |
+ | |colspan="2"|0 |
| − | | |
+ | |colspan="2"|?? |
| + | |colspan="2"|?? |
||
| − | |- |
||
| + | |colspan="2"| ?? |
||
| − | |{{ShipLink|Ise|Hyuuga|text=Ise Class (Base)|link_class=Ise}} |
||
| − | | |
+ | |colspan="2"| ?? |
|colspan="2"|?? |
|colspan="2"|?? |
||
| − | |style="background-color:#C8E6C9"| +2 |
||
| − | |0 |
||
| − | |style="background-color:#C8E6C9" colspan="2"| +2 |
||
| − | |style="background-color:#C8E6C9" colspan="2"| +2 |
||
| − | |style="background-color:#FFCDD2" colspan="2"| -3 |
||
| − | |style="background-color:#E57373" colspan="2"| -7 |
||
| − | |colspan="2"|? |
||
|style="background-color:#888888" colspan="2"|N/A |
|style="background-color:#888888" colspan="2"|N/A |
||
|- |
|- |
||
| − | |{{ShipLink|Fusou|Yamashiro|text=Fusou Class (Base) |
+ | |{{ShipLink|Ise|Hyuuga|Fusou|Yamashiro|text=Ise/Fusou Class (Base)}} |
| − | |style="background-color:#C8E6C9" colspan=" |
+ | |style="background-color:#C8E6C9" colspan="2"|+2 |
| + | |colspan="2"|0 |
||
| + | |style="background-color:#C8E6C9" colspan="2"|+2 |
||
| + | |style="background-color:#C8E6C9" colspan="2"|+2 |
||
| + | |style="background-color:#C8E6C9" colspan="2"|+2 |
||
| + | |style="background-color:#C8E6C9" colspan="2"|+3 |
||
|colspan="2"|?? |
|colspan="2"|?? |
||
| + | |colspan="2"|?? |
||
| − | |style="background-color:#C8E6C9"| +2 |
||
| + | |style="background-color:#FFCDD2" colspan="2"|-3 |
||
| − | |0 |
||
| − | |style="background-color:# |
+ | |style="background-color:#E57373" colspan="2"|-7 |
| − | |style="background-color:# |
+ | |style="background-color:#E57373" colspan="2"|?? |
| − | |style="background-color:#FFCDD2" colspan="2"| -3 |
||
| − | |style="background-color:#E57373" colspan="2"| -7 |
||
| − | |colspan="2"|? |
||
|style="background-color:#888888" colspan="2"|N/A |
|style="background-color:#888888" colspan="2"|N/A |
||
|- |
|- |
||
| − | |{{ShipLink|Ise|Hyuuga| |
+ | |{{ShipLink|Ise/Kai|Hyuuga/Kai|Fusou/Kai|Fusou/Kai Ni|Yamashiro/Kai|Yamashiro/Kai Ni|text=BBV-class}} |
| − | |style="background-color:#A5D6A7" colspan=" |
+ | |style="background-color:#A5D6A7" colspan="2"|+4 |
| − | |style="background-color:#FFCDD2" colspan="2"| -2 |
||
| − | |style="background-color:#C8E6C9"| +2 |
||
| − | |0 |
||
| − | |style="background-color:#C8E6C9" colspan="2"| +2 |
||
|colspan="2"|0 |
|colspan="2"|0 |
||
| − | |style="background-color:# |
+ | |style="background-color:#C8E6C9" colspan="2"|+2 |
| − | |style="background-color:# |
+ | |style="background-color:#C8E6C9" colspan="2"|+2 |
| + | |colspan="2"|0 |
||
| − | |style="background-color:#E57373" | -7 |
||
| + | |colspan="2"|0 |
||
| − | |style="background-color:#E57373" | -8 |
||
| − | | |
+ | |colspan="2"|?? |
| + | |colspan="2"|?? |
||
| + | |style="background-color:#FFCDD2" colspan="2"|-3 |
||
| + | |style="background-color:#E57373" colspan="2"|-7 |
||
| + | |style="background-color:#EF9A9A" colspan="2"|-4 |
||
|style="background-color:#888888" colspan="2"|N/A |
|style="background-color:#888888" colspan="2"|N/A |
||
|- |
|- |
||
| − | |{{ShipLink| |
+ | |{{ShipLink|Ise/Kai Ni|text=Ise-class (Kai Ni)}} |
| − | |style="background-color:#A5D6A7" colspan=" |
+ | |style="background-color:#A5D6A7" colspan="2"|+4 |
| − | |style="background-color:#FFCDD2" colspan="2"| -2 |
||
| − | |style="background-color:#C8E6C9"| +2 |
||
| − | |0 |
||
| − | |style="background-color:#C8E6C9" colspan="2"| +2 |
||
|colspan="2"|0 |
|colspan="2"|0 |
||
| + | |colspan="2"|?? |
||
| − | |style="background-color:#FFCDD2" | -3 |
||
| − | |style="background-color:# |
+ | |style="background-color:#C8E6C9" colspan="2"|+4? |
| + | |colspan="2"|?? |
||
| − | |style="background-color:#E57373" | -7 |
||
| + | |colspan="2"|?? |
||
| − | |style="background-color:#E57373" | -8 |
||
| − | | |
+ | |colspan="2"|?? |
| + | |style="background-color:#C8E6C9" colspan="2"|+2 |
||
| + | |style="background-color:#FFCDD2" colspan="2"|-3? |
||
| + | |style="background-color:#E57373" colspan="2"|-7 <br /> '''Fast +:''' -11? |
||
| + | |style="background-color:#E57373" colspan="2"|?? |
||
|style="background-color:#888888" colspan="2"|N/A |
|style="background-color:#888888" colspan="2"|N/A |
||
|- |
|- |
||
| − | |{{ShipLink|Nagato|Mutsu|text=Nagato Class |
+ | |{{ShipLink|Nagato|Mutsu|text=Nagato Class|link_class=Nagato}} |
| − | |style="background-color:#C8E6C9" colspan=" |
+ | |style="background-color:#C8E6C9" colspan="2"|+2 |
| + | |colspan="2"|0 |
||
| + | |style="background-color:#C8E6C9" colspan="2"|+2 |
||
| + | |style="background-color:#C8E6C9" colspan="2"|+2 |
||
| + | |style="background-color:#C8E6C9" colspan="2"|+2 |
||
| + | |style="background-color:#C8E6C9" colspan="2"|+3 |
||
| + | |colspan="2"|?? |
||
|colspan="2"|?? |
|colspan="2"|?? |
||
| − | |style="background-color:# |
+ | |style="background-color:#FFCDD2" colspan="2"|-3 |
| + | |style="background-color:#E57373" colspan="2"|-7 |
||
| − | |0 |
||
| − | |style="background-color:# |
+ | |style="background-color:#E57373" colspan="2"|?? |
| − | |style="background-color:#C8E6C9" colspan="2"| +2 |
||
| − | |style="background-color:#FFCDD2" colspan="2"| -3 |
||
| − | |style="background-color:#E57373" colspan="2"| -7 |
||
| − | |colspan="2"|? |
||
|colspan="2"|0 |
|colspan="2"|0 |
||
|- |
|- |
||
|{{ShipLink|Nagato Kai Ni|text=Nagato Class (Kai Ni)|link_class=Nagato}} |
|{{ShipLink|Nagato Kai Ni|text=Nagato Class (Kai Ni)|link_class=Nagato}} |
||
| − | |colspan=" |
+ | |style="background-color:#C8E6C9" colspan="2"|+2 |
| − | |colspan="2"| |
+ | |colspan="2"|0 |
| + | |style="background-color:#C8E6C9" colspan="2"|+2 |
||
| − | |?? |
||
| − | |0 |
||
|style="background-color:#A5D6A7" colspan="2"| +5 |
|style="background-color:#A5D6A7" colspan="2"| +5 |
||
|colspan="2"|0 |
|colspan="2"|0 |
||
| − | | |
+ | |colspan="2"|?? |
| − | |style="background-color:# |
+ | |style="background-color:#A5D6A7" colspan="2"|+4 |
| − | | |
+ | |colspan="2"|?? |
| − | |colspan="2"| |
+ | |style="background-color:#FFCDD2" colspan="2"| -2 |
| + | |style="background-color:#EF9A9A" colspan="2"| -4 |
||
| + | |style="background-color:#EF9A9A" colspan="2"| -6 |
||
| + | |style="background-color:#EF9A9A" colspan="2"| '''Nagato:''' -5<br />'''Mutsu: ''' -8 |
||
|- |
|- |
||
|{{ShipLink|Yamato|Musashi|text=Yamato Class|link_class=Yamato}} |
|{{ShipLink|Yamato|Musashi|text=Yamato Class|link_class=Yamato}} |
||
| − | |colspan=" |
+ | |colspan="16"|0 |
| − | |colspan="2"| |
+ | |style="background-color:#A5D6A7" colspan="2"|+3 |
| − | |colspan="2"| |
+ | |style="background-color:#A5D6A7" colspan="2"|+3 |
| − | |colspan="2"| |
+ | |style="background-color:#81C784" colspan="2"|+7 |
| − | |colspan="2"|0 |
||
| − | |colspan="2"|0 |
||
| − | |colspan="2"|0 |
||
| − | |colspan="2"|0 |
||
|colspan="2"|0 |
|colspan="2"|0 |
||
|- |
|- |
||
| − | |style="text-align:left" colspan=" |
+ | |style="text-align:left" colspan="27"|'''Note: Fit gun mechanics are still being investigated to this day, hence the values are not final and may be subject to changes. Values with a question mark either means that its not conclusive yet or the conclusion drawn here is not the same as the one drawn by yumeji.''' |
* The table shows an estimated accuracy fit bonus based on having '''one fit gun''' equipped. |
* The table shows an estimated accuracy fit bonus based on having '''one fit gun''' equipped. |
||
* For married ships, the overweight penalty is reduced by 40% (A married Kongou with a 46cm receives a penalty of -6 instead of -10, for example). |
* For married ships, the overweight penalty is reduced by 40% (A married Kongou with a 46cm receives a penalty of -6 instead of -10, for example). |
||
| Line 246: | Line 242: | ||
* If guns from different classes are used together, add the modifiers together. (A Kongou with a 35.6cm and 41cm mixed for example, that's 7 - 5 = 2. |
* If guns from different classes are used together, add the modifiers together. (A Kongou with a 35.6cm and 41cm mixed for example, that's 7 - 5 = 2. |
||
* Exceptions arises where different guns of the same class gives different bonuses on certain ships, notably Gangut. What would happen if you combine 30.5cm and 35.6cm is still under investigations. |
* Exceptions arises where different guns of the same class gives different bonuses on certain ships, notably Gangut. What would happen if you combine 30.5cm and 35.6cm is still under investigations. |
||
| + | * The information in this table is sourced from [https://docs.google.com/spreadsheets/d/11-nekeN0IBLtzdxxIzV0Gm3T7U4BpCrYA1lGsQYAEJo this spreadsheet] maintained by Dewy with the relevant sources linked in the spreadsheet. |
||
|- |
|- |
||
| − | |colspan=" |
+ | |colspan="18"|Last Updated: July 15th 2019 |
| − | |colspan=" |
+ | |colspan="9"|Made by: [[User:Tsubakura|Tsubakura]] |
|} |
|} |
||
More generally, the accuracy offset can be defined with the formula: |
More generally, the accuracy offset can be defined with the formula: |
||
| Line 256: | Line 253: | ||
Where: |
Where: |
||
| − | *<math>W</math> |
+ | *<math>W</math>is the resulting fit bonus or overweight penalty |
| − | *<math>C_{k}</math> |
+ | *<math>C_{k}</math>is the main coefficient of the equipped gun class. Refer to the above table for the coefficients applied to each Battleship for their respective guns. |
| − | *<math>M_{k}</math> |
+ | *<math>M_{k}</math>is the marriage coefficient for the particular gun class. Assumes a value of '''0.6''' if the ship is married, and if the main coefficient is negative. |
| − | *<math>N_{k}</math> |
+ | *<math>N_{k}</math>is the number of equipped guns for that gun class. |
==Cruisers== |
==Cruisers== |
||
| Line 268: | Line 265: | ||
!rowspan="2"|'''Ship Class''' |
!rowspan="2"|'''Ship Class''' |
||
!colspan="2"|{{EquipmentLink|12.7cm Twin High-angle Gun Mount (Late Model)|text=12.7cm Twin (LM)|icon=x}} |
!colspan="2"|{{EquipmentLink|12.7cm Twin High-angle Gun Mount (Late Model)|text=12.7cm Twin (LM)|icon=x}} |
||
| − | !colspan="2"|{{EquipmentLink|14cm Single Gun Mount|text=14cm Single|icon=x}}<br /> |
+ | !colspan="2"|{{EquipmentLink|14cm Single Gun Mount|text=14cm Single|icon=x}}<br /> |
{{EquipmentLink|15.2cm Single Gun Mount|text=15.2cm|icon=x}} |
{{EquipmentLink|15.2cm Single Gun Mount|text=15.2cm|icon=x}} |
||
| − | !colspan="2"|{{EquipmentLink|14cm Twin Gun Mount|text=14cm Twin|icon=x}}<br /> |
+ | !colspan="2"|{{EquipmentLink|14cm Twin Gun Mount|text=14cm Twin|icon=x}}<br /> |
| − | {{EquipmentLink|14cm Twin Gun Mount Kai|text=14cm Twin Kai|icon=x}} |
+ | {{EquipmentLink|14cm Twin Gun Mount Kai|text=14cm Twin Kai|icon=x}} |
| − | {{EquipmentLink|15.2cm Twin Gun Mount|text=15.2cm|icon=x}}<br /> |
+ | !colspan="2"|{{EquipmentLink|15.2cm Twin Gun Mount|text=15.2cm|icon=x}}<br /> |
{{EquipmentLink|15.2cm Twin Gun Mount Kai|text=15.2cmK|icon=x}} |
{{EquipmentLink|15.2cm Twin Gun Mount Kai|text=15.2cmK|icon=x}} |
||
!colspan="2"|{{EquipmentLink|Bofors 15.2cm Twin Gun Mount Model 1930|text=Bofors 15.2cm|icon=x}} |
!colspan="2"|{{EquipmentLink|Bofors 15.2cm Twin Gun Mount Model 1930|text=Bofors 15.2cm|icon=x}} |
||
| − | !colspan="2"|{{EquipmentLink|15.5cm Triple Gun Mount|text=15.5cm|icon=x}}<br /> |
+ | !colspan="2"|{{EquipmentLink|15.5cm Triple Gun Mount|text=15.5cm|icon=x}}<br /> |
{{EquipmentLink|15.5cm Triple Gun Mount Kai|text=15.5cmK|icon=x}} |
{{EquipmentLink|15.5cm Triple Gun Mount Kai|text=15.5cmK|icon=x}} |
||
| − | !colspan="2"|{{EquipmentLink|20.3cm Twin Gun Mount|text=20.3cm|icon=x}}<br /> |
+ | !colspan="2"|{{EquipmentLink|20.3cm Twin Gun Mount|text=20.3cm|icon=x}}<br /> |
{{EquipmentLink|20.3cm (No.2) Twin Gun Mount|text=20.3cm(2)|icon=x}}<br /> |
{{EquipmentLink|20.3cm (No.2) Twin Gun Mount|text=20.3cm(2)|icon=x}}<br /> |
||
{{EquipmentLink|20.3cm (No.3) Twin Gun Mount|text=20.3cm(3)|icon=x}} |
{{EquipmentLink|20.3cm (No.3) Twin Gun Mount|text=20.3cm(3)|icon=x}} |
||
!colspan="2"|{{EquipmentLink|203mm/53 Twin Gun Mount|text=203mm/53|icon=x}} |
!colspan="2"|{{EquipmentLink|203mm/53 Twin Gun Mount|text=203mm/53|icon=x}} |
||
|- |
|- |
||
| + | !colspan="1"|Day |
||
| + | !colspan="1"|Night |
||
!colspan="1"|Day |
!colspan="1"|Day |
||
!colspan="1"|Night |
!colspan="1"|Night |
||
| Line 300: | Line 299: | ||
|style="background-color:#A5D6A7" colspan="2"| +2 +2N{{Hit}} |
|style="background-color:#A5D6A7" colspan="2"| +2 +2N{{Hit}} |
||
|style="background-color:#A5D6A7" colspan="2"| +4N{{Hit}} +1{{Firepower}} |
|style="background-color:#A5D6A7" colspan="2"| +4N{{Hit}} +1{{Firepower}} |
||
| + | |style="background-color:#A5D6A7" colspan="2"| +2{{Hit}} +2{{Firepower}} |
||
|style="background-color:#A5D6A7" colspan="2"| +2{{Hit}} +2{{Firepower}} |
|style="background-color:#A5D6A7" colspan="2"| +2{{Hit}} +2{{Firepower}} |
||
|colspan="2"| ?? |
|colspan="2"| ?? |
||
|style="background-color:#81C784" colspan="2"| +2{{Hit}} |
|style="background-color:#81C784" colspan="2"| +2{{Hit}} |
||
| − | |style="background-color:#FFCDD2" colspan="2"| -2 -2N{{Hit}} |
||
|colspan="2"|0 |
|colspan="2"|0 |
||
| + | |style="background-color:#FFCDD2" colspan="2"| -2 -2.5N??{{Hit}} |
||
|- |
|- |
||
|{{ShipLink|Agano|Noshiro|Yahagi|Sakawa|text=Agano Class|link_class=Agano}} |
|{{ShipLink|Agano|Noshiro|Yahagi|Sakawa|text=Agano Class|link_class=Agano}} |
||
|style="background-color:#A5D6A7" colspan="2"| +2 +2N{{Hit}} |
|style="background-color:#A5D6A7" colspan="2"| +2 +2N{{Hit}} |
||
|style="background-color:#A5D6A7" colspan="2"| +4N{{Hit}} +1{{Firepower}} |
|style="background-color:#A5D6A7" colspan="2"| +4N{{Hit}} +1{{Firepower}} |
||
| + | |style="background-color:#81C784" colspan="2"| +5 +2N{{Hit}} +2{{Firepower}} |
||
|style="background-color:#81C784" colspan="2"| +5 +2N{{Hit}} +2{{Firepower}} |
|style="background-color:#81C784" colspan="2"| +5 +2N{{Hit}} +2{{Firepower}} |
||
|colspan="2"| ?? |
|colspan="2"| ?? |
||
|style="background-color:#FFCDD2" colspan="2"| -2 -2N{{Hit}} |
|style="background-color:#FFCDD2" colspan="2"| -2 -2N{{Hit}} |
||
| − | | |
+ | |colspan="2"| 0 |
| − | |colspan="2"| |
+ | |style="background-color:#FFCDD2" colspan="2"| -2 -2.5N??{{Hit}} |
|- |
|- |
||
|'''All other CL(T)''' |
|'''All other CL(T)''' |
||
|style="background-color:#A5D6A7" colspan="2"| +2 +2N{{Hit}} |
|style="background-color:#A5D6A7" colspan="2"| +2 +2N{{Hit}} |
||
|style="background-color:#A5D6A7" colspan="2"| +4N{{Hit}} +1{{Firepower}} |
|style="background-color:#A5D6A7" colspan="2"| +4N{{Hit}} +1{{Firepower}} |
||
| + | |style="background-color:#A5D6A7" colspan="2"| +2{{Hit}} +2{{Firepower}} |
||
|style="background-color:#A5D6A7" colspan="2"| +2{{Hit}} +2{{Firepower}} |
|style="background-color:#A5D6A7" colspan="2"| +2{{Hit}} +2{{Firepower}} |
||
|style="background-color:#A5D6A7" colspan="2"| +3{{Hit}} ??{{Firepower}} |
|style="background-color:#A5D6A7" colspan="2"| +3{{Hit}} ??{{Firepower}} |
||
|style="background-color:#FFCDD2" colspan="2"| -2 -2N{{Hit}} |
|style="background-color:#FFCDD2" colspan="2"| -2 -2N{{Hit}} |
||
| − | | |
+ | |colspan="2"| 0 |
|style="background-color:#FFCDD2" colspan="2"| -2 -2.5N??{{Hit}} |
|style="background-color:#FFCDD2" colspan="2"| -2 -2.5N??{{Hit}} |
||
|- |
|- |
||
|{{ShipLink|Mogami|Mikuma|Suzuya|Kumano|text=Mogami Class|link_class=Mogami}} |
|{{ShipLink|Mogami|Mikuma|Suzuya|Kumano|text=Mogami Class|link_class=Mogami}} |
||
| + | |colspan="2"|0 |
||
|colspan="2"|0 |
|colspan="2"|0 |
||
|colspan="2"|0 |
|colspan="2"|0 |
||
| Line 334: | Line 337: | ||
|colspan="2"|0 |
|colspan="2"|0 |
||
|- |
|- |
||
| − | |{{ShipLink |
+ | |{{ShipLink|Suzuya/Kai Ni|Kumano/Kai Ni|text=Mogami Class (K2)|link_class=Mogami}} |
| + | |colspan="2"|0 |
||
|colspan="2"|0 |
|colspan="2"|0 |
||
|colspan="2"|0 |
|colspan="2"|0 |
||
| Line 343: | Line 347: | ||
|- |
|- |
||
|{{ShipLink|Zara|Pola|text=Zara Class|link_class=Zara}} |
|{{ShipLink|Zara|Pola|text=Zara Class|link_class=Zara}} |
||
| + | |colspan="2"|0 |
||
|colspan="2"|0 |
|colspan="2"|0 |
||
|colspan="2"|0 |
|colspan="2"|0 |
||
| Line 351: | Line 356: | ||
|- |
|- |
||
|'''All other CA(V)''' |
|'''All other CA(V)''' |
||
| + | |colspan="2"|0 |
||
|colspan="2"|0 |
|colspan="2"|0 |
||
|colspan="2"|0 |
|colspan="2"|0 |
||
| Line 361: | Line 367: | ||
|colspan="2"|?? |
|colspan="2"|?? |
||
|colspan="2"|?? |
|colspan="2"|?? |
||
| − | |style="background-color:# |
+ | |style="background-color:#E57373" colspan="2"| -5N{{Hit}} <br /> '''Kai:'''-7N{{Hit}} |
| + | |style="background-color:#E57373" colspan="2"| -6N{{Hit}} |
||
|colspan="2"|0 |
|colspan="2"|0 |
||
| − | | |
+ | |colspan="2"| ?? |
| − | |style="background-color:#E57373" colspan="2"|- |
+ | |style="background-color:#E57373" colspan="2"| -8 -10N{{Hit}} |
|colspan="2"|?? |
|colspan="2"|?? |
||
|- |
|- |
||
| − | |style="text-align:left" colspan=' |
+ | |style="text-align:left" colspan='17'| |
'''Note: Fit gun mechanics are still being investigated to this day, hence the values are not final and may be subject to changes. Values with a question mark means that it is potentially outdated and might no longer be correct.''' |
'''Note: Fit gun mechanics are still being investigated to this day, hence the values are not final and may be subject to changes. Values with a question mark means that it is potentially outdated and might no longer be correct.''' |
||
* The table shows an estimated accuracy and/or firepower fit bonus based on having '''one fit gun''' equipped. |
* The table shows an estimated accuracy and/or firepower fit bonus based on having '''one fit gun''' equipped. |
||
| Line 375: | Line 382: | ||
* There is a possibility that certain fit categories only work during the day. The possibility is plausible, but there's no concrete data proving. The alternative theory is that the night bonus from the '''20.3cm''' series overrides any other categories. |
* There is a possibility that certain fit categories only work during the day. The possibility is plausible, but there's no concrete data proving. The alternative theory is that the night bonus from the '''20.3cm''' series overrides any other categories. |
||
* The information in this table is sourced from [https://docs.google.com/spreadsheets/d/11-nekeN0IBLtzdxxIzV0Gm3T7U4BpCrYA1lGsQYAEJo this spreadsheet] maintained by Dewy with the relevant sources linked in the spreadsheet. |
* The information in this table is sourced from [https://docs.google.com/spreadsheets/d/11-nekeN0IBLtzdxxIzV0Gm3T7U4BpCrYA1lGsQYAEJo this spreadsheet] maintained by Dewy with the relevant sources linked in the spreadsheet. |
||
| − | *As of 13th December the hidden firepower bonus of {{14cm Twin Gun Mount Kai}} does not work/does not exist. |
+ | *As of 13th December the hidden firepower bonus of {{EquipmentLink|14cm Twin Gun Mount Kai}} does not work/does not exist. |
|- |
|- |
||
| − | |style = colspan='9'|<span style="text-align: left;">Last Updated: |
+ | |style = colspan='9'|<span style="text-align: left;">Last Updated: June 23rd 2019</span> |
| − | |style = colspan=' |
+ | |style = colspan='9'|<span style="text-align: right;">Made by: [[User:Tsubakura|Tsubakura]]</span> |
|} |
|} |
||
| Line 394: | Line 401: | ||
|style="background-color:#A5D6A7" colspan="2"| +5{{Hit}} |
|style="background-color:#A5D6A7" colspan="2"| +5{{Hit}} |
||
|- |
|- |
||
| + | |{{ShipLink|Mutsuki|Kisaragi|Yayoi|Uzuki|Minazuki|Fumizuki|Nagatsuki|Kikuzuki|Mikazuki|Mochizuki|text=Other Mutsuki-class|link_class=Mutsuki}} |
||
| − | |'''Other Mutsuki-Class''' |
||
|colspan="2"|?? |
|colspan="2"|?? |
||
|- |
|- |
||
| + | |{{ShipLink|Kamikaze|Asakaze|Harukaze|Matsukaze|Hatakaze|text=Kamikaze-class|link_class=Kamikaze}} |
||
| − | |'''Kamikaze-Class''' |
||
|colspan="2"|?? |
|colspan="2"|?? |
||
|- |
|- |
||
| Line 412: | Line 419: | ||
* It is unknown whether the [[12.7cm Single Gun Mount]] gives a fit bonus or not. |
* It is unknown whether the [[12.7cm Single Gun Mount]] gives a fit bonus or not. |
||
|- |
|- |
||
| − | |style = colspan='2'|<span style="text-align: left;">Last Updated: |
+ | |style = colspan='2'|<span style="text-align: left;">Last Updated: December 5th 2018</span> |
|style = colspan='1'|<span style="text-align: right;">Made by: [[User:Tsubakura|Tsubakura]]</span> |
|style = colspan='1'|<span style="text-align: right;">Made by: [[User:Tsubakura|Tsubakura]]</span> |
||
|} |
|} |
||
| Line 418: | Line 425: | ||
{{Clear}} |
{{Clear}} |
||
| + | ==References== |
||
| − | ==Small Caliber Guns== |
||
| + | <references /> |
||
| − | Some {{RedGunLight}} {{GreenGunDP}} small caliber main guns grant additional stats to certain ships and ship classes. |
||
| − | {| class="wikitable typography-x1-optout" style="text-align:center;" |
||
| − | !rowspan="1"|'''Ship''' |
||
| − | !colspan="4"|{{EquipmentLink|12cm Single Gun Mount Kai 2|text='''12cm Single K2'''|icon=x}} |
||
| − | |- |
||
| − | |rowspan="2"|{{ShipLink|text=Shimushu-class|link_class=Shimushu}}<br>{{ShipLink|text=Etorofu-class|link_class=Etorofu}} |
||
| − | |style="background-color:#A5D6A7" rowspan="1" colspan="1"|'''Normal''' |
||
| − | |style="background-color:#A5D6A7" rowspan="1" colspan="3"| +1{{Firepower}} +1{{AA}} +2{{Evasion}} |
||
| − | |- |
||
| − | |style="background-color:#BFBA58" rowspan="1" colspan="1"|'''w/ Radar''' |
||
| − | |style="background-color:#BFBA58" rowspan="1" colspan="3"| +3{{Firepower}} +1{{AA}} +1{{ASW}} +5{{Evasion}} |
||
| − | |- |
||
| − | |rowspan="4"|{{ShipLink|text=Mutsuki-class|link_class=Mutsuki}}<br>{{ShipLink|text=Kamikaze-class|link_class=Kamikaze}} |
||
| − | |style="background-color:#A5D6A7" rowspan="1" colspan="1"|'''Normal''' |
||
| − | |style="background-color:#A5D6A7" rowspan="1" colspan="3"| +2{{Firepower}} +1{{AA}} +3{{Evasion}} |
||
| − | |- |
||
| − | |style="background-color:#BFBA58" rowspan="1" colspan="1"|'''w/ Radar:''' |
||
| − | |style="background-color:#BFBA58" rowspan="1" colspan="3"| +4{{Firepower}} +1{{Torpedo}} +1{{AA}} +6{{Evasion}} |
||
| − | |- |
||
| − | |style="background-color:#99C7F9" rowspan="1" colspan="1"|'''w/ {{EquipmentLink|53cm Twin Torpedo Mount|text=53cm Twin}} x1:''' |
||
| − | |style="background-color:#99C7F9" rowspan="1" colspan="3"| +4{{Firepower}} +4{{Torpedo}} +1{{AA}} +3{{Evasion}} |
||
| − | |- |
||
| − | |style="background-color:#99C7F9" rowspan="1" colspan="1"|'''w/ {{EquipmentLink|53cm Twin Torpedo Mount|text=53cm Twin}} x2:''' |
||
| − | |style="background-color:#99C7F9" rowspan="1" colspan="3"| +5{{Firepower}} +7{{Torpedo}} +1{{AA}} +3{{Evasion}} |
||
| − | |} |
||
| − | {{Clear}} |
||
| + | {{Equipmentlist}} |
||
| − | {| class="wikitable typography-x1-output" style="text-align:center;" |
||
| − | |'''Ship''' |
||
| − | |colspan="4"|{{EquipmentLink|12.7cm Twin Gun Mount Model A Kai 2|text='''12.7cm Twin Model A K2'''|icon=x}} |
||
| − | |colspan="4"|{{EquipmentLink|12.7cm Twin Gun Mount Model A Kai 3 (Wartime Modification) + Anti-Aircraft Fire Director|text='''12.7cm Twin Model A K3 + AAFD'''|icon=x}} |
||
| − | |- |
||
| − | |rowspan="7"|{{ShipLink|text=Fubuki-class|link_class=Fubuki}} |
||
| − | |style="background-color:#A5D6A7" rowspan="1" colspan="1"|'''Normal''' |
||
| − | |style="background-color:#A5D6A7" rowspan="1" colspan="3"| +1{{Firepower}} |
||
| − | |style="background-color:#A5D6A7" rowspan="1" colspan="1"|'''Normal''' |
||
| − | |style="background-color:#A5D6A7" rowspan="1" colspan="3"| +2{{Firepower}} +2{{AA}} |
||
| − | |- |
||
| − | |style="background-color:#BFBA58" rowspan="2" colspan="1"|'''w/ Radar''' |
||
| − | |style="background-color:#BFBA58" rowspan="2" colspan="3"| +2{{Firepower}} +1{{Torpedo}} +2{{Evasion}} |
||
| − | |style="background-color:#BFBA58" rowspan="1" colspan="1"|'''w/ Air Radar''' |
||
| − | |style="background-color:#BFBA58" rowspan="1" colspan="3"| +2{{Firepower}} +8{{AA}} |
||
| − | |- |
||
| − | |style="background-color:#BFBA58" rowspan="1" colspan="1"|'''w/ Radar''' |
||
| − | |style="background-color:#BFBA58" rowspan="1" colspan="3"| +5{{Firepower}} +1{{Torpedo}} +2{{Evasion}} |
||
| − | |- |
||
| − | |style="background-color:#99C7F9" rowspan="1" colspan="1"|'''w/ 61cm Triple x1''' |
||
| − | |style="background-color:#99C7F9" rowspan="1" colspan="3"| +2{{Firepower}} +3{{Torpedo}} |
||
| − | |style="background-color:#99C7F9" rowspan="1" colspan="1"|'''w/ 61cm Triple x1''' |
||
| − | |style="background-color:#99C7F9" rowspan="1" colspan="3"| +3{{Firepower}} +3{{Torpedo}} +2{{AA}} |
||
| − | |- |
||
| − | |style="background-color:#99C7F9" rowspan="1" colspan="1"|'''w/ 61cm Triple x2''' |
||
| − | |style="background-color:#99C7F9" rowspan="1" colspan="3"| +3{{Firepower}} +5{{Torpedo}} |
||
| − | |style="background-color:#99C7F9" rowspan="1" colspan="1"|'''w/ 61cm Triple x2''' |
||
| − | |style="background-color:#99C7F9" rowspan="1" colspan="3"| +4{{Firepower}} +5{{Torpedo}} +2{{AA}} |
||
| − | |- |
||
| − | |style="background-color:#99C7F9" rowspan="1" colspan="1"|'''w/ {{EquipmentLink|61cm Triple (Oxygen) Torpedo Mount Late Model|text=61cm Triple LM}} x1''' |
||
| − | |style="background-color:#99C7F9" rowspan="1" colspan="3"| +2{{Firepower}} +4{{Torpedo}} |
||
| − | |style="background-color:#99C7F9" rowspan="1" colspan="1"|'''w/ {{EquipmentLink|61cm Triple (Oxygen) Torpedo Mount Late Model|text=61cm Triple LM}} x1''' |
||
| − | |style="background-color:#99C7F9" rowspan="1" colspan="3"| +3{{Firepower}} +4{{Torpedo}} +2{{AA}} |
||
| − | |- |
||
| − | |style="background-color:#99C7F9" rowspan="1" colspan="1"|'''w/ {{EquipmentLink|61cm Triple (Oxygen) Torpedo Mount Late Model|text=61cm Triple LM}} x2''' |
||
| − | |style="background-color:#99C7F9" rowspan="1" colspan="3"| +3{{Firepower}} +6{{Torpedo}} |
||
| − | |style="background-color:#99C7F9" rowspan="1" colspan="1"|'''w/ {{EquipmentLink|61cm Triple (Oxygen) Torpedo Mount Late Model|text=61cm Triple LM}} x2''' |
||
| − | |style="background-color:#99C7F9" rowspan="1" colspan="3"| +4{{Firepower}} +6{{Torpedo}} +2{{AA}} |
||
| − | |- |
||
| − | |rowspan="7"|{{ShipLink|text=Ayanami-class|link_class=Ayanami}}<br>{{ShipLink|text=Akatsuki-class|link_class=Akatsuki}} |
||
| − | |rowspan="7" colspan="4"| |
||
| − | |style="background-color:#A5D6A7" rowspan="1" colspan="1"|'''Normal''' |
||
| − | |style="background-color:#A5D6A7" rowspan="1" colspan="3"| +2{{Firepower}} +2{{AA}} |
||
| − | |- |
||
| − | |style="background-color:#BFBA58" rowspan="1" colspan="1"|'''w/ Air Radar''' |
||
| − | |style="background-color:#BFBA58" rowspan="1" colspan="3"| +2{{Firepower}} +8{{AA}} |
||
| − | |- |
||
| − | |style="background-color:#BFBA58" rowspan="1" colspan="1"|'''w/ Air Radar''' |
||
| − | |style="background-color:#BFBA58" rowspan="1" colspan="3"| +5{{Firepower}} +1{{Torpedo}} +2{{AA}} +2{{Evasion}} |
||
| − | |- |
||
| − | |style="background-color:#99C7F9" rowspan="1" colspan="1"|'''w/ 61cm Triple x1''' |
||
| − | |style="background-color:#99C7F9" rowspan="1" colspan="3"| +3{{Firepower}} +3{{Torpedo}} +2{{AA}} |
||
| − | |- |
||
| − | |style="background-color:#99C7F9" rowspan="1" colspan="1"|'''w/ 61cm Triple x2''' |
||
| − | |style="background-color:#99C7F9" rowspan="1" colspan="3"| +4{{Firepower}} +5{{Torpedo}} +2{{AA}} |
||
| − | |- |
||
| − | |style="background-color:#99C7F9" rowspan="1" colspan="1"|'''w/ {{EquipmentLink|61cm Triple (Oxygen) Torpedo Mount Late Model|text=61cm Triple LM}} x1''' |
||
| − | |style="background-color:#99C7F9" rowspan="1" colspan="3"| +3{{Firepower}} +4{{Torpedo}} +2{{AA}} |
||
| − | |- |
||
| − | |style="background-color:#99C7F9" rowspan="1" colspan="1"|'''w/ {{EquipmentLink|61cm Triple (Oxygen) Torpedo Mount Late Model|text=61cm Triple LM}} x2''' |
||
| − | |style="background-color:#99C7F9" rowspan="1" colspan="3"| +4{{Firepower}} +6{{Torpedo}} +2{{AA}} |
||
| − | |- |
||
| − | |colspan="8" style="text-align:left;"|'''Note:''' "61cm Triple" refers to either the {{EquipmentLink|61cm Triple Torpedo Mount}} or the {{EquipmentLink|61cm Triple (Oxygen) Torpedo Mount}}; both provide the same bonus alongside the relevant equipment. The {{EquipmentLink|61cm Triple (Oxygen) Torpedo Mount Late Model|text=Late Model}} variant, however, provides different bonuses. |
||
| − | |} |
||
| − | |||
| − | {| class="wikitable typography-x1-output" style="text-align:center;" |
||
| − | |'''Ship''' |
||
| − | |colspan="2"|{{EquipmentLink|12.7cm Twin Gun Mount Model B Kai 2|text='''12.7cm Twin Model B K2'''|icon=x}} |
||
| − | |- |
||
| − | |{{ShipLink|Shiratsuyu Kai Ni}}<br>{{ShipLink|Murasame Kai Ni}} |
||
| − | | +1{{Evasion}} |
||
| − | |- |
||
| − | |{{ShipLink|Shigure Kai Ni}} |
||
| − | | +1{{Firepower}} |
||
| − | |- |
||
| − | |{{ShipLink|Yuudachi Kai Ni}} |
||
| − | | +1{{Firepower}} +1{{Torpedo}} +1{{AA}} +2{{Evasion}} |
||
| − | |- |
||
| − | |{{ShipLink|Kawakaze Kai Ni}} |
||
| − | | +2{{Evasion}} |
||
| − | |- |
||
| − | |{{ShipLink|text=Ayanami-class|link_class=Ayanami}}<br>{{ShipLink|text=Akatsuki-class|link_class=Akatsuki}}<br>{{ShipLink|text=Hatsuharu-class|link_class=Hatusharu}} |
||
| − | | +1{{AA}} |
||
| − | |- |
||
| − | |} |
||
| − | |||
| − | {|class="wikitable typography-x1-output" style="text-align:center;" |
||
| − | |'''Ship''' |
||
| − | |colspan="4"|{{EquipmentLink|12.7cm Twin Gun Mount Model B Kai 4 (Wartime Modification) + Anti-Aircraft Fire Director|text='''12.7cm Twin Model K B4 + AAFD'''|icon=x}} |
||
| − | |- |
||
| − | |rowspan="4"|{{ShipLink|Shiratsuyu Kai Ni}} |
||
| − | |style="background-color:#A5D6A7" rowspan="1" colspan="1"|'''Normal''' |
||
| − | |style="background-color:#A5D6A7" rowspan="1" colspan="3"| +2{{Firepower}} +2{{Evasion}} |
||
| − | |- |
||
| − | |style="background-color:#BFBA58" rowspan="1" colspan="1"|'''w/ Air Radar''' |
||
| − | |style="background-color:#BFBA58" rowspan="1" colspan="3"| +2{{Firepower}} +6{{AA}} +2{{Evasion}} |
||
| − | |- |
||
| − | |style="background-color:#BFBA58" rowspan="1" colspan="1"|'''w/ Radar''' |
||
| − | |style="background-color:#BFBA58" rowspan="1" colspan="3"| +3{{Firepower}} +3{{Torpedo}} +4{{Evasion}} |
||
| − | |- |
||
| − | |style="background-color:#99C7F9" rowspan="1" colspan="1"|'''w/ {{EquipmentLink|61cm Quadruple (Oxygen) Torpedo Mount|text=61cm Quad (Oxy)}} or {{EquipmentLink|61cm Quadruple (Oxygen) Torpedo Mount Late Model|text=LM}}''' |
||
| − | |style="background-color:#99C7F9" rowspan="1" colspan="3"| +3{{Firepower}} +3{{Torpedo}} +2{{Evasion}} |
||
| − | |- |
||
| − | |rowspan="4"|{{ShipLink|Shigure Kai Ni}} |
||
| − | |style="background-color:#A5D6A7" rowspan="1" colspan="1"|'''Normal''' |
||
| − | |style="background-color:#A5D6A7" rowspan="1" colspan="3"| +2{{Firepower}} +1{{AA}} +1{{Evasion}} |
||
| − | |- |
||
| − | |style="background-color:#BFBA58" rowspan="1" colspan="1"|'''w/ Air Radar''' |
||
| − | |style="background-color:#BFBA58" rowspan="1" colspan="3"| +2{{Firepower}} +7{{AA}} +1{{Evasion}} |
||
| − | |- |
||
| − | |style="background-color:#BFBA58" rowspan="1" colspan="1"|'''w/ Radar''' |
||
| − | |style="background-color:#BFBA58" rowspan="1" colspan="3"| +3{{Firepower}} +3{{Torpedo}} +1{{AA}} +3{{Evasion}} |
||
| − | |- |
||
| − | |style="background-color:#99C7F9" rowspan="1" colspan="1"|'''w/ {{EquipmentLink|61cm Quadruple (Oxygen) Torpedo Mount|text=61cm Quad (Oxy)}} or {{EquipmentLink|61cm Quadruple (Oxygen) Torpedo Mount Late Model|text=LM}}''' |
||
| − | |style="background-color:#99C7F9" rowspan="1" colspan="3"| +3{{Firepower}} +3{{Torpedo}} +1{{AA}} +1{{Evasion}} |
||
| − | |- |
||
| − | |rowspan="4"|{{ShipLink|Murasame Kai Ni}} |
||
| − | |style="background-color:#A5D6A7" rowspan="1" colspan="1"|'''Normal''' |
||
| − | |style="background-color:#A5D6A7" rowspan="1" colspan="3"| +1{{Firepower}} +1{{AA}} +2{{Evasion}} |
||
| − | |- |
||
| − | |style="background-color:#BFBA58" rowspan="1" colspan="1"|'''w/ Air Radar''' |
||
| − | |style="background-color:#BFBA58" rowspan="1" colspan="3"| +1{{Firepower}} +7{{AA}} +2{{Evasion}} |
||
| − | |- |
||
| − | |style="background-color:#BFBA58" rowspan="1" colspan="1"|'''w/ Radar''' |
||
| − | |style="background-color:#BFBA58" rowspan="1" colspan="3"| +2{{Firepower}} +3{{Torpedo}} +1{{AA}} +4{{Evasion}} |
||
| − | |- |
||
| − | |style="background-color:#99C7F9" rowspan="1" colspan="1"|'''w/ {{EquipmentLink|61cm Quadruple (Oxygen) Torpedo Mount|text=61cm Quad (Oxy)}} or {{EquipmentLink|61cm Quadruple (Oxygen) Torpedo Mount Late Model|text=LM}}''' |
||
| − | |style="background-color:#99C7F9" rowspan="1" colspan="3"| +2{{Firepower}} +3{{Torpedo}} +1{{AA}} +2{{Evasion}} |
||
| − | |- |
||
| − | |rowspan="4"|{{ShipLink|Yuudachi Kai Ni}} |
||
| − | |style="background-color:#A5D6A7" rowspan="1" colspan="1"|'''Normal''' |
||
| − | |style="background-color:#A5D6A7" rowspan="1" colspan="3"| +2{{Firepower}} +1{{Torpedo}} +1{{Evasion}} |
||
| − | |- |
||
| − | |style="background-color:#BFBA58" rowspan="1" colspan="1"|'''w/ Air Radar''' |
||
| − | |style="background-color:#BFBA58" rowspan="1" colspan="3"| +2{{Firepower}} +1{{Torpedo}} +6{{AA}} +1{{Evasion}} |
||
| − | |- |
||
| − | |style="background-color:#BFBA58" rowspan="1" colspan="1"|'''w/ Radar''' |
||
| − | |style="background-color:#BFBA58" rowspan="1" colspan="3"| +3{{Firepower}} +4{{Torpedo}} +3{{Evasion}} |
||
| − | |- |
||
| − | |style="background-color:#99C7F9" rowspan="1" colspan="1"|'''w/ {{EquipmentLink|61cm Quadruple (Oxygen) Torpedo Mount|text=61cm Quad (Oxy)}} or {{EquipmentLink|61cm Quadruple (Oxygen) Torpedo Mount Late Model|text=LM}}''' |
||
| − | |style="background-color:#99C7F9" rowspan="1" colspan="3"| +3{{Firepower}} +4{{Torpedo}} +1{{Evasion}} |
||
| − | |- |
||
| − | |rowspan="4"|{{ShipLink|Kawakaze Kai Ni}} |
||
| − | |style="background-color:#A5D6A7" rowspan="1" colspan="1"|'''Normal''' |
||
| − | |style="background-color:#A5D6A7" rowspan="1" colspan="3"| +1{{Firepower}} +2{{Evasion}} |
||
| − | |- |
||
| − | |style="background-color:#BFBA58" rowspan="1" colspan="1"|'''w/ Air Radar''' |
||
| − | |style="background-color:#BFBA58" rowspan="1" colspan="3"| +1{{Firepower}} +6{{AA}} +2{{Evasion}} |
||
| − | |- |
||
| − | |style="background-color:#BFBA58" rowspan="1" colspan="1"|'''w/ Radar''' |
||
| − | |style="background-color:#BFBA58" rowspan="1" colspan="3"| +2{{Firepower}} +3{{Torpedo}} +4{{Evasion}} |
||
| − | |- |
||
| − | |style="background-color:#99C7F9" rowspan="1" colspan="1"|'''w/ {{EquipmentLink|61cm Quadruple (Oxygen) Torpedo Mount|text=61cm Quad (Oxy)}} or {{EquipmentLink|61cm Quadruple (Oxygen) Torpedo Mount Late Model|text=LM}}''' |
||
| − | |style="background-color:#99C7F9" rowspan="1" colspan="3"| +2{{Firepower}} +3{{Torpedo}} +2{{Evasion}} |
||
| − | |- |
||
| − | |rowspan="4"|{{ShipLink|text=Shiratsuyu-class|link_class=Shiratsuyu}}<br>{{ShipLink|text=Hatsuharu-class|link_class=Hatsuharu}} |
||
| − | |style="background-color:#A5D6A7" rowspan="1" colspan="1"|'''Normal''' |
||
| − | |style="background-color:#A5D6A7" rowspan="1" colspan="3"| +1{{Firepower}} +1{{Evasion}} |
||
| − | |- |
||
| − | |style="background-color:#BFBA58" rowspan="1" colspan="1"|'''w/ Air Radar''' |
||
| − | |style="background-color:#BFBA58" rowspan="1" colspan="3"| +1{{Firepower}} +5{{AA}} +1{{Evasion}} |
||
| − | |- |
||
| − | |style="background-color:#BFBA58" rowspan="1" colspan="1"|'''w/ Radar''' |
||
| − | |style="background-color:#BFBA58" rowspan="1" colspan="3"| +2{{Firepower}} +2{{Torpedo}} +3{{Evasion}} |
||
| − | |- |
||
| − | |style="background-color:#99C7F9" rowspan="1" colspan="1"|'''w/ {{EquipmentLink|61cm Quadruple (Oxygen) Torpedo Mount|text=61cm Quad (Oxy)}} or {{EquipmentLink|61cm Quadruple (Oxygen) Torpedo Mount Late Model|text=LM}}''' |
||
| − | |style="background-color:#99C7F9" rowspan="1" colspan="3"| +2{{Firepower}} +3{{Torpedo}} +1{{Evasion}} |
||
| − | |- |
||
| − | |rowspan="4"|{{ShipLink|text=Ayanami-class|link_class=Ayanami}}<br>{{ShipLink|text=Akatsuki-class|link_class=Akatsuki}} |
||
| − | |style="background-color:#A5D6A7" rowspan="1" colspan="1"|'''Normal''' |
||
| − | |style="background-color:#A5D6A7" rowspan="1" colspan="3"| +1{{Firepower}} |
||
| − | |- |
||
| − | |style="background-color:#BFBA58" rowspan="1" colspan="1"|'''w/ Air Radar''' |
||
| − | |style="background-color:#BFBA58" rowspan="1" colspan="3"| +1{{Firepower}} +5{{AA}} |
||
| − | |- |
||
| − | |style="background-color:#BFBA58" rowspan="1" colspan="1"|'''w/ Radar''' |
||
| − | |style="background-color:#BFBA58" rowspan="1" colspan="3"| +2{{Firepower}} +2{{Torpedo}} +2{{Evasion}} |
||
| − | |- |
||
| − | |style="background-color:#99C7F9" rowspan="1" colspan="1"|'''w/ {{EquipmentLink|61cm Quadruple (Oxygen) Torpedo Mount|text=61cm Quad (Oxy)}} or {{EquipmentLink|61cm Quadruple (Oxygen) Torpedo Mount Late Model|text=LM}}''' |
||
| − | |style="background-color:#99C7F9" rowspan="1" colspan="3"| +2{{Firepower}} +3{{Torpedo}} |
||
| − | |- |
||
| − | |colspan="4" style="text-align:left;"|'''Note:''' No additional bonus from equipping multiple torpedoes. |
||
| − | |} |
||
| − | |||
| − | These tables show the visible stat bonuses for using certain equipment on certain ships/ship classes. These bonuses are added onto the regular stats of the equipment; this table does '''not''' show the total stats gained from the equipment. Hidden stat bonuses are not included. "Radar" refers to any radar with an accuracy stat greater than or equal to 3, while "Air Radar" specifically requires a radar classified as an air radar. If multiple combinations of listed equipment is equipped, the highest bonus is given. |
||
| − | |||
| − | Last Updated: August 15, 2018 by '''[[User:Drakylon|Drakylon]]''' |
||
| − | |||
| − | {{Clear}} |
||
| − | |||
| − | ==References== |
||
| − | <references /> |
||
[[Category:Calculation]] |
[[Category:Calculation]] |
||
[[Category:Example]] |
[[Category:Example]] |
||
Latest revision as of 10:22, 15 July 2019
Template:Under ConstructionSee also: Fit gun bonus - Reddit intermediate players' guide
Fit Bonus and Overweight Penalty[]
With the introduction of fit gun mechanics on July 28th 2014, ships now will receive fit bonus/penalties depending if the equipped gun fits for the class or if the gun is too heavy for the ship to use.
As fit bonuses are unaffected by morale or combined fleets, it becomes important that you utilize the fit bonuses as much as possible.
Fit mechanics do not apply to the abyssal fleet.[1]
Battleships[]
Battleships receives accuracy bonuses if the guns are fit and accuracy penalties if its overweight[2]. How much bonus/penalty a ship receives, depends on the battleship class, the caliber and type of the gun and whether the battle takes place during day or night.
| Ship Class | 35.6cm P35.6cm  Dazzle  38cmK  30.5cm  30.5cmK  38.1cm  38.1cm/N 
|
38cm四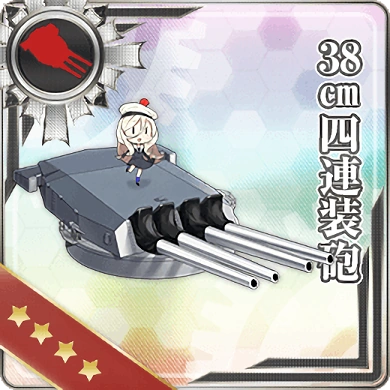 38cmK四 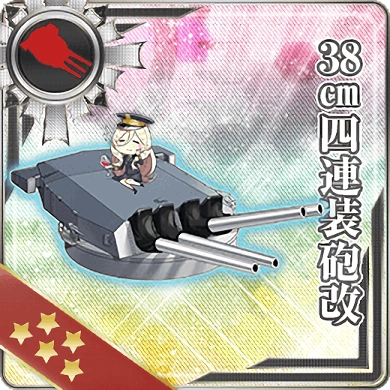
|
381mm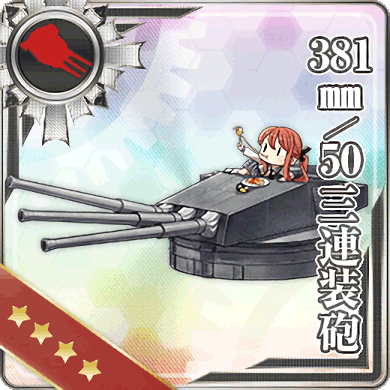 381mmK 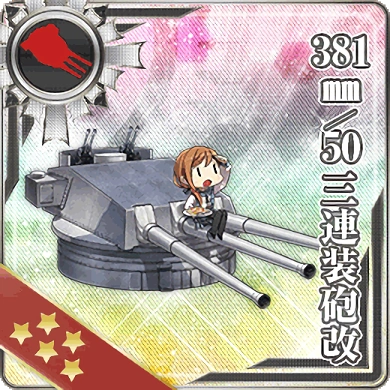
|
41cm P41cm  41cmK  41cmK2 
|
16inch 16inch + GFCS 
|
16inch Mk.I
|
16inch + AFCT Kai 
|
16inch Kai + FCR Type 284 
|
P46cm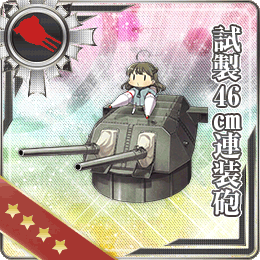
|
46cm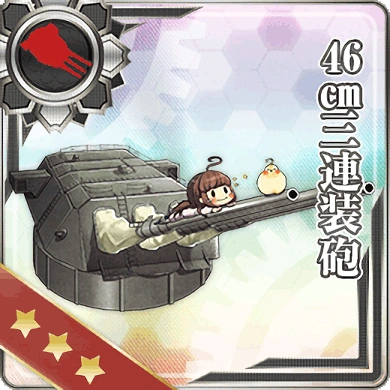
|
46cmK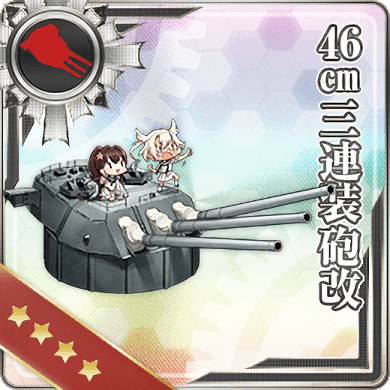
|
P51cm 51cm 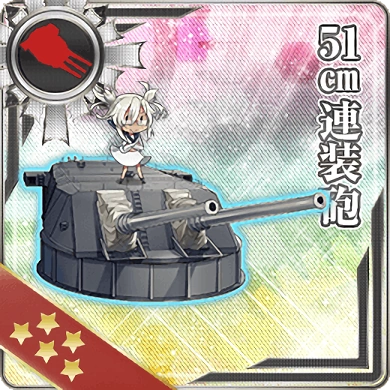
| ||||||||||||||
|---|---|---|---|---|---|---|---|---|---|---|---|---|---|---|---|---|---|---|---|---|---|---|---|---|---|---|
| Гангут Class | +7 30.5cm: +10 |
0 | 0 | -7 | -3 | -10? | ?? | ?? | -10 | -18 | ?? | N/A | ||||||||||||||
| Kongou Class |
+7 | 0 | -2 | -5 | -5 | -5 | -6 | -3 | -7 | -10 | -10? | N/A | ||||||||||||||
| Bismarck Class | +4 | 0 | +1 | -5 | -5 | -5 | ?? | ?? | -7 | -10 | ?? | N/A | ||||||||||||||
| Vittorio Veneto Class |
+4 | 0 | +1 | -5 | -5 | -5 | ?? | ?? | -7 | -10 | ?? | N/A | ||||||||||||||
| Richelieu Class | +4 | +5 | -2 | -5 | -5 | -7 | -14? | -8 | -7 | -10 | ?? | N/A | ||||||||||||||
| Iowa Class | +4 | 0 | -2 | -5 | 0 Married: +5 |
?? | ?? | ?? | -7 | -10 | ?? | N/A | ||||||||||||||
| Queen Elizabeth Class | +6 38.1 cm: +8 |
?? | +2 | +2 | -2? | +5 | ?? | +4 | -3 | -10 | ?? | N/A | ||||||||||||||
| Nelson Class | ?? | ?? | 0 | +3 | ?? | 0 | ?? | ?? | ?? | ?? | ?? | N/A | ||||||||||||||
| Ise/Fusou Class (Base) |
+2 | 0 | +2 | +2 | +2 | +3 | ?? | ?? | -3 | -7 | ?? | N/A | ||||||||||||||
| BBV-class |
+4 | 0 | +2 | +2 | 0 | 0 | ?? | ?? | -3 | -7 | -4 | N/A | ||||||||||||||
| Ise-class (Kai Ni) | +4 | 0 | ?? | +4? | ?? | ?? | ?? | +2 | -3? | -7 Fast +: -11? |
?? | N/A | ||||||||||||||
| Nagato Class |
+2 | 0 | +2 | +2 | +2 | +3 | ?? | ?? | -3 | -7 | ?? | 0 | ||||||||||||||
| Nagato Class (Kai Ni) | +2 | 0 | +2 | +5 | 0 | ?? | +4 | ?? | -2 | -4 | -6 | Nagato: -5 Mutsu: -8 | ||||||||||||||
| Yamato Class |
0 | +3 | +3 | +7 | 0 | |||||||||||||||||||||
Note: Fit gun mechanics are still being investigated to this day, hence the values are not final and may be subject to changes. Values with a question mark either means that its not conclusive yet or the conclusion drawn here is not the same as the one drawn by yumeji.
| ||||||||||||||||||||||||||
| Last Updated: July 15th 2019 | Made by: Tsubakura | |||||||||||||||||||||||||


More generally, the accuracy offset can be defined with the formula:

Where:
- is the resulting fit bonus or overweight penalty
- is the main coefficient of the equipped gun class. Refer to the above table for the coefficients applied to each Battleship for their respective guns.
- is the marriage coefficient for the particular gun class. Assumes a value of 0.6 if the ship is married, and if the main coefficient is negative.
- is the number of equipped guns for that gun class.


Cruisers[]
Cruisers can receive accuracy and/or firepower bonuses from using fit guns in their load-out.
| Ship Class | 
|
 |
 |
 |
|
 |
 |
| ||||||||
|---|---|---|---|---|---|---|---|---|---|---|---|---|---|---|---|---|
| Day | Night | Day | Night | Day | Night | Day | Night | Day | Night | Day | Night | Day | Night | Day | Night | |
| Ooyodo Class | +2 +2N |
+4N |
+2 |
+2 |
?? | +2 |
0 | -2 -2.5N?? | ||||||||
| Agano Class |
+2 +2N |
+4N |
+5 +2N |
+5 +2N |
?? | -2 -2N |
0 | -2 -2.5N?? | ||||||||
| All other CL(T) | +2 +2N |
+4N |
+2 |
+2 |
+3 |
-2 -2N |
0 | -2 -2.5N?? | ||||||||
| Mogami Class |
0 | 0 | 0 | 0 | 0 | +2 |
0 | Template:Nowrap |
0 | |||||||
| Mogami Class (K2) |
0 | 0 | 0 | 0 | 0 | +5 |
0 | |||||||||
| Zara Class |
0 | 0 | 0 | 0 | 0 | ?? | +1 | |||||||||
| All other CA(V) | 0 | 0 | 0 | 0 | 0 | ?? | 0 | |||||||||
| Seaplane Tenders (AV) | ?? | ?? | -5N Kai:-7N |
-6N |
0 | ?? | -8 -10N |
?? | ||||||||
|
Note: Fit gun mechanics are still being investigated to this day, hence the values are not final and may be subject to changes. Values with a question mark means that it is potentially outdated and might no longer be correct.
| ||||||||||||||||
| Last Updated: June 23rd 2019 | Made by: Tsubakura | |||||||||||||||


Single Mount High-Angle Bonus[]
As of June 23, Yura and Mutsuki/Kamikaze-class destroyers gain fit bonuses from having single mount ![]() equipped.
equipped.
| Ship | 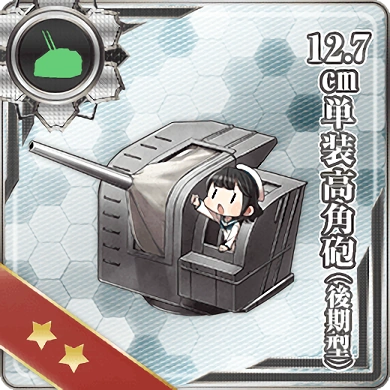
| |
|---|---|---|
| Satsuki K2 | +5 | |
| Other Mutsuki-class |
?? | |
| Kamikaze-class |
?? | |
| Yura K2 | +4 +10N | |
| Light Cruisers (CL) | +4N | |
|
Unknown factors:
| ||
| Last Updated: December 5th 2018 | Made by: Tsubakura | |


References[]