Introduction
Combat is where the majority of the game's action takes place. When sortieing to a map, you will notice along the way that there are red nodes scattered all over the maps. These are combat nodes, in which your goal is to sink the enemy ships. Combat is completely automated, save for a few decisions you can make during some sections.
This article explains the basic flow of combat mechanics and is more focused for beginners to gain an understanding as to how combat works. In case you already have a basic understanding of this, use the tabs above to navigate to the topic you're interested in.
This article will explain the following combat phases in order:
- Formation Selection
- Detection
- Aerial Combat
- Engagement Form Modifier
- Day Combat
- Night Combat
Damage Calculation
Before we actually explore each combat phase though, it is important to know what the relevant stats are when dealing damage and how they are applied during each phase.
Each form of attack has their own mechanics associated with them as well as a damage cap. The damage cap is also known as the softcap and any damage value that goes past the damage cap will be met with diminishing returns. Of course, there are exceptions to anything, but more to that later.
For more information about damage calculation, click here
Formation Selection
When approaching a red node, you are given the choice to select a fleet formation. There are 5 formations for the player to choose and each formation has its advantages and disadvantages.
However, in case the player has less than 4 ships, you will not be given the choice and the fleet will default to Line Ahead formation.
Note: Keep in mind that the formation you select here, will only affect your own fleet.
Formation Modifier
| Formation | Icon | Damage Modifier | Accuracy Modifier | FS Prot | ||||||
|---|---|---|---|---|---|---|---|---|---|---|
| Shelling | ASW | Night | AA | Shelling | ASW | Torp | Night | |||
| Line Ahead 単縦陣? |
100% | 60% | 100% | 100% | 100% | 100% | 100% | 100% | 45% | |
| Double Line 複縦陣? |
80% | 80% | 100% | 120% | 120% | 120% | 80% | 90% | 60% | |
| Diamond 輪形陣? |
70% | 120% | 100% | 160% | 100% | 100% | 40% | 70% | 75% | |
| Echelon 梯形陣? |
60% | 100% | 100% | 100% | 120% | 120% | 60% | 80% | 60% | |
| Line Abreast 単横陣? |
60% | 130% | 100% | 100% | 120% | 120% | 30% | 80% | 60% | |
Note:
- The values are based from data found in Kancolle Vita. All the analysis and tests done on the browser version seems to match the current values so far.
- This table consists of only damage and hit rate modifiers of each attack, which are the basic essentials. In case you are interested in the full table, check out Day Combat for more info.
- The surface damage modifier applies to both shelling and torpedo attacks but does not affect Opening Airstrikes or Anti-Submarine attacks.
- All attacks during night battle have a 100% damage modifier, regardless of formation.
- The exception being against submarines.
- Enemy's fleet is affected by the same formation modifier as us; furthermore, the formation shown on screen is based on the perspective of both fleet. This may result in the situation where the formations of both sides are shown as "line ahead" icon on-screen, but it is actually "line abreast".
- Flagship protection is the situation where a non-flagship ship protects the flagship from being damaged by receiving the attack instead. This will only work if there is a healthy (green health) non-flagship ship available in the fleet. In case all the requirements are met, the chances will trigger every time a flagship is targeted.
Factors that decides which formation you should choose:
- Line Ahead: This formation has the highest offensive power for surface combat. This is generally the choice you should always be choosing when surface combat is involved. Keep in mind though that ASW damage is very poor.
- Double Line: This formation increases the shelling accuracy, but lowers the damage output in return during the day. This is a good choice in case the enemy fleet contains a mix of submarines and surface fleets, but because of the firepower penalty, you are recommended not to choose this formation for the increased accuracy.
- Diamond: This formation has the strongest anti-air modifier and is almost as good as Line Abreast for ASW purposes. Diamond is the formation you should always be using when you have to defend yourself in an Air Raid node. This is also a good alternative to Double Line when you are faced with mixed fleets.
- Keep in mind that Diamond formation is only available when there are at least 5 ships in the fleet.
- Echelon: A formation which doesn't excel in anything during the day and is generally useless.
- Line Abreast: Line Abreast is the best formation for anti-sub purposes, but has the worst damage modifier against surface targets during the day. This is also the best formation to use if the goal is to increase your evasion in night battles.
Detection
In detection, your fleet attempts to detect the enemy fleet by either sending out recon seaplanes, using radars or detect them using sonars, in case you are dealing with submarines. The success rate of a detection is influenced by the ![]() of your fleet.
of your fleet.
In case your fleet fails to detect the enemy fleet, your fleet will not participate in the Aerial Combat Phase, resulting in an automatic Air Incapability. Failing the detection will also run the risk of your recon seaplane getting shot down.
Aerial Combat
Aerial combat is a phase where both friendly fleet and opponents send their planes out at the same time trying to determine the air control status while shooting down each others' planes. The fleets then start their anti-air defense against bombers and the remaining surviving bombers would then launch an attack on the enemy ships.
The important main stages that take place in aerial combat are in the following order:
- Fighter Combat
- Fleet Anti-Air Defense
- Bombing Phase
Fighter Combat (First Stage)
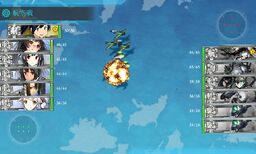
Fighting for Air Superiority
In this phase, all fighters and bombers fight for the air control to establish air superiority. The air state is dependent on how many fighter power your fleet has, compared to the enemy fleet. Planes are proportionally shot down depending on which air state has been achieved. The air states are as follows:
- AS+: Air Supremacy
- AS: Air Superiority
- AP: Air Parity
- AD: Air Denial
- AI: Air Incapability
In case your opponent does not have any fighter power, you will gain Air Supremacy by default. If neither side have aircraft that can participate in the fighter combat, the air control will default to parity. You are advised to always attempt to obtain at least Air Superiority and in cases where it's possible, Air Supremacy. The stronger your air control, the more advantages you gain in your favor.
Fleet Anti-Air Defense (Second Stage)

An Anti-Air Cut-In
After the first stage, all the fighters will retreat, as they already finished their job of establishing air control. In this phase, all your bombers will approach the opponent fleet in an attempt to attack them, while the enemy will attempt to shoot them down through ![]() fire.
fire.
The strength of the ![]() fire is heavily dependent on the
fire is heavily dependent on the ![]() equipment and Anti-Air Cut-In attacks. While base
equipment and Anti-Air Cut-In attacks. While base ![]() stats of a ship do contribute to your anti-air, it is the least relevant.
stats of a ship do contribute to your anti-air, it is the least relevant.
Bombing Phase (Third Stage)
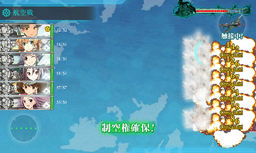
An airstrike being carried out
All remaining surviving bombers will randomly choose and attack a target among the enemy fleet. The damage done is affected by the amount of planes in a slot and whether you have used a dive bomber or a torpedo bomber.
Note: Opening Airstrike accuracy is not affected by morale and the damage is not affected by formations or engagement modifiers.
For more information about aerial combat, click here.
Engagement Form Modifier
During every battle, an engagement form is declared, which further modifies the amount of damage you can potentially deal.
| Form | Damage Modifier | Chance | Chance with Saiun
|
Combat Screens |
|---|---|---|---|---|
| Crossing the T (Advantage) T字戦有利 (T Ji-sen Yuuri?) |
120% | 15% | 15% | 
|
| Parallel Engagement 同航戦 (Doukousen?) |
100% | 45% | 45% | 
|
| Head-on Engagement 反航戦 (Hankousen?) |
80% | 30% | 40% | 
|
| Crossing the T (Disadvantage) T字戦不利 (T Ji-sen Furi?) |
60% | 10% | 0% | 
|
Note:
- All engagement forms affect both sides equally, including crossing the T (Advantage or Disadvantage). In the case of Green T, both sides will gain a 120% boost in firepower.
- Night battle and aerial combat are not affected by engagement forms. However, day torpedo attacks are affected by engagement forms.
- Engagement modifiers do affect opening phases like Opening Torpedo or Opening ASW, even though they happen before the engagement modifier is declared.
- Equipping a
 Saiun
Saiun effectively prevents Red T.
Day Combat
- Main article: Day Combat
During day combat, your fleet and the enemy will exchange fire and attempt to sink each other. It is basically the phase where also the most action happens, including the majority of the phases that was explained above.
This is further categorized into two categories:
- Opening Phases: The opening phases consists of stages where attacks are fired pre-emptively against your opponents before any other attacks are performed. This phase ends when the formation modifier gets displayed.
- Day Shelling Phase: After the formation modifier is displayed, the shelling phase will start. In this phase, all surface ships will each take a turn in firing a barrage against the enemy fleet. This can extend to a 2nd shelling phase if a battleship is present. This will then be concluded with a torpedo phase, in which all ships with torpedo capabilities will fire off a torpedo.
Opening Phases:
- Aerial Combat
- Jet Assault
- Land Base Aerial Support
- Fighter Combat
- Fleet Anti-Air Defense
- Bombing Phase
- Support Expedition
- Opening Anti-Submarine Warfare
- Opening Torpedo Salvo
Day Shelling Phase:
- 1st Shelling Phase
- Artillery Spotting
- Anti-Submarine Warfare
- 2nd Shelling Phase
- Artillery Spotting
- Anti-Submarine Warfare
- Closing Torpedo
For more information regarding the phases of aerial combat, check out Aerial Combat.
For more information regarding each phase related to shelling, check out the Day Combat.
Support Expeditions
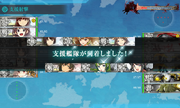
Support Shelling initiated
Support expeditions involve sending a fleet into an expedition to provide additional support to the current fleet that is at sortie. Depending on whether you used a node support that supports you on the way or a boss support, the expedition fleet will appear on the battle nodes and fire an opening barrage against the enemy fleet. The type of support you receive depends completely on what kind of ships you have sent to the expedition.
Note: Keep in mind that this is only available for World 5 and event maps.
For more information regarding support expeditions, check out Support Expedition.
Artillery Spotting
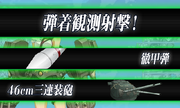
Cut-in Type Observed Fire using 1 Main 1 Sec & Type 91 AP shell
When at least Air Superiority is achieved during the Aerial phase, ships that are equipped with a ![]() Seaplane will be eligible to use Artillery Spotting during the day shelling phase. Artillery Spotting is either a strong but accurate single attack (Cut In) or a powerful double attack (Double Attack) that deals double the amount of damage against surface targets.
Seaplane will be eligible to use Artillery Spotting during the day shelling phase. Artillery Spotting is either a strong but accurate single attack (Cut In) or a powerful double attack (Double Attack) that deals double the amount of damage against surface targets.
All forms of artillery spotting attack deal extra post-cap damage, meaning that the extra damage is not restricted by the damage cap. Note that Artillery Spotting does not work against submarines because guns are useless against them.
If you want to learn more about artillery spotting, check out the Artillery Spotting requirements.
Anti-Submarine Warfare
Any submarine present in the enemy fleet will force Destroyers, Light Cruisers, Torpedo Cruisers, Training Cruisers, and Hayasui to target them during the shelling phases even if there are surface targets present. It also applies to Aviation Heavy Cruisers, Aviation Battleships, Seaplane Tenders, Light Carriers and Akitsu Maru equipped with seaplane bombers, File:Ka-type Observation Autogyro Icon.pngKa-type Autogyro or
or ![]() Liaison Aircraft
Liaison Aircraft .
.
Note: Guns are completely useless against submarines, hence they should not be used if you are only facing submarines as enemies, like 1-5.
To find more information about ASW among other things, check out the Day Combat.
Night Combat
- Main article: Night Battle
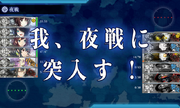
Entering Night Battle
An example of a cut-in
Searchlight, Starshell and Night Recon
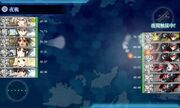
In the scenario that the enemy fleet has not been defeated yet during Day Combat, the player has the choice to pursue them in a Night battle (夜戦) to finish them off. During night battle, the following effects are applied:
- The ammo usage on that node is increased by 50% if night battle is entered from day-battle. As most nodes on normal and event maps alike use 20% ammo, this will be increased to 30% for example.
- During night, the firepower is
 and
and  stats combined together. Consequently, DDs, CLs, CLTs and CAs have drastically increased strength at night.
 - Any vessel that is heavily damaged ((大破)) are not allowed to attack during the night battle.
- Night battle damage cap is raised to 300.
- Any attack against submarines in regular Night Battles are automatically nullified, so they are practically invincible. Avoid going into a night battle against a submarine, unless one of the following happens, which allows you to do damage against submarines as normal:
- You are using a Combined Fleet.
- The battle started at night.
- Formation damage modifiers and Engagement Form damage modifiers do not apply in Night Battle (i.e. they are always 100%).
Night Battle Special Attacks
- Certain combinations of weapon equipment will cause Cut-In or Double Attacks at night, greatly increasing accuracy and/or firepower.
- If night combat nodes are anticipated, it can be very helpful to utilize specialized night battle equipment such as Star Shell
 s, Searchlight
 and Type 98 Recon Seaplane (Night Scout)
 , as they provide bonuses during night-battle and also increases your Cut-In chances.
Note: Unlike Artillery Spotting attacks, the special attacks performed during the night are not post-cap, meaning that it will be affected by the damage cap.
For more information regarding night battle and the setups, check out Night Battle.
Victory Conditions
- For victory conditions for Air Raid Battles (空襲戦), see Events/Mechanics.
- For alternative formulation of victory conditions, see Partials/Victory Conditions.
- Perfect S (完全勝利, Total Victory)
- All enemy ships sunk and no damage taken.
- S (勝利, Victory)
- All enemy ships sunk and no allied ships sunk.
- A (勝利, Victory)
- Required number of enemy ships sunk (see below) and no allied ships sunk.
- B (戦術的勝利, Tactical Victory)
- Sinking the enemy flagship guarantees at least a B as long as no allied ships are sunk.
- Enemy flagship sunk, friendly ship sunk and number of friendly ships sunk < number of enemy ships sunk.
- Damage gauge at least 2.5 times higher enemy damage gauge.
- This rate is the minimum requirement to clear maps without boss gauge.
- C (戦術的敗北, Tactical Defeat)
- Didn't clear any of the conditions for A or B, but enemy took over a certain amount of damage.
- Damage gauge higher than enemy gauge, but not reaching 2.5 times as much.
- Friendly ship sunk, damage gauge higher than enemy, but not 2.5 times as much.
- Friendly ship sunk, enemy flagship sunk and number of friendly ships sunk lower than number of enemy ships sunk. It is possible to clear maps with boss gauges (eg. 4-4, 5-3, event maps) with a C if the enemy flagship is sunk.
- D (敗北, Defeat)
- Enemy took less than a certain amount of damage.
- Both sides taking 0 damage is also D.
- If your fleet consist only 1 ship and it is reaching Heavy Damage without meeting any winning requirements, it will instantly judged as D as well.
- Damage gauge lower than enemy gauge.
- Friendly ship sunk, not all enemy ships sunk, and gauge lower than enemy gauge.
- E (敗北, Defeat)[1]
- Over a certain number of friendly ships sunk. (see below)
- Friendly ship sunk while not meeting any victory conditions.
- No damage done to enemy, while taking over a certain amount (Never happens in a fleet of 1).
Notes
- The Minimum Sunk Requirement:
- 4 ships out of a fleet of 6
- 3 ships out of a fleet of 5
- 2 ships out of a fleet of 4
- 2 ships out of a fleet of 3
- 1 ship out of a fleet of 2
- Victory status affects the chance of getting drops and rare drops on the specified node.
- B rank or above is necessary to obtain drops.
- A rank or above is typically necessary for obtaining rare drops.
- S rank has a higher chance of obtaining rare drops than A rank, and is required for some very rare drops.
- Getting Perfect S does not give you an increased drop rate, compared to a regular S rank.


