m (Replacing them, until its fixed.) |
(→Formation Modifier: Echelon) |
||
| (15 intermediate revisions by 5 users not shown) | |||
| Line 138: | Line 138: | ||
| style="text-align:left;" | Echelon<br /><span style="cursor:help;" title="Teikei-jin">梯形陣</span><sup>[http://kancolle.wikia.com/wiki/Help:Japanese ?]</sup> |
| style="text-align:left;" | Echelon<br /><span style="cursor:help;" title="Teikei-jin">梯形陣</span><sup>[http://kancolle.wikia.com/wiki/Help:Japanese ?]</sup> |
||
| {{Echelon}} |
| {{Echelon}} |
||
| − | | |
+ | |75% |
| − | | |
+ | |110% |
|100% |
|100% |
||
|100% |
|100% |
||
| Line 162: | Line 162: | ||
'''Note:''' |
'''Note:''' |
||
* The values are based from data found in Kancolle Vita. All the analysis and tests done on the browser version seems to match the current values so far. |
* The values are based from data found in Kancolle Vita. All the analysis and tests done on the browser version seems to match the current values so far. |
||
| + | ** Echelon formation was strengthened during the [[Thread:711264|February 27, 2019 update]] |
||
* This table consists of only damage and hit rate modifiers of each attack, which are the basic essentials. In case you are interested in the full table, check out [[Combat/Day Combat|Day Combat]] for more info. |
* This table consists of only damage and hit rate modifiers of each attack, which are the basic essentials. In case you are interested in the full table, check out [[Combat/Day Combat|Day Combat]] for more info. |
||
*The surface damage modifier applies to both shelling and torpedo attacks but does not affect Opening Airstrikes or Anti-Submarine attacks. |
*The surface damage modifier applies to both shelling and torpedo attacks but does not affect Opening Airstrikes or Anti-Submarine attacks. |
||
| Line 174: | Line 175: | ||
*'''Diamond:''' This formation has the strongest anti-air modifier and is almost as good as Line Abreast for ASW purposes. Diamond is the formation you should always be using when you have to defend yourself in an '''Air Raid''' node. This is also a good alternative to Double Line when you are faced with mixed fleets. |
*'''Diamond:''' This formation has the strongest anti-air modifier and is almost as good as Line Abreast for ASW purposes. Diamond is the formation you should always be using when you have to defend yourself in an '''Air Raid''' node. This is also a good alternative to Double Line when you are faced with mixed fleets. |
||
** Keep in mind that Diamond formation is only available when there are at least 5 ships in the fleet. |
** Keep in mind that Diamond formation is only available when there are at least 5 ships in the fleet. |
||
| − | *'''Echelon:''' A formation |
+ | *'''Echelon:''' A somewhat balanced formation with relatively high ASW damage but relatively low firepower and torpedo accuracy that is a good option for engaging submarine fleets that also contain surface ships. |
| − | *'''Line Abreast:''' Line Abreast is the best formation for anti-sub purposes, but has the worst damage modifier against surface targets during the day. |
+ | *'''Line Abreast:''' Line Abreast is the best formation for anti-sub purposes, but has the worst damage modifier against surface targets during the day. Please be advised that although this formation does have the highest Evasion modifier among the five for Night Battle Nodes, due to the Evasion Cap, it will have diminishing returns, and therefore you are more recommended to go Line Ahead. |
| + | |||
{{Clear}} |
{{Clear}} |
||
| Line 280: | Line 282: | ||
==Day Combat== |
==Day Combat== |
||
| − | {{Main|Day Combat}} |
+ | {{Main|Day Combat|tab=true}} |
During day combat, your fleet and the enemy will exchange fire and attempt to sink each other. It is basically the phase where also the most action happens, including the majority of the phases that was explained above. |
During day combat, your fleet and the enemy will exchange fire and attempt to sink each other. It is basically the phase where also the most action happens, including the majority of the phases that was explained above. |
||
| Line 324: | Line 326: | ||
==Night Combat== |
==Night Combat== |
||
| − | {{ |
+ | {{:Combat/Night Battle|Night Battle}} |
[[File:Night Battle Intro.png|thumb|Entering Night Battle]] |
[[File:Night Battle Intro.png|thumb|Entering Night Battle]] |
||
| Line 333: | Line 335: | ||
*The ammo usage on that node is increased by 50% if night battle is entered from day-battle. As most nodes on normal and event maps alike use 20% ammo, this will be increased to 30% for example. |
*The ammo usage on that node is increased by 50% if night battle is entered from day-battle. As most nodes on normal and event maps alike use 20% ammo, this will be increased to 30% for example. |
||
*During night, the firepower is {{Firepower}} and {{Torpedo}} stats combined together. Consequently, DDs, CLs, CLTs and CAs have drastically increased strength at night. |
*During night, the firepower is {{Firepower}} and {{Torpedo}} stats combined together. Consequently, DDs, CLs, CLTs and CAs have drastically increased strength at night. |
||
| − | *Any vessel that is heavily damaged (<span style="color:red;">''' |
+ | *Any vessel that is heavily damaged (<span style="color:red;">'''大破'''</span>) are not allowed to attack during the night battle. |
*Night battle damage cap is raised to '''300'''. |
*Night battle damage cap is raised to '''300'''. |
||
| − | * Any attack against submarines in regular Night Battles are automatically nullified |
+ | * Any attack against submarines in regular Night Battles are automatically nullified and reduced to scratch damages, practically making them invincible. Avoid going into a night battle against a submarine, unless one of the following happens, which allows you to do damage against submarines as normal: |
| − | ** You are using a [[Combined Fleet]]. |
+ | ** You are using a [[Combat/Combined Fleet|Combined Fleet]]. |
** The battle started at night. |
** The battle started at night. |
||
| − | *Formation damage modifiers and Engagement Form damage modifiers do not apply in Night Battle (i.e. they are always 100%). |
+ | *Formation '''damage modifiers''' and Engagement Form damage modifiers do not apply in Night Battle (i.e. they are always 100%). |
===Night Battle Special Attacks=== |
===Night Battle Special Attacks=== |
||
Revision as of 18:04, 1 March 2019
Introduction
Combat is where the majority of the game's action takes place. When sortieing to a map, you will notice along the way that there are red nodes scattered all over the maps. These are combat nodes, in which your goal is to sink the enemy ships. Combat is completely automated, save for a few decisions you can make during some sections.
This article explains the basic flow of combat mechanics and is more focused for beginners to gain an understanding as to how combat works. In case you already have a basic understanding of this, use the tabs above to navigate to the topic you're interested in.
This article will explain the following combat phases in order:
- Formation Selection
- Detection
- Aerial Combat
- Engagement Form Modifier
- Day Combat
- Night Combat
Damage Calculation
Before we actually explore each combat phase though, it is important to know what the relevant stats are when dealing damage and how they are applied during each phase.
| Icon | Description |
|---|---|
| The health of a ship. If a ship reaches 0 | |
| The | |
| The | |
| For Anti-Submarine Warfare (ASW). This stat affects how much damage you do against enemy submarines. | |
| The |
Each form of attack has their own mechanics associated with them as well as a damage cap. The damage cap is also known as the softcap and any damage value that goes past the damage cap will be met with diminishing returns. Of course, there are exceptions to anything, but more to that later.
| Type | Relevant Stats | Damage Cap | Description |
|---|---|---|---|
| Shelling Attacks | 180 | Attacks that involves firing a barrage at your opponents. | |
| Torpedo Attacks | 150 | Any form of torpedo attacks that are performed during the day. | |
| Opening Airstrikes | 150 | The aerial attack of an opening airstrike. | |
| ASW | 150 | Anti-Submarine attacks, which involves attacking the enemy submarine with depth charges or by attacking them with aircraft. | |
| Night Battle | 300 | During night battle, all forms of attacks are treated the same. |
For more information about damage calculation, click here
Formation Selection
When approaching a red node, you are given the choice to select a fleet formation. There are 5 formations for the player to choose and each formation has its advantages and disadvantages.
However, in case the player has less than 4 ships, you will not be given the choice and the fleet will default to Line Ahead formation.
Note: Keep in mind that the formation you select here, will only affect your own fleet.
Formation Modifier
| Formation | Icon | Damage Modifier | Accuracy Modifier | FS Prot | ||||||
|---|---|---|---|---|---|---|---|---|---|---|
| Shelling | ASW | Night | AA | Shelling | ASW | Torp | Night | |||
| Line Ahead 単縦陣? |
100% | 60% | 100% | 100% | 100% | 100% | 100% | 100% | 45% | |
| Double Line 複縦陣? |
80% | 80% | 100% | 120% | 120% | 120% | 80% | 90% | 60% | |
| Diamond 輪形陣? |
70% | 120% | 100% | 160% | 100% | 100% | 40% | 70% | 75% | |
| Echelon 梯形陣? |
75% | 110% | 100% | 100% | 120% | 120% | 60% | 80% | 60% | |
| Line Abreast 単横陣? |
60% | 130% | 100% | 100% | 120% | 120% | 30% | 80% | 60% | |
Note:
- The values are based from data found in Kancolle Vita. All the analysis and tests done on the browser version seems to match the current values so far.
- Echelon formation was strengthened during the February 27, 2019 update
- This table consists of only damage and hit rate modifiers of each attack, which are the basic essentials. In case you are interested in the full table, check out Day Combat for more info.
- The surface damage modifier applies to both shelling and torpedo attacks but does not affect Opening Airstrikes or Anti-Submarine attacks.
- All attacks during night battle have a 100% damage modifier, regardless of formation.
- The exception being against submarines.
- Enemy's fleet is affected by the same formation modifier as us; furthermore, the formation shown on screen is based on the perspective of both fleet. This may result in the situation where the formations of both sides are shown as "line ahead" icon on-screen, but it is actually "line abreast".
- Flagship protection is the situation where a non-flagship ship protects the flagship from being damaged by receiving the attack instead. This will only work if there is a healthy (green health) non-flagship ship available in the fleet. In case all the requirements are met, the chances will trigger every time a flagship is targeted.
Factors that decides which formation you should choose:
- Line Ahead: This formation has the highest offensive power for surface combat. This is generally the choice you should always be choosing when surface combat is involved. Keep in mind though that ASW damage is very poor.
- Double Line: This formation increases the shelling accuracy, but lowers the damage output in return during the day. This is a good choice in case the enemy fleet contains a mix of submarines and surface fleets, but because of the firepower penalty, you are recommended not to choose this formation for the increased accuracy.
- Diamond: This formation has the strongest anti-air modifier and is almost as good as Line Abreast for ASW purposes. Diamond is the formation you should always be using when you have to defend yourself in an Air Raid node. This is also a good alternative to Double Line when you are faced with mixed fleets.
- Keep in mind that Diamond formation is only available when there are at least 5 ships in the fleet.
- Echelon: A somewhat balanced formation with relatively high ASW damage but relatively low firepower and torpedo accuracy that is a good option for engaging submarine fleets that also contain surface ships.
- Line Abreast: Line Abreast is the best formation for anti-sub purposes, but has the worst damage modifier against surface targets during the day. Please be advised that although this formation does have the highest Evasion modifier among the five for Night Battle Nodes, due to the Evasion Cap, it will have diminishing returns, and therefore you are more recommended to go Line Ahead.
Detection
| Success | Failed |
|---|---|

|
|
| Effects | |
| Allows the participation of allied planes. Note: While it states that |
Prevents the participation of allied planes. |
| Fleet LOS affects Detection rate. | |
In detection, your fleet attempts to detect the enemy fleet by either sending out recon seaplanes, using radars or detect them using sonars, in case you are dealing with submarines. The success rate of a detection is influenced by the ![]() of your fleet.
of your fleet.
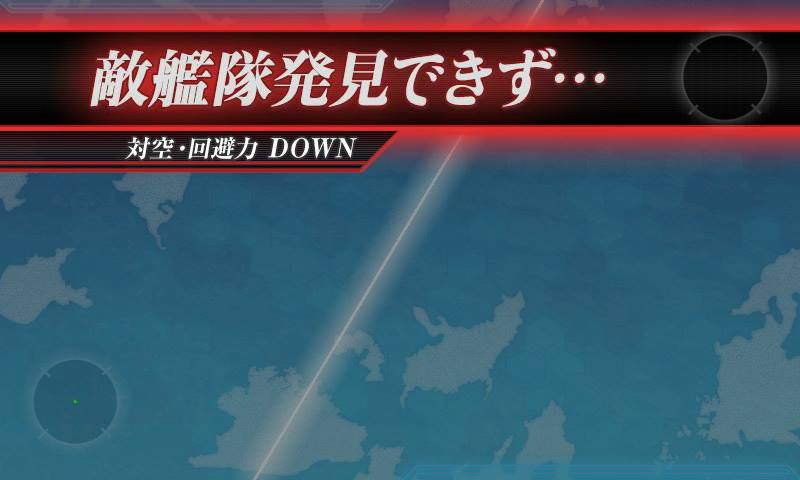
In case your fleet fails to detect the enemy fleet, your fleet will not participate in the Aerial Combat Phase, resulting in an automatic Air Incapability. Failing the detection will also run the risk of your recon seaplane getting shot down.
Aerial Combat
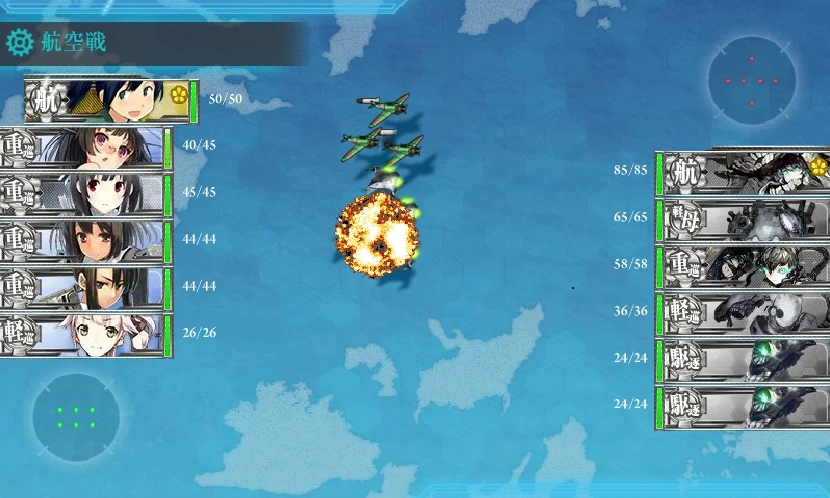
Aerial combat is a phase where both friendly fleet and opponents send their planes out at the same time trying to determine the air control status while shooting down each others' planes. The fleets then start their anti-air defense against bombers and the remaining surviving bombers would then launch an attack on the enemy ships.
The important main stages that take place in aerial combat are in the following order:
- Fighter Combat
- Fleet Anti-Air Defense
- Bombing Phase
Fighter Combat (First Stage)
Fighting for Air Superiority
In this phase, all fighters and bombers fight for the air control to establish air superiority. The air state is dependent on how many fighter power your fleet has, compared to the enemy fleet. Planes are proportionally shot down depending on which air state has been achieved. The air states are as follows:
- AS+: Air Supremacy
- AS: Air Superiority
- AP: Air Parity
- AD: Air Denial
- AI: Air Incapability
In case your opponent does not have any fighter power, you will gain Air Supremacy by default. If neither side have aircraft that can participate in the fighter combat, the air control will default to parity. You are advised to always attempt to obtain at least Air Superiority and in cases where it's possible, Air Supremacy. The stronger your air control, the more advantages you gain in your favor.
Fleet Anti-Air Defense (Second Stage)
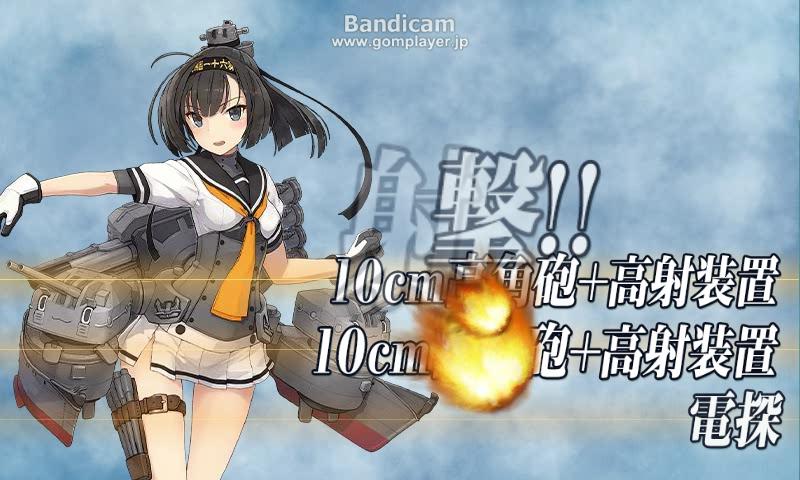
An Anti-Air Cut-In
After the first stage, all the fighters will retreat, as they already finished their job of establishing air control. In this phase, all your bombers will approach the opponent fleet in an attempt to attack them, while the enemy will attempt to shoot them down through ![]() fire.
fire.
The strength of the ![]() fire is heavily dependent on the
fire is heavily dependent on the ![]() equipment and Anti-Air Cut-In attacks. While base
equipment and Anti-Air Cut-In attacks. While base ![]() stats of a ship do contribute to your anti-air, it is the least relevant.
stats of a ship do contribute to your anti-air, it is the least relevant.
Bombing Phase (Third Stage)

An airstrike being carried out
All remaining surviving bombers will randomly choose and attack a target among the enemy fleet. The damage done is affected by the amount of planes in a slot and whether you have used a dive bomber or a torpedo bomber.
Note: Opening Airstrike accuracy is not affected by morale and the damage is not affected by formations or engagement modifiers.
For more information about aerial combat, click here.
Engagement Form Modifier
During every battle, an engagement form is declared, which further modifies the amount of damage you can potentially deal.
| Form | Damage Modifier | Chance | Chance with Saiun
|
Combat Screens |
|---|---|---|---|---|
| Crossing the T (Advantage) T字戦有利 (T Ji-sen Yuuri?) |
120% | 15% | 15% | 
|
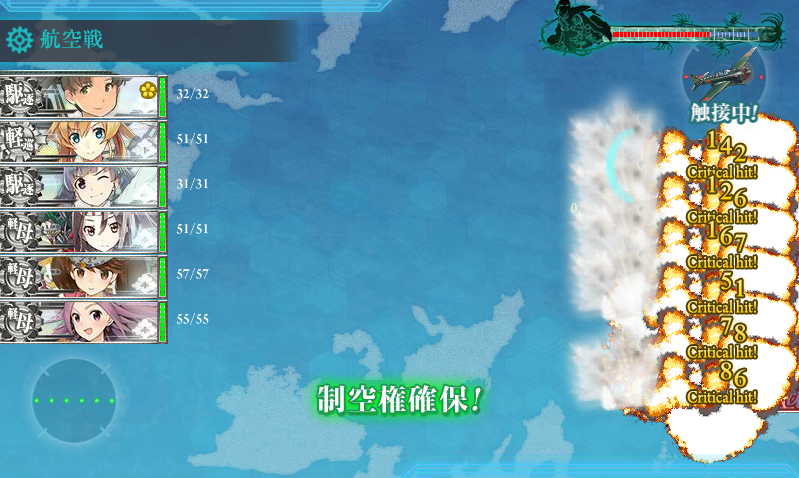
| Parallel Engagement 同航戦 (Doukousen?) |
100% | 45% | 45% | 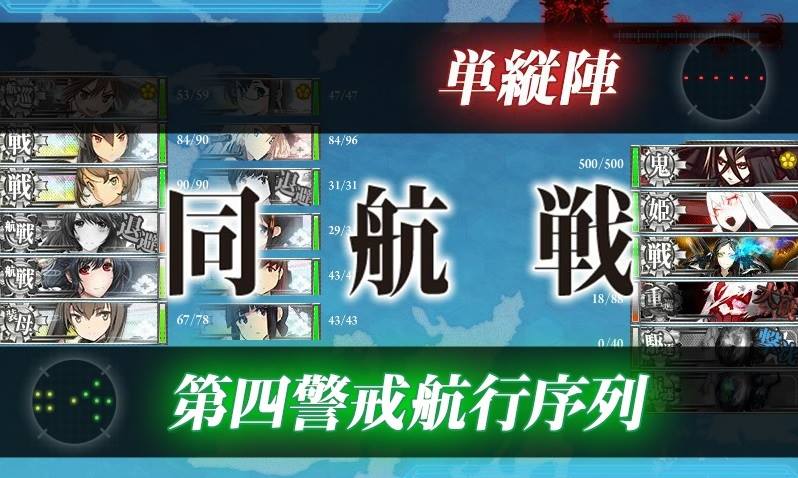
|
| Head-on Engagement 反航戦 (Hankousen?) |
80% | 30% | 40% | 
|
| Crossing the T (Disadvantage) T字戦不利 (T Ji-sen Furi?) |
60% | 10% | 0% | 
|
Note:
- All engagement forms affect both sides equally, including crossing the T (Advantage or Disadvantage). In the case of Green T, both sides will gain a 120% boost in firepower.
- Night battle and aerial combat are not affected by engagement forms. However, day torpedo attacks are affected by engagement forms.
- Engagement modifiers do affect opening phases like Opening Torpedo or Opening ASW, even though they happen before the engagement modifier is declared.
- Equipping a
 Saiun effectively prevents Red T.
Day Combat
- Main article: Day Combat
During day combat, your fleet and the enemy will exchange fire and attempt to sink each other. It is basically the phase where also the most action happens, including the majority of the phases that was explained above.
This is further categorized into two categories:
- Opening Phases: The opening phases consists of stages where attacks are fired pre-emptively against your opponents before any other attacks are performed. This phase ends when the formation modifier gets displayed.
- Shelling Phase: After the formation modifier is displayed, the shelling phase will start. In this phase, all surface ships will each take a turn in firing a barrage against the enemy fleet. This can extend to a 2nd shelling phase if a battleship is present.
- Torpedo Phase: The end of the shelling phase is concluded with a torpedo phase, in which all ships with torpedo capabilities will fire off a torpedo against their enemies. In case there are no enemies present who are vulnerable to torpedo attacks, this phase will be skipped instead.
Due to the length of the day combat phase, you are recommended to check out Day Combat instead for more in-depth information regarding this phase.
Support Expeditions
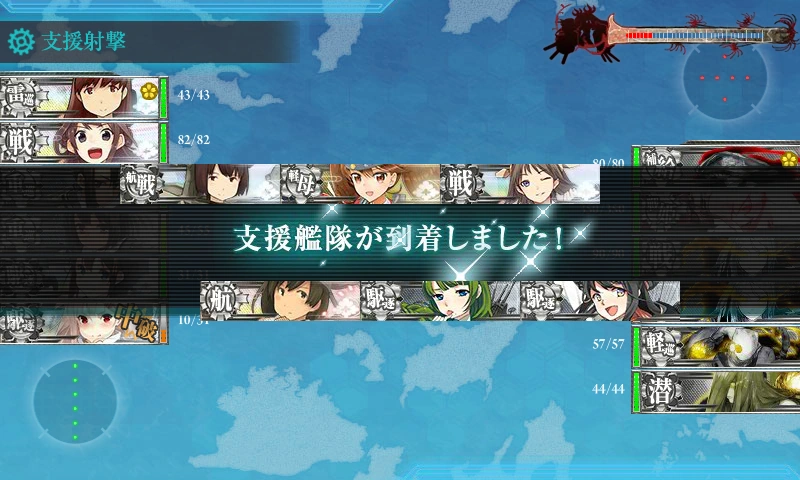
Support Shelling initiated
Support expedition involves sending a fleet into an expedition to provide additional support to the current fleet that is at sortie. Depending on whether you used a node support that supports you on the way or a boss support, the expedition fleet will appear on the battle nodes and fire an opening barrage against the enemy fleet. The type of support you receive depends completely on what kind of ships you have sent to the expedition. This mechanic is part of the Opening Phase.
Note: Keep in mind that this is only available for World 5 and event maps.
For more information regarding support expeditions, check out Support Expedition.
Artillery Spotting
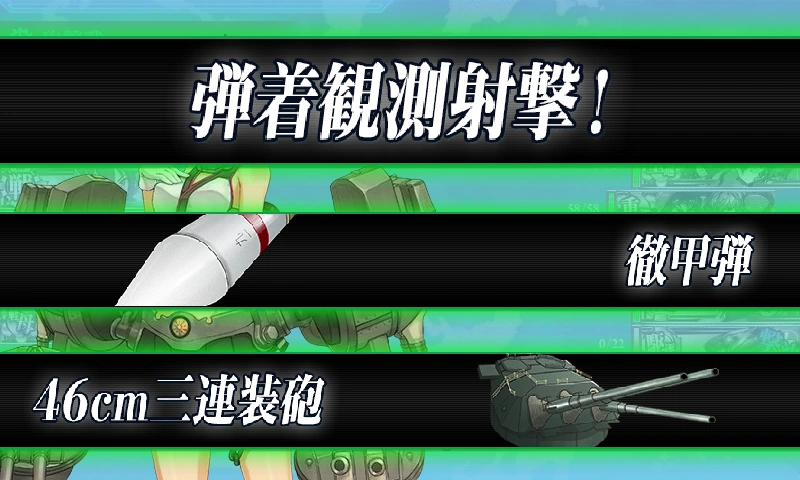
Cut-in Type Observed Fire using 1 Main 1 Sec & Type 91 AP shell
When at least Air Superiority is achieved during the Aerial phase, ships that are equipped with a ![]() Seaplane will be eligible to use Artillery Spotting during the day shelling phase. Artillery Spotting is either a strong but accurate single attack (Cut-In) or a powerful double attack (Double Attack) that deals double the amount of damage against surface targets.
Seaplane will be eligible to use Artillery Spotting during the day shelling phase. Artillery Spotting is either a strong but accurate single attack (Cut-In) or a powerful double attack (Double Attack) that deals double the amount of damage against surface targets.
All forms of artillery spotting attack deal extra post-cap damage, meaning that the extra damage is not restricted by the damage cap. Note that Artillery Spotting does not work against submarines because guns are useless against them. Note that Artillery Spotting does not work during the night, as no aerial combat takes place in the night phase.
If you want to learn more about artillery spotting, check out the Artillery Spotting requirements.
Anti-Submarine Warfare
Any submarine present in the enemy fleet will force Destroyers, Light Cruisers, Torpedo Cruisers, Training Cruisers, and Hayasui to target them during the shelling phases even if there are surface targets present. It also applies to Aviation Heavy Cruisers, Aviation Battleships, Seaplane Tenders, Light Carriers and Akitsu Maru equipped with seaplane bombers, ![]() Ka-type Autogyro
Ka-type Autogyro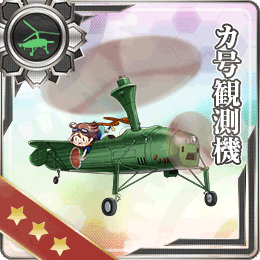 or
or ![]() Liaison Aircraft
Liaison Aircraft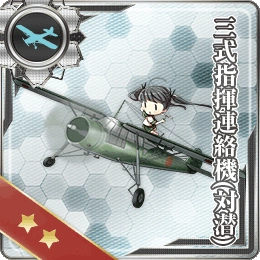 .
.

Note: Guns are completely useless against submarines, hence they should not be used if you are only facing submarines as enemies, like 1-5.
To find more information about ASW among other things, check out the Day Combat.
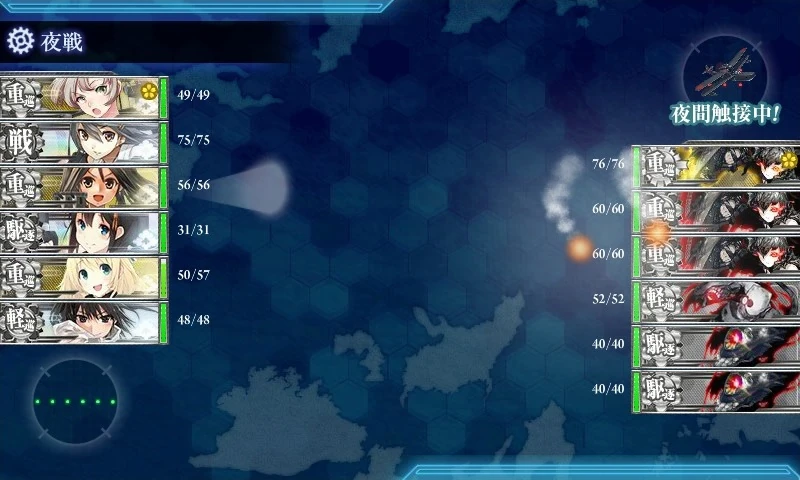
Night Combat
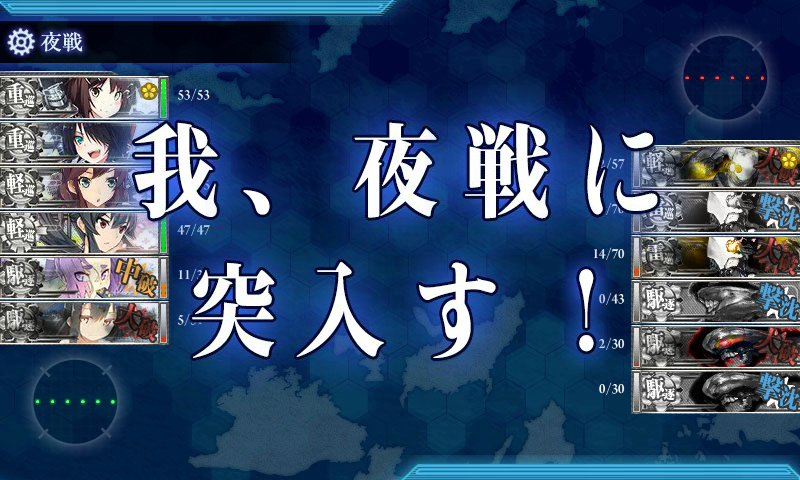

Entering Night Battle
In the scenario that the enemy fleet has not been defeated yet during Day Combat, the player has the choice to pursue them in a Night battle (夜戦) to finish them off. Ships who utilizes both Firepower and Torpedo stats have a drastically increased strength, giving them a stronger edge against the tougher armored opponents. The damage soft cap is raised to 300 during the night, allowing your ships to effectively unleash even more damage to your opponents. Bombers cannot attack during the night, unless they are equipped with the Night Operation Aviation Personnel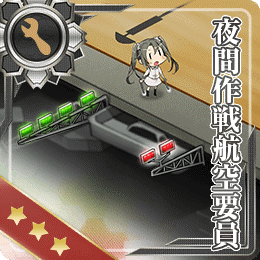 or the Night Operation Aviation Personnel + Skilled Deckhands
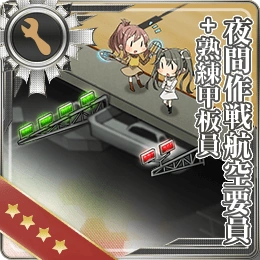 (exceptions being Saratoga Mk.II, Ark Royal, Graf Zeppelin and Taiyou Kai Ni).


The common way of entering a night battle is by selecting 夜戦 at the end of a day battle, although there exists nodes that forces the fleet to immediately start in a night battle. Battles that start during a night battle will not transition to a day battle usually, but such nodes do exist.
Night Battle Effects
During night battle, the following effects are applied:
General
- The ammo usage on that node is increased by 50% if night battle is entered from day. As most nodes on normal and event maps alike uses 20% ammo, this will be increased to 30% for example.
- Night battle damage depends on both the and stats for attack power. Consequently, DDs, CLs, CLTs and CAs have drastically increased strength at night.
- Any vessel that is heavily damaged (大破), is not allowed to attack during the night.
- Certain combinations of weapon equipment (Main Guns, Secondary Guns, Torpedoes) will cause Cut-In or Double Attacks at night, greatly increasing accuracy and/or firepower.
- Auxiliary equipment (e.g RADAR, SONAR, Depth Charges, Searchlights, Turbines, Special ammunition, Pure AA Equipment, Torpedo Bulges, and Midget-subs) will not affect the combination.
- All ASW attacks during night battle are reduced to scratch damage. This means that submarines are impossible to kill during night, as you cannot sink a ship with scratch damages. However, in battles starting at night and/or Combined Fleet sorties, ASW damage will apply as normal.
- With the exception of Vanguard, formation damage modifiers and Engagement Form damage modifiers do not apply in Night Battle (i.e., they are always 100%).
Night Buffs
- All CA(V)s gain a +5 .
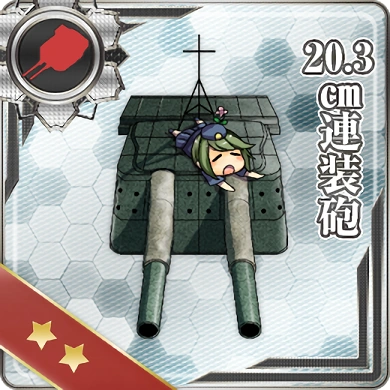
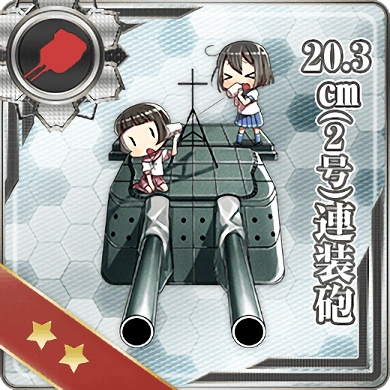
- All CA(V)s equipped with the 20.3cm series guns gain an accuracy boost (applied after modifiers, but before the hit rate cap).
- Destroyers equipped with Surface Radar and Skilled Lookouts will gain an evasion bonus.

The following night equipment buffs can trigger when equipped. Keep in mind that only one of them triggers if your fleet contains duplicate equipment (e.g. 2 searchlights, 2 starshells).
| Equipment | Effect | Requirement(s) |
|---|---|---|
|
|
|
 |
|
|
|
|
|
|
|
|
While entering a night battle offers many benefits, keep in mind that this also applies to your opponents! Enemy destroyers who aren't as much as a threat during the day will also gain a huge increase in firepower during the night, so be careful that you don't end up on the short end of the stick.
Night Battle Special Attacks
Night battle special attacks allow your ship to Double Attack (DA) and Cut-In (CI) at night. Compared to artillery spotting, these special attacks are less demanding on equipment setups and give different bonuses. Note that it is important to realize the differences between the two types of special attack and know when to use which.
Requirements
- Not in heavily damaged (大破) state.
- CV(L) performing the attack is not in moderate damage (中破) state.
- Certain equipment setups (see below).
Setups and Attack Types
Different setups have chances to trigger different attack types. Attack types are only determined by the prerequisites.
- is used to indicate a Main Gun. is used for Destroyer Cut-Ins.
- is used to indicate a Secondary Gun.
- is used to indicate a Torpedo, note that Kouhyouteki is not a torpedo.
- For Carrier Cut-Ins (note that placeholders are used in order to avoid confusion):
- For a given attack type, any other equipment can be added on the remaining slots, as long as it does not switch the attack type. Feel free to add any auxiliary equipment ( AP shell, Seaplane, Anti-Air Gun, etc.).
- When your set up fulfills the prerequisites for multiple attack types, the one closer to the bottom of the list will be used.
- When the setup does not fulfill any prerequisites or when its special attack is not triggered, the ship will perform a normal single attack (one hit, no special damage modifiers).
- Two hit attacks will have two independent chances to miss, hit or deal a critical hit, as well as two independent armor rolls. For Double Attacks the damage values are displayed as is for each hit twice, for two hit Cut-Ins they are displayed as a sum once.
- The animation for ships equipped with 2 different torpedoes may be different but the damage output is always the same.
- A Prototype FaT Type 95 Oxygen Torpedo Kai + 61cm Quint (Oxygen) Torpedo Mount will show a cut-in animation of FaT + Quint + Quint and if equipped the other way around, the cut-in animation will show Quint + FaT + FaT. However, both animation produces the same damage output, so the order in which you equip them is purely aesthetic.
| Attack Type | Prerequisites | Notes | Pre-cap Damage Modifier |
Hits |
|---|---|---|---|---|
| Double Attack | No additional |
1.2 | 2 | |
| Additional | ||||
| Additional | ||||
| Mixed Torpedo Cut-In | Additional |
1.3 | 2 | |
| Mixed Gun Cut-In | No additional |
1.75 | 1 | |
| Gun Cut-In | + Any on the remaining slots | 2 | 1 | |
| Torpedo Cut-In | + Any on the remaining slots | 1.5 | 2 | |
| Submarine Cut-Ins | With New Submarine Torpedoes | 1.6 | 2 | |
| 1.75 | 2 | |||
| Destroyer Cut-Ins | 1.3 | 1 | ||
With 12.7D
|
1.625 | 1 | ||
| Synergy with evasion bonus | 1.2 | 1 | ||
| With 12.7D
|
1.5 | 1 | ||
| Carrier Cut-Ins |    or Iwai F/B or Iwai F/B
|
1.18 | 1 | |
| 1.18 | 1 | |||
| 1.18 | 1 | |||
| 1.18 | 1 | |||
| 1.18 | 1 | |||
| 1.18 | 1 | |||
| 1.18 | 1 | |||
| 1.18 | 1 | |||
| 1.18? | 1 | |||
| 1.2 | 1 | |||
| 1.2 | 1 | |||
| 1.2 | 1 | |||
| 1.25 | 1 |
| Sortable table | |||||||
|---|---|---|---|---|---|---|---|
| Setup | Hits | Pre-Cap modifier |
Norm | Total crit modifier |
Norm | Trigger | Accuracy |
| - | 1 | 1 | 1 | 1.5 | 1.5 | 1 | ? |
| TLR | 1 | 1.2 | 1.2 | 1.8 | 1.8 | 0.62? | ? |
| TGR | 1 | 1.3 | 1.3 | 1.95 | 1.95 | ? | ? |
| TGR (12.7D) | 1 | 1.625 | 1.625 | 2.4375 | 2.4375 | ? | ? |
| GGS | 1 | 1.75 | 1.75 | 2.625 | 2.625 | 0.77 | ? |
| GGG | 1 | 2 | 2 | 3 | 3 | 0.71 | ? |
| GG | 2 | 1.2 | 2.4 | 1.8 | 3.6 | 0.99 | ? |
| TG | 2 | 1.3 | 2.6 | 1.95 | 3.9 | 0.87 | ? |
| TT | 2 | 1.5 | 3 | 2.25 | 4.5 | 0.82 | ? |
| SS | 2 | 1.6 | 3.2 | 2.4 | 4.8 | ? | ? |
| SR | 2 | 1.75 | 3.5 | 2.625 | 5.25 | ? | ? |
Night Double Attack Chance
Has a very high (~99%) and relatively consistent activation chance.[1] Activation rate is not dependent on luck. This typically results in more consistent and higher average damage than cut-in setup for ships with normal luck values.
Night Cut-In Chance


Theoretical Torpedo Cut-In Rates
The probability of a Night Cut-In occurring is given by the general formula:

The result of which can be multiplied by 100 and interpreted as a percentage.

Where:
- Level is the ship's level
- Luck is the ship's luck
- Type Factor: is a modifier defined by the cut-in type:
| Type | Value | % per Base Value |
|---|---|---|
| Destroyer Only (Torpedo-Radar-Lookout) | 150 | 0.66% |
| Gun Cut-In | 140 | 0.71% |
| Mixed Gun Cut-In | 130 | 0.77% |
| Destroyer Only (Gun-Torpedo-Radar) | 130 | 0.77% |
| Torpedo Cut-In | 122 | 0.82% |
| Mixed Torpedo Cut-In | 115 | 0.87% |
- Modifiers: is a sum of various other modifiers:
| Modifier | Value | % | ||||
|---|---|---|---|---|---|---|
| Gun Cut-In | Mixed Gun Cut-In | Torpedo Cut-In | Mixed Torpedo Cut-In | |||
| Placement | Flagship | 15 | 10.7% | 11.5% | 12.3% | 13% |
| Other | 0 | |||||
| Health | Moderate damage (中破 Chuuha) |
18 | 12.9% | 13.8% | 14.8% | 15.7% |
| Any other health state | 0 | |||||
| Searchlight
|
Allied | 7 | 5% | 5.4% | 5.7% | 6.1% |
| Enemy | -5 | -3.6% | -3.8% | -4.1% | -4.3% | |
Large Searchlight
|
Allied | ? | ||||
| Enemy | -? | |||||
| Star Shell
|
Allied | 4 | 2.9% | 3.1% | 3.3% | 3.5% |
| Enemy | -10 | -7.1% | -7.7% | -8.2% | -8.7% | |
| Skilled Lookouts
|
Allied | 5 | 3.6% | 3.8% | 4.1% | 4.3% |
| Enemy | 0 | |||||

An example of a cut-in

Searchlight, Starshell and Night Recon
- The effect of over the cap is negligible, thus going over it is generally not recommended. Starting at 51 , any extra luck will suffer from strong diminishing returns.
- No bonus is received when ships enter light damage state.[2]
- Marriage itself does not increase cut-in chances.[3]
- The above formula originates from KanColle Kai[4]. Generally, it's close to the previously researched formula and is in agreement with the experimental data.[5][6][7]
- According to this formula, torpedo cut-in types have higher probabilities than gun cut-in types.
Destroyer Cut In Properties
Destroyer Cut Ins are special Night Battle attack types unique to only Destroyers when they meet the proper equipment setups. Their properties are as follows:
- When Destroyer Cut-In requirements are met, they will attempt to activate first before normal night attack types. In the case of failure, the game will then attempt to roll for any other Destroyer Cut-In setup they qualify for, and then finally rolling for the first normal Night Attack type the destroyer qualifies for.
- This is different from normal night battle setups, which will only roll once for the highest priority attack type they qualify for.
- For example, if a destroyer has Gun/Torpedo/Radar, the game will roll for the GTR Destroyer Cut-In, and if it fails, will roll again for Mixed Torpedo Cut-In, increasing the overall chance of cutting in.
- Equipping 12.7cm Twin Gun Mount Model D Kai 2/3 can increase the damage multiplier of destroyer cut-ins, with one gun adding x1.25, and the second gun adding x1.125. Both modifiers are added multiplicatively, however, only Tashkent is able to use the second gun multiplier due to equipment slots and cut-in equipment requirements.
- Using a 12.7cm Twin Gun Mount Model D Kai 3 will also add yet another pre-cap x1.05 multiplier that is multiplicative with all the other modifiers.
- Using a 12.7cm Twin Gun Mount Model D Kai 3

.png)
| D Gun Multipliers | |||
|---|---|---|---|
| None | 1 | 2 | |
| x1.3 | x1.625 | x1.828 | |
| x1.2 | x1.5 | x1.687 | |
Reference
- ↑ Data on NB DA chance
- ↑ http://ch.nicovideo.jp/HSG/blomaga/ar1145767
- ↑ http://ch.nicovideo.jp/HSG/blomaga/ar1204798
- ↑ https://docs.google.com/document/d/1tqYyqzdc1RT_fYDKFMcUId0kOZHCdGpVsObm6yt-Yco
- ↑ Haru and Vita formulas plotted
- ↑ https://docs.google.com/spreadsheets/d/155L1l555hPgB2zidnw-uYu7sWYW6SAS6rC5M4mnFn9Y
- ↑ http://bs-arekore.at.webry.info/201504/article_4.html
Entering Night Battle
An example of a cut-in
Searchlight, Starshell and Night Recon
In the scenario that the enemy fleet has not been defeated yet during Day Combat, the player has the choice to pursue them in a Night battle (夜戦) to finish them off. During night battle, the following effects are applied:
- The ammo usage on that node is increased by 50% if night battle is entered from day-battle. As most nodes on normal and event maps alike use 20% ammo, this will be increased to 30% for example.
- During night, the firepower is and stats combined together. Consequently, DDs, CLs, CLTs and CAs have drastically increased strength at night.
- Any vessel that is heavily damaged (大破) are not allowed to attack during the night battle.
- Night battle damage cap is raised to 300.
- Any attack against submarines in regular Night Battles are automatically nullified and reduced to scratch damages, practically making them invincible. Avoid going into a night battle against a submarine, unless one of the following happens, which allows you to do damage against submarines as normal:
- You are using a Combined Fleet.
- The battle started at night.
- Formation damage modifiers and Engagement Form damage modifiers do not apply in Night Battle (i.e. they are always 100%).
Night Battle Special Attacks
- Certain combinations of weapon equipment will cause Cut-In or Double Attacks at night, greatly increasing accuracy and/or firepower.
- If night combat nodes are anticipated, it can be very helpful to utilize specialized night battle equipment such as Star Shells, Searchlight and Type 98 Recon Seaplane (Night Scout), as they provide bonuses during night-battle and also increases your Cut-In chances.
Note: Unlike Artillery Spotting attacks, the special attacks performed during the night are not post-cap, meaning that it will be affected by the damage cap.
For more information regarding night battle and the setups, check out Night Battle.
Victory Conditions
- For victory conditions for Air Raid Battles (空襲戦), see Events/Mechanics.
- For alternative formulation of victory conditions, see Partials/Victory Conditions.
- Perfect S (完全勝利, Total Victory)
- All enemy ships sunk and no damage taken.
- S (勝利, Victory)
- All enemy ships sunk and no allied ships sunk.
- A (勝利, Victory)
- Required number of enemy ships sunk (see below) and no allied ships sunk.
- B (戦術的勝利, Tactical Victory)
- Sinking the enemy flagship guarantees at least a B as long as no allied ships are sunk.
- Enemy flagship sunk, friendly ship sunk and number of friendly ships sunk < number of enemy ships sunk.
- Damage gauge at least 2.5 times higher enemy damage gauge.
- This rate is the minimum requirement to clear maps without boss gauge.
- C (戦術的敗北, Tactical Defeat)
- Didn't clear any of the conditions for A or B, but enemy took over a certain amount of damage.
- Damage gauge higher than enemy gauge, but not reaching 2.5 times as much.
- Friendly ship sunk, damage gauge higher than enemy, but not 2.5 times as much.
- Friendly ship sunk, enemy flagship sunk and number of friendly ships sunk lower than number of enemy ships sunk. It is possible to clear maps with boss gauges (eg. 4-4, 5-3, event maps) with a C if the enemy flagship is sunk.
- D (敗北, Defeat)
- Enemy took less than a certain amount of damage.
- Both sides taking 0 damage is also D.
- If your fleet consist only 1 ship and it is reaching Heavy Damage without meeting any winning requirements, it will instantly judged as D as well.
- Damage gauge lower than enemy gauge.
- Friendly ship sunk, not all enemy ships sunk, and gauge lower than enemy gauge.
- E (敗北, Defeat)[1]
- Over a certain number of friendly ships sunk. (see below)
- Friendly ship sunk while not meeting any victory conditions.
- No damage done to enemy, while taking over a certain amount (Never happens in a fleet of 1).
Notes
- The Minimum Sunk Requirement:
- 4 ships out of a fleet of 6
- 3 ships out of a fleet of 5
- 2 ships out of a fleet of 4
- 2 ships out of a fleet of 3
- 1 ship out of a fleet of 2
- Victory status affects the chance of getting drops and rare drops on the specified node.
- B rank or above is necessary to obtain drops.
- A rank or above is typically necessary for obtaining rare drops.
- S rank has a higher chance of obtaining rare drops than A rank, and is required for some very rare drops.
- Getting Perfect S does not give you an increased drop rate, compared to a regular S rank.